Wednesday, August 12, 2015

Sewing Cards for Shoeboxes

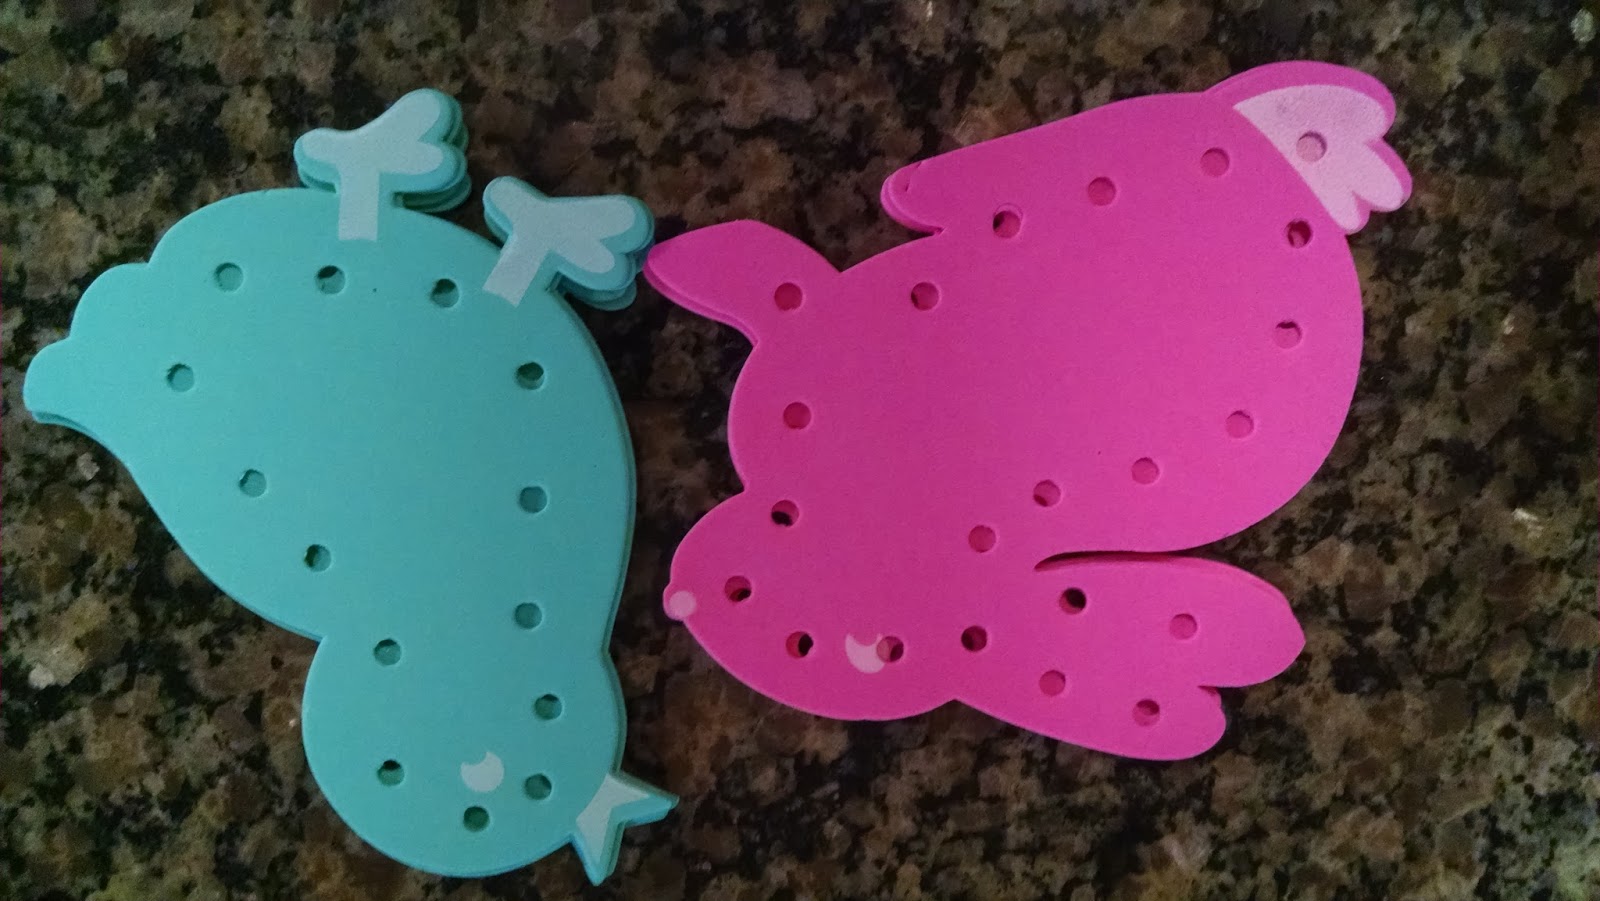
I can remember when I was a little girl having sewing cards to play with. I loved them. Of course, that was long before all the technology age. These days you never see children with this types of activities. But then in the countries where our shoeboxes go, things are different. The children don't have access to the technology that our kids in the US have. Sewing cards can still be a great gift. It is a wonderful way for small children to develop their fine motor skills and might even help them in learning beginning sewing skills. IMO, the sewing cards will be great for our girl or boy boxes for the 2-4 age group.


There are a lot of options for making sewing cards for you boxes. One way is to use foam sheets. You can buy rectangle sheets like these 
 at any craft store or stores like Wal-Mart, etc.

You can draw or trace patterns on these and then cut them out. You can trace cookie cutters, get patterns out of color books or use my patterns. more patterns
You can also find foam figures that can be used. I found rabbit and chick shapes on sale after Easter. I also found butterflies that I was able to buy at Michael's with a 40% coupon. 


Materials needed:
Foam and shapes to cut or pre-cut foam shapes
1/4"  circle hole punch
yarn or shoe laces
tape or white glue

1. After you have your shape or have cut out your shape, punch holes around the edge at least 1/4" from the outer edge. Holes should be punched about 1/2" apart but it doesn't have to be exact.
2. Cut a length of yarn about 30". Tie a pony bead on one end and wrap the other end with tape. You can use masking tape or scotch tape. Another way to do the end is to dip it in white glue and let it dry to make a stiff end.  When I started, I was using just the yarn but then I found 8 pair of shoe laces for $1 at Dollar Tree. Shoe laces actually work best but unless you can find them cheap they can get pretty expensive.
3. Pack them 4 in a sandwich size zipper bag with 4 piece of yarn or shoe laces in each. We thread one of these so that the child will have an idea of what to do with them.


You will want to put 4 different shapes and/or colors in each bag to give the child some variety. 

This is a very simple item that you can put in shoe boxes. Your children can help you make these and be more involved in the packing. Packing shoe boxes for Operation Christmas Child is one of the best ways that I know to teach your children about sharing and missions. 


Monday, August 10, 2015

A Little Bird

I picked up a Martha Stewart Hand Lettering Kit not long ago at my local Michael's and I've been playing around with it. My friend, Milie Jones, does lots of hand lettering and it looks great but any time I've tried hand lettering, I didn't like the looks of it. There are so many times that I want a title or a greeting that I just don't have a stamp for... So with Martha's guidance, I've been practicing. Here is my first card that I've done hand lettering on. I don't think it's too bad but I hope with more practice, I'll improve.


Materials needed:
Fine tip pen for lettering
Pencil
Flock Together patterned paper (SU, retired) 4 x 5 1/4 & 3 1/2 x 4 1/4" 
  These two pieces were the front and back of one sheet
Marina Mist card stock 4 1/4 x 5 1/2"
Feather Stencil by Jenni Bowlin
Marina Mist ink
sponge
button
Candy Dots
glue dots
Stampin' Dimensionals

1. After the paper is cut to size, I stenciled the feather on the patterned paper. I place the stencil how I wanted it and placed a small piece of scrap paper on each side of the feather I planned to stencil. You might want to use a bit of repositional tape to hold it in place. I dabbed the sponge on the Marina Mist ink pad.Then I dabbed it on to the stencil. I used side swipes on the edges to get a good look on the feather.
2. Next, I hand lettered the greeting I wanted. I draw lines to keep my letters straight with pencil first. Then I use pencil to do my hand lettering. If you don't want to get the Martha Stewart kit, I know that many card making magazines and web sites, have info about hand lettering. After I've got the letters in pencil, I go over them in ink. Always give the ink a bit of time to dry before you erase the pencil marks. If you don't, you could smear the ink and then you have a mess. I know. I've made plenty of messes.
3. Add the Candy Dot to the left of the lettering and a button to the top left. Use glue dots to adhere the button.
4. Adhere the striped patterned paper to the card stock. The place dimensionals on the back of the feather piece and place on top of the patterned paper. 

The card can be used for many different things. Think of all the times someone has said "well. a little birdie told me." You can send a card for that! 

Wednesday, August 5, 2015

Popped Daisy

For today's card, I've used materials that I've had around my craft room for quite a while. The Uppsy Daisy stamp has been retired from Stampin' Up for a few years but it's still a great stamp.


Materials needed:
Upsy Daisy stamp set (SU retired #111710)
Teeny Tiny Wishes stamp set
Subtles Candy Dots (SU #130933)
Basic Pearls (SU #119247)
Gumball Green ink pad
Marina Mist Striped Organdy Ribbon (SU retired)
White card stock, 5 1/2 x 8 1/2" & 2 1/2 x 5 1/2"
Glue Dots
Stampin' Dimensionals
Brilliant Blue Acrylic paint
Stipple brush or other stiff bristle brush
Word Window punch

1. Score and fold the 8 1/2" piece of white card stock at 4 1/4."
2. Open the card stock up to paint. Pour a small amount of acrylic paint onto a plate. Dab the brush into the paint and then dab it on to the card stock. Be sparring with the amount.

When the card stock is covered with paint, allow time to dry. The amount of time needed will depend on how thick you put on the paint.
3. On the other piece of card stock, stamp the daisy image in Gumball Green ink.

Stamp twice across the width of the card stock. Cut out the image along the top of it.
4. After the paint is dry, stamp the daisy image on top of the blue painted card stock with Gumball Green ink. Stamp two images next to each other across the bottom. Stamp a third image in the center, higher than the other two.
5. Add several pieces of dimensionals to the back of the cut out daisy piece. Be sure to put enough to support the card stock. Lay this carefully on top of the painted and stamped card stock, lining it up with the bottom.
6. Stamp a greeting from Teeny Tiny Wishes stamp set with Gumball Green on white card stock. Punch this out with the Word Window punch. Rub Gumball Green ink on around the edges of the punched greeting and adhere to the top right corner of the card. Place Candy Dots on the outside edges of the punched greeting. This will give it the look of brads without having to have a brad go completely through the card.
7. Add 3 small pearls on to the flower image.
8. Tie a small bow out of the Marina Mist ribbon and adhere to the top left corner with glue dots.

Have fun using a different media other than just the stamped image. 

Monday, August 3, 2015

World of Dreams


Materials Needed:
World of Dreams stamp set (#134186 SU)
Versa Mark ink pad
Coastal Cabana ink pad
Clear Embossing powder
Heat Tool
Crisp Cantaloupe card stock 4 1/4 x 5 1/2"
Coastal Cabana card stock 3 3/4 x 5"
Scallop Dots border punch
Corner Rounder punch

1. Punch the border on two sides of the Crisp Cantaloupe card stock. Lay aside.
2. Stamp the image from the World of Dreams stamp set on to top left of the Coastal Cabana card stock using  Versa Mark ink. Sprinkle clear embossing powder over the stamped image and shake off any excess. Use a heat tool to melt the embossing powder. 
3. Stamp your greeting on the bottom right of the Coastal Cabana card stock with Coastal Cabana ink.
4. Round the top two corners on the Coastal Cabana card stock.
5. Adhere the punched Crisp Cantaloupe piece on top of the Lost Lagoon card stock lining up the bottom right hand corners.
6. Adhere the stamped Coastal Cabana card stock on top of the Crisp Cantaloupe lining up the bottom right hand corners. 
Have fun punching and embossing!

Wednesday, July 29, 2015

Think Outside the Shoe Box

Just a quick tips today for items for Operation Chirstmas Child shoeboxes.

Just let you brain go wild when you are looking in the clearance aisle for your stores. I recently found some tins with 2 decks of cards in each one for $2 each. The tins and cards were decorated for Doc McStuffins and Pet Patrol. My first thought for $1 for each deck. Then I got to thinking about what to do with the tins. They are a great size for pencil boxes.


I used some of the chalk board paint left over from the chalkboards I showed you on Monday's post to paint the top of each box. I painted the bottom of each box green but any color will do. I had some green paint at the house. I had to do 2 coats on the top and bottom. After the dry, they are perfect to put pencils, erasers, chalk and other items in! So for $2, I got items for 3 shoeboxes which averaged out to about 66 cents for each item. This would also be good to put Legos in, a sewing kit, a fishing kit, or many more things in.

As you are shopping for things to go in shoeboxes, don't be afraid to repurpose things for them. A little paint or fabric can turn a throw away into a WOW for your boxes. Remember, don't put a throw away item that still looks like a throw away into the shoeboxes. Be sure to take some time to make it into something new and great.

Monday, July 27, 2015

Make Chalk Boards for Shoeboxes


I thought that small chalk boards would be good for shoeboxes so I decided that I would make some. Today, while I was out, I did find some already completed at Dollar Tree for $1 but these were too wide to lay flat in the shoebox. For easier packing, I feel that the chalk board needs to be able to lay flat. I figure that the ones I'm making cost about 17 cents each.

This can make a good project for a church youth group, a Vacation Bible School craft, a scout group or some other group. With a dozen or so people, these can be made pretty quickly.

Materials needed:
1 large piece of backing  board or plywood, 3/8 - 1/4" thick
sandpaper
sanding block
chalk board paint
paint brushes, sponge or bristle
lytex or rubber gloves (optional)

I recommend that you use some type of gloves for this project or your hands may look like this.

I used to be able to paint without making a mess but that time seems to have passed. You also might want to wear an apron or an old shirt.

 I made my chalk boards to be 4 x 6" so that they will fit flat into the shoebox without any trouble. 
Many lumber yards will cut the boards for you but be sure to ask what they charge. My local Lowes store would cut them at 25 cents a cut.  That could add up pretty fast. If you can find someone with a table saw or a radial saw, they can cut them for you. My son cut mine on a radial saw in about 30 minutes. For the 4 x 8' piece of board, he was able to cut 165 pieces. That's a lot of chalkboards! It helps to fill a lot of shoeboxes though and remember, every shoebox is a gospel opportunity. 
If you don't want that many, you should be able to buy a piece of board that is half that size.

Sand the edges of the cut boards so that there are no splinters. You can use plain sandpaper or put it on a sanding block. IMO, it's easier to use a sanding block. You can buy sand paper already cut to size for sanding blocks or it's easy enough to cut it yourself from a sheet.

You will want to spread out newspaper or card board to cover your surface before you paint.
Paint each board. I started out with a can Krylon spray paint but I was only able to do about 20 boards, one side, with it. When I got more paint, I got a quart can of Glidden chalkboard paint. This was more than enough to do all of the chalkboards. You can paint just one side or you can paint both sides. Painting the edges is up to you. Each side that you paint needs two coats of paint. I paint it horizontal the first coat and vertical for the second coat.
I set the slab of boards outside in our Texas sun and they dried in about 20 minutes. Inside it will take a little longer to dry.

You will need something for an eraser to go with the chalk boards. I took fabric scraps and cut pieces about 4 x 6" for this.
Be sure you also include at least 2 or 3 pieces of chalk for the children to use. Because chalk can be very dusty, you might want to put it into a zip lock type of bag so the dust doesn't get all over the other items in the box.

Cost breakdown:
1 sheet of board   $15
1 qt of paint           10
sand paper, misc      3
  total                    $28
Divided by 165 pieces = 0.16969 cents per chalk board

Left over fabric scraps  free--If you don't have any, ask your church members or mothers for some.
Chalk cost varies. Look for it on sale. I found some side walk chalk, which works just as well, in the Dollar Spot at my local Target. That was 12 pieces of chalk for $1.


Saturday, July 25, 2015

Craft Day for Shoe Boxes

Today, at church, we had a craft day where several of us came and put some simple crafts together to make some cool things to put in our shoe boxes. We've been working on felt "paper" dolls. washer necklaces, chalk boards, fleece scarves, spinner tops, clothespin airplanes, note pads, sewing cards, and other items. Today we had 12 people show up and we got a lot accomplished. We have things that any age person can work with and you don't have to be a crafter or seamstress to do it. We always have some items that are at the point where they just need assembling and we have no sew items. Several of the things were working on have been posted on this blog or will be in the coming days. Take a look at some of our pictures.