Showing posts with label ribbon. Show all posts

Wednesday, November 4, 2015

Wood & Flower

Here's a card for fall birthdays.

Materials needed:
Chocolate Chip card stock 4 1/4 x 5 1/2"
Old Olive card stock 4 x 5 1/4"
Tan card stock 3 1/2 x 2 1/2"
Truly Grateful stamp set SU!
Bloom with Hope stamp set SU!
Pumpkin Pie striped ribbon about 6"
Orange brads
White card stock
Pumpkin Pie ink pad
Modern Label punch

Friday, July 17, 2015

It's Your Day

Shouldn't a birthday always be a special time for the birthday person? I think so. I like to make my birthday special. In fact, mine was this past Monday & hubby & I went to Red Lobster for dinner. My dear friend, Marian, thinks that we should all have a birthday month! She celebrates her birthday for the whole month of September!


Materials needed:
Wild About Flowers stamp set (138728)
Wild Wasabi card stock 4 1/4 x  5 1/2"
Slate Gray card stock 3 x 4 5/8"
Lost Lagoon card stock 2 3/4 x 4 1/4"
Sizzix embossing folder (sorry, I can't find the name of this one)
Corner Rounder punch
Modern Label punch SU
1/2" Grosgrain Striped Old Olive ribbon (113883, retired)
Wild Wasabi ink
Primrose Petals ink
It's Your Day stamp SU from a Pumpkin Patch kit
Sponge dauber
Stampin' Dimensionals

1.Run the Lost Lagoon card stock in the embossing folder through your Big Shot machine. Use the corner rounder punch to round all four corners of the blue and the gray card stock.
2. Adhere the Lost Lagoon to the top of the gray card stock Adhere this card stock on to the left side of the Wild Wasabi card stock.
3. Adhere the ribbon to the right side of the Wild Wasabi card stock wrapping around to the back.
4. Use the stamps from the Wild About Flowers stamp set to stamp the image on white card stock. This stamp  is really cool because the flowers are a separate stamp and make it easy to get the flowers a different color. And these flowers fit perfectly on the stems!
5. Cut the image out. Place dimensionals on the back of the image and adhere to the embossed Lost Lagoon card stock. 
6. Stamp the greeting on white card stock with Wild Wasabi ink. Use the Modern Label punch to punch out the greeting. Use the sponge dauber to dab Wild Wasabi ink around the edge of the punched greeting.  
7. Place one dimensional on the end of the greeting, under the word day. Place a small amount of adhesive on the other end. Adhere the greeting across the right side of the card.
8. Adhere the card front to a white card back and add greetings or a special message to the inside.

Saturday, June 27, 2015

Victorian Birthday Card

Well, bringing the flu B back from my trip to Tanzania has really thrown me for a loop! I hadn't gotten the flu in probably 30 years, since I started taking the flu shot. They said that this year the flu mutated and the shot wasn't as effective. I really felt bad for a couple of weeks. I'm doing a lot better now but I still have that lingering cough!

Here's a card I made for some of my July birthdays.


Materials needed:
White card stock 5 1/2 x 8 1/2" scored and folded at 4 1/4"
Lost Lagoon card stock SU! 4 x 5 1/4"
Pink stripe patterned paper 3 3/4 x 5"
Dazzles stickers by Hot Off the Press
Birthday stamp, Vintage Rose Garden stamp set by Jennifer Ellory
Whisper White 5/8" Ribbon Organza SU (#114319)
Lost Lagoon stamp  pad SU
Ticket corner punch
Glue Dots
Stampin' Dimensionals SU

This card is simple to assemble after you cut your papers to size. 
1.Punch all four corners of the Lost Lagoon card stock and the patterned paper with the ticket corner punch. 
2. Stick the lacy stickers across the patterned paper about 1" from the bottom and wrap around to the back.
3. Adhere about 6" of the ribbon just below the stickers on the patterned paper and wrap around the back also. 
4. Use about 6" of the ribbon to tie a bow and place on top of the other ribbon with glue dots. I used 3 to get it to hold in place good.
5. Stamp the greeting with Lost Lagoon ink across the top of the patterned paper.
6. Place Stampin' Dimensionals or other dimensionals on the back of the patterned paper. Adhere it to the Lost Lagoon card stock.
7. Adhere this to the white, folded card stock.
Add a greeting or note to the inside and you are ready for a birthday.

Friday, May 15, 2015

Butterflies and Poppies


Materials needed:
Greenhouse Gala from SU! 4 x 5 1/4"
Lost Lagoon card stock  2 x 3"
Tangerine Tango card stock 2 1/4 x 3 1/4"
Wild Wasabi card stock 4 1/4 x 5 1/2"
White card stock
Lost Lagoon ink
Lost Lagoon ribbon
Crystal Gem
Perfect Punches stamp set SU!
Butterfly stamps (Sorry, but I honestly don't know where this set came from. I think it came from              Quick Cards Made Easy magazine but I'm not sure.)
Stampin' Dimensionals

Wednesday, April 8, 2015

Chevron Birthday

Here is the card that I made for the men in my life with April birthdays. Aside from a bit of embossing with my Big Shot, there is nothing fancy about this card. Lately, I've been too busy volunteering to have time to do anything fancy! But I do love my volunteering for Operation Christmas Child!

Materials needed:
Wild Wasabi card stock 4 1/4 x 5 1/2"
Patterned paper from my scrap box 2 1/2 x 5 1/2"
Old Olive ink
Serene Silhouettes stamp set
Teeny Tiny Wishes stamp set
Certainly Celery grosgrain 5/8" ribbon (from SU! but retired)
Word Window punch
Chevron embossing folder
Stampin' Dimensionals

This is  a super easy card but if you want me to put step by step directions, let me know and I'll be happy to do that.

Monday, January 5, 2015

Victorian Lady

Well, I've finished all of my January birthday cards now. Here is the last one.
Materials needed:
Victorian lady stamp set from Hot Off the Press
Warmest Regards stamp set from SU!
First Edition patterned paper from SU! 4 1/4 x 5 1/2"
White card stock
Pastel chalks/mine are from SU! but they are now retired
Hair Spray
Certainly Celery ribbon from SU!
Large oval punch SU!
Old Olive card stock 2 3/4 x 2 3/4"
Doily from SU! or Wilton's
Mementos Black ink
Stampin' Dimenionals

This is easy to make just following the design you see on the card.
I think chalk is my favorite medium, even though I don't use it that often. There is so much you can do with it and it's so versatile! When I finish chalking my image, I spary it lightly with hair spray. This is not acid free so if you are doing something that you want to last for generations, find an acid free fixative at your local store. For cards, IMO, hair spray works just fine.

Have fun and I hope everyone who receives one of your cards appreciates the time you put into it!
Have a blessed 2015!
 

Monday, September 22, 2014

The Earth Laughs in Fall Flowers

We had our Operation Christmas Child rally last Saturday. We had a really good turnout and had lots of fun. We hope that everyone is getting geared up now to pack more shoeboxes and allow more gospel opportunities for children around the world. Maybe I'll have a bit more time now to post instructions for my cards. If you have any suggestions, just leave a comment.
Here's a card with some colors for fall.

Materials needed:
Fabulous Florets stamp set (#123027)
Greenhouse Gala patterned paper (117167, retired)
Wild Wasabi card stock 3 1/4 x 4 1/4"
So Saffron card stock 2 1/2 x 3 3/4"
White card stock
Tangerine Tango ink
Scallop border punch
Dotted Scallop border punch
Corner Rounder punch
Everyday Enchantment Organdy ribbon (or other ribbon)
   Lucky Limeade
   Calypso Coral
Stampin' Dimensionals (#104430)
Xyron Little X

1. After you cut your card stock to the sizes named, then punch your border. I punched the dotted scallop border on the Wild Wasabi and the scalloped border on the So Saffron card stock.
2. Stamp you flower image in Tangerine Tango ink. Cut it out. Place dimensionals on the back of the cut out image. Place it on the So Saffron card stock.
3. Adhere the Wild Wasibi card stock on top of the patterned paper and the So Saffron on top of the Wild Wasibi card stock as shown in the picture.
4. I usually run my tape runner down the back of my ribbon to adhere it to the card. This ribbon is very thin so I ran it through my Little X sticker maker. That put adhesive on the back of the ribbon without me making a mess on everything else. Then I simply peel the ribbon off of the backing paper and placed it on the right hand side of my patterned paper.
5. Because I had room, I placed my greeting strip in the Little X beside the ribbons. Then I adhered it over the green and yellow card stock.
6. Adhere the card front to a card base and you are ready for your fall greeting to a friend.
 

Monday, September 15, 2014

Daisy, Clips and Ribbon


Materials needed:
Melon Mambo card stock 5 1/2 x 8 1/2" score at 4 1/4
Greenhouse Gala patterned paper (#117167)
Marina Mist dotted scalloped ribbon 11"
2 White silk daisy petals
Top Note Die
Framelits Labels die (#125598)
Basic Pearl Jewels (#119247)
Subtles collection brads (#119738)
Gold circle clip
White card stock
Greeting stamp
 
Since the patterned paper is two sided, I used the opposite side of the same sheet for the center die cut.
Place adhesive on the back of the ribbon and wrap it all the way around the card and overlap on the back. Place the circle clip on the card over the ribbon.


Wednesday, July 30, 2014

Mixed Media Bear & Flowers

Materials needed:
Regarding Dahlias stamp set (#130327)
Gingham Garden patterned paper (#129310)
Lost Lagoon card stock
Lost Lagoon In Color ribbon
Fizzy Moon from Daisy Trails
Corner Rounder
Night of Navy card stock
Crushed Curry ink
Felt flowers
Brads

*****I apoligize for not giving you details directions on the last few cards. I've had a combination of being busy getting things ready for the fall kick off of our area Operation Christmas Child, recovering from a medium level surgery(not life or death but still takes recovery time), problems with artiritis in my fingers, and just generally feeling rotten. I hope that you this is enough for right now to keep you coming back. If there is something that you see here that you don't understand how to do, leave a comment and I will try to explain things to you. I'm not trying to leave you high & dry, it's just been a difficult summer.

Wednesday, May 7, 2014

Special Blues & Greens Embossed

This card uses the embossing technique that I used early in April. Instead of the pinks I went with blues and greens for this one. Check out here to see how to do this.

Materials needed:
Elements of Style stamp set (#120045)
Trust God stamp set (#126702)
Bermuda Bay card stock 3 x 3 3/4" and 4 1/4 x 5 1/2"
White card stock 4 x 5 1/4," 2 3/4 x 3," and 2 x 2 1/2"
Crushed Curry ink
Gumball Green ink
Bermuda Bay ink
Versa Mark ink
Crystal Clear embossing powder
Heat tool
Sycamore Street 1/4" ribbon, Island Indigo (#130812)
Very Vintage buttons (#129327)
Corner Rounder punch
Sponge Dauber (#102892)
Glue Dots

1. Emboss the larger 2 white card stock pieces according to the directions found here.On this card I used the Crushed Curry, Gumball Green and Bermuda Bay inks in that order. Stamp the flurish image on to the colored card stock with Versa Mark ink. Follow the directions on the card link listed here.
2. Round all the corners. Adhere the embossed card stock pieces to the Bermuda Bay card stock pieces.
3. Wrap the Island Indigo ribbon around the card front and tie a bow. Use glue dots to hold in place.
4. Stamp the saying that you want on the smallest piece of white card stock in Bermuda Bay ink. Use sponge daubers to sponge the edges around the saying with Bermuda Bay ink.  Adhere this piece to the center of the 2 3/4 x 3" embossed piece.
5. Add a button to the bottom right side of the saying piece.
6. Adhere the card front on to a card base and add a note or greeting on the inside.

Friday, April 25, 2014

Ooo La La card

I had fun making this card with leftover pieces of patterned paper. The ones that I used are from SU! but you can use any leftover pieces that you like the colors of.

Materials needed:
Mimi in Paris stamp set by Penny Black
Raspberry Ripple card stock 4 1/4 x 5 1/2"
White card stock
Smoky Slate card stock 3 x 3 1/2"
4 pieces of scrap patterned paper sizes 1 x 1 5/8", 1 3/4 x 4 1/4", 2 pieces 2 1/4 x 2 1/2"
Marina Mist 3/8" Striped Organdy ribbon (#129292)
Stampin' Pastels (retired) or other pastels
Black or dark brown ink
Stampin' Dimensionals (#104430)
Hair spray

1. Cut out the scraps of patterned paper according to the sizes listed above. Adhere them to the Raspberry Ripple card stock, leaving space between each piece.
2. Stamp the Mimi stamp on white card stock. Color with your favorite pastel chalks. Spray the finished image with hair spray to set the chalks and enhance the colors. (The hair spray is NOT acid free.) Cut the image out around the edges.
3. To adhere Mimi to the Smoky Slate card stock, place Stampin' Dimensionals to the back. Adhere it to the center, left of the card front.
4. Wrap Marina Mist Organdy ribbon around the card and tie a bow. If you don't tie bows any better than I do, you might want to adhere a 5" piece of ribbon on the right side of the card front wrapping the ends around to the back. Then tie a bow with the ribbon and put in place with glue dots.
5. Adhere the card front to a card back and you are ready to send out a fun card to a friend.

Monday, April 21, 2014

Spring Blooms Card


Materials needed:
Elements of Style stamp set (#120045)
Teeny Tiny Wishes stamp set (#115370)
Beyond the Garden patterned paper (#122342) 3 x 4," 4 x 5 1/4"
White card stock 5 1/2 x 8 1/2," 3 1/4 x 4 1/4" plus
Labels Collection Thinlits Dies (#125598)
Textured Impressions Designer Frames embossing folder (#123130)
1/2" Melon Mambo Polka Dot Grosgrain Ribbon (#115611) 2 pcs. one about 3 1/2" and one about 6"
Sherbet Buttons (#116312)
Glue Dots
Stampin' Dimensionals (#104430)
1" Circle punch
Gumball Green marker
Melon Mambo marker
Marina Mist ink pad
Melon Mambo ink pad
Sponge dauber

1. Cut the white card stock and the patterned paper the dimensions listed above.
2. Choose a die from the Labels Collection that is about 2 3/4 x 3 1/4." Using white card stock and the Labels die, cut the card stock with the Big Shot machine. Next, place the embossing folder so that the oval frame is centered in the die. Run this through the Big Shot machine. 
3. Use a sponge dauber and Marina Mist and Melon Mambo ink to color the outer edge of the die cut as shown in the picture. Put blue around most of the die cut with pink at the bottom. I've found that a sponge dauber gives a softer color on card stock than doing a direct to ink pad method of coloring. 

4. Using the Melon Mambo and the Gumball Green markers, color the floral stamp from the Elements of Style stamp set. It is not necessary to color the entire stamp. Look to see how much of this will fit on the die cut. Huff some breath on the ink and then stamp on white card stock. Cut the image out around the outer edges of the image.  Place Stampin' Dimensionals on the back of the flowers and then place them on top of the prepared die. Set aside.

5. Adhere the smaller rectangle of patterned paper to the smaller rectangle of white card stock. Adhere this to the larger piece of patterned paper, placing it slightly to the right side.
6. Adhere a strip of about 6" of ribbon across the patterned paper and card stock rectangles. Wrap the ends around to the back. Score and fold the largest piece of white card stock at 4 1/4."  Adhere the piece with the ribbon wrapped on it to the white base card. You will have a small frame border around the edge of the patterned paper.
7. Get the decorated die cut and apply adhesive to the back. Press  it down to the patterned paper on the right hand side over the ribbon. 
8. On the 3 1/2" piece of ribbon, apply glue dots to the center on the front and back. Then pinch the sides together.

Cut the ends of the ribbon to be even and add an angled cut. Add more glue dots on the back of the pinch. Press this on top  of the ribbon on the card on the left hand end of the ribbon. Place glue dots on the back of a pink button and press on to the knot area of the ribbon.
9. Put glue dots on the back of two more buttons and place them at the top  left hand corner of the card.
10. Punch a circle of white card stock with a 1" circle punch. Dab blue and pink ink around the edge of the circle. Choose a simple greeting from Teeny Tiny Wishes and stamp in the center of the circle. Adhere the circle to the bottom left of the card.
Finish by adding a greeting to the inside or a special note.

Monday, April 7, 2014

Springy Pink & Embossed

This card has a spring like feel to it with a feminine touch. If you want a card that is real girly girl, this is the one for you.
You'll spend most of the time to make this card with inking and embossing. It takes a while but you get a really pretty look. If you've never done any heat embossing before, you might find this project a little difficult.

White card stock 5 1/2 x 8 1/2" for base card, 4 x 5 1/4", 3 x 3 3/4", 2 3/4 x 3 1/2",1 3/4 x 2 3/4",
                           1 3/8 X 2 3/8"
Pale pink card stock2 X 3", 1 1/2 X 2 1/2"
Marina Mist ink
Regal Rose ink
More Mustard ink
Versa Mark ink
Clear Embossing Powder
Regarding Dahlias stamp set (#130327)
Trust God stamp set (#126702)
3/8" Melon Mambo Striped Organdy ribbon (#129293)
Sherbet Buttons (#116312) or other buttons that has a pale pink
Paper Piercing Pack
Paper Piercing Tool
Paper Piercing mat or mouse pad
Glue Dots

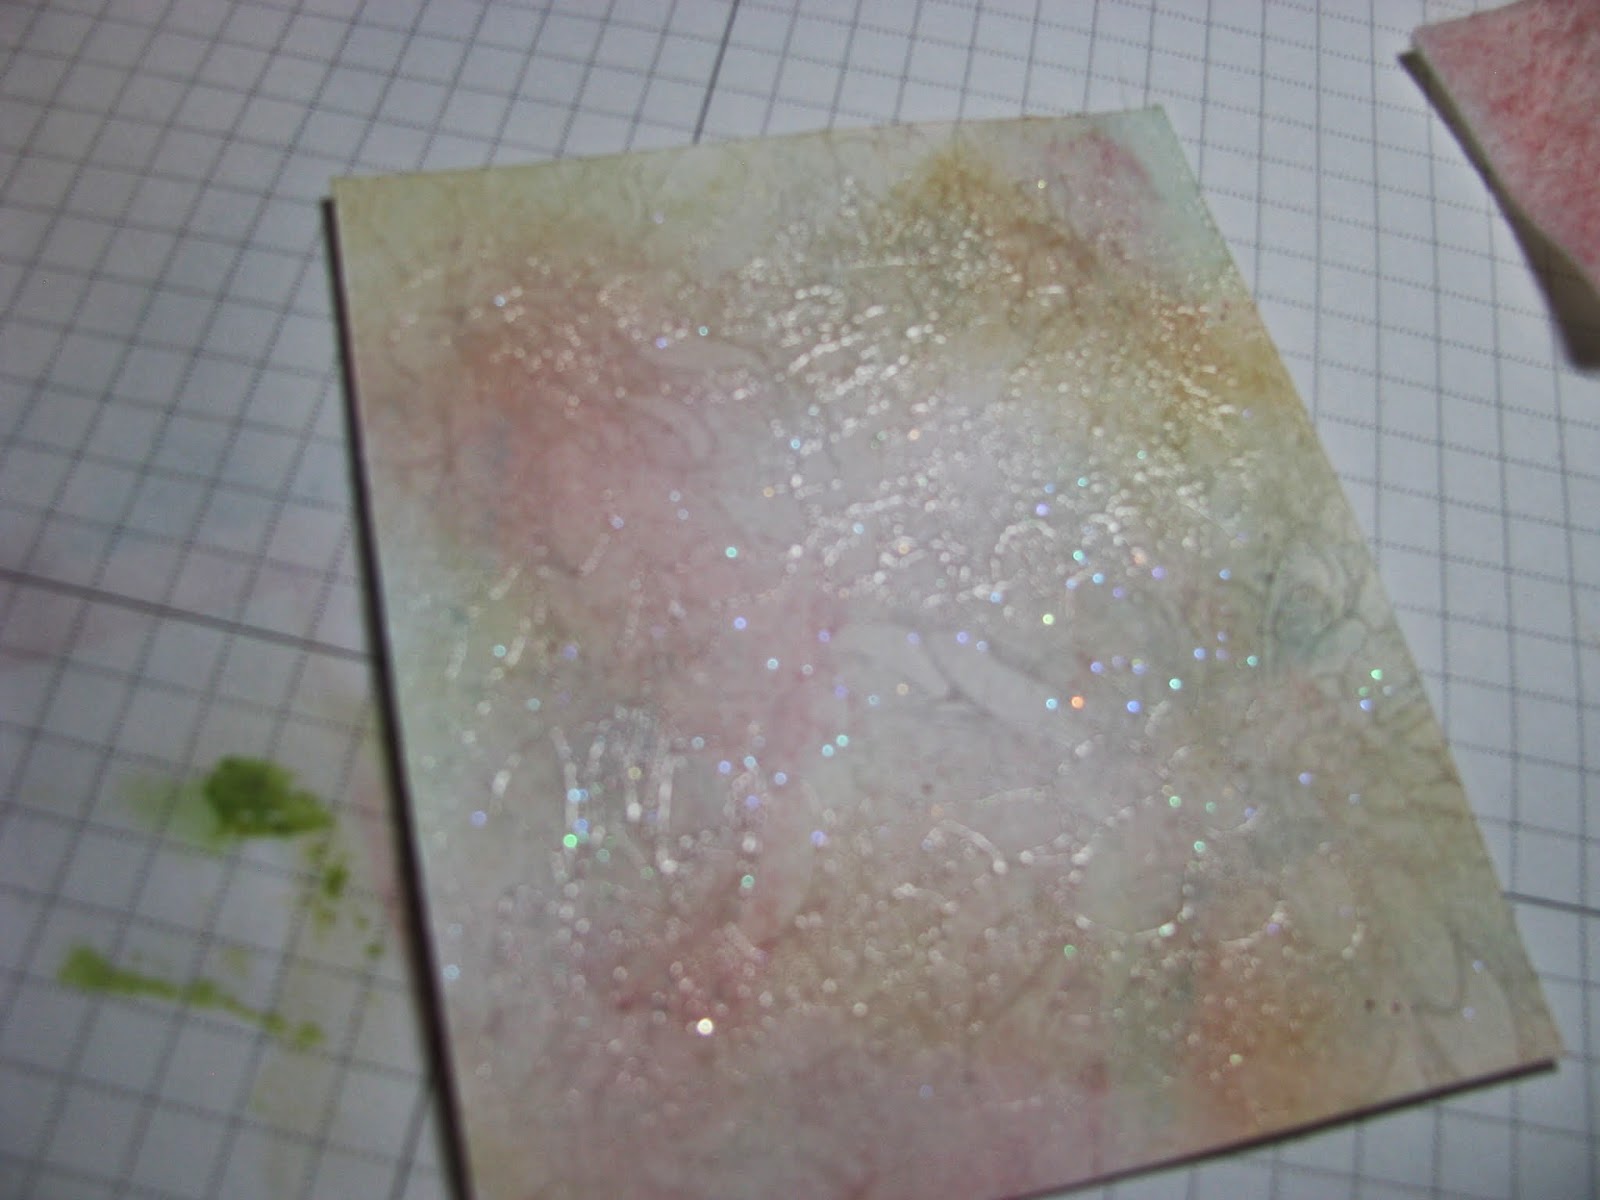
1. Distress the 4 x 5 1/4" piece, the 2 3/4 x 3 1/2" piece and the 1 3/4 x 2 3/4" piece of white card stock. I start with the yellow ink. Dab the felt or other distressing medium on the More Mustard ink pad and then directly onto the white card stock. Next, do the same thing with the Regal Rose ink going over top of the More Mustard. Finish with the Marina Mist ink over the Regal Rose. You will not cover the card stock solid with any one color. As you dab the ink onto the card stock, use a rubbing motion to get a good coverage around the card stock.


 2. Ink your image (I used the dahlia from the stamp set) with the Versa Mark ink. Stamp it randomly around the distressed card stock.
3. Place the card stock in a tray, on a lid or a sheet of paper. Sprinkle clear embossing powder to cover the card stock.

Shake off any excess powder. Return excess powder to the jar to use in your next embossing project.
4. Heat the entire card stock until the embossing powder melts.
When it is melted, it will have a glossy, shiny look.
Repeat this technique with the 3 pieces of white card stock.
5. Adhere the embossed card stock on to the plain white card stock leaving about 1/8" border all the way around each piece. The smallest embossed piece should be adhered to a piece of pale pink card stock. Layer the layers according to size with the smallest on top.
6. With the smallest piece of card stock, stamp a greeting from the Trust God stamp set in the center with Regal Rose ink. Use Marina Mist ink to distress with the blue around the outer edge of the card stock. Adhere it to the other piece of pale pink card stock with a border around the greeting piece.
7. Using the Paper Piercing tool or a very sharp needle(not recommended but it will work) punch holes all the way around the white card stock with the saying. Adhere this to the bottom right side of the card, overlapping the other layers.
8. Wrap ribbon around the right side of the card and tie in a bow. Sometimes I use glue dots to keep my bow in place.
9. Place glue dots on the back of a large pink button and adhere to the top left rectangle as shown in the picture.
10. Adhere the card front on to the card base, leaving a white border all the way around the card.


Wednesday, February 26, 2014

Pink Florets

Materials needed:
Fabulous Florets stamp set (#123027)
Framelits Labels dies (#125598)
Melon Mambo 1/2" Polka Dot Grosgrain ribbon (#115611)
Melon Mambo card stock 4 1/4 x 5 1/2"
Gumball Green card stock 3 x 4 1/2"
Greenhouse Gala patterned paper (#117167) 2 1/2 x 3 1/2"
White card stock
Sponge Daubers
Stampin' Dimensionals (#104430)
Melon Mambo ink

1. Layer the patterned paper on top of the Gumball Green card stock. Round the corners.
2. Adhere ribbon at the top and bottom of the patterned paper wrapping the ends around to the back. Adhere this to the center of the Melon Mambo card stock.
3. Stamp an image from Fabulous Florets stamp set in Melon Mambo ink on white card stock.
4. Cut it out with the smallest Framelits Labels die. Use a sponge dauber to apply Melon Mambo ink to the edges of the cut out.
5. Place dimensionals on the back of the cut out and adhere it to the center of the patterned paper.
Adhere this to a card base and add your greeting or note to the inside.

Friday, February 21, 2014

Rippled Poppies

Material needed:
Pleasant Poppies background stamp (#129499)
Teeny Tiny Wishes stamp set
Greenhouse Gala patterned paper (#117167) 4 1/4 x 5 1/2"
Snow Festival patterned paper (#126908) 3 1/2 x 4"
White card stock
Old Olive card stock
Raspberry Ripple In Color ink
Gumball Green In Color marker
Raspberry Ripple In Color marker
Raspberry Ripple 3/8" Satin Stitched ribbon (#126845)
Brights Candy dots  (#130931)
Word Window punch (#119857)
Modern Label punch (#119849)
Stampin' Dimensionals (#104430)

1. Use the brush tip of the markers to color the Pleasant Poppies stamp. Stamp it on white card stock.  Cut the flower & stem images out, cutting out the excess white card stock. You will want to cut fairly close to the image but it doesn't have to be fussy cutting. Leave overlapping images and close images connected.
2. Add Stampin' Dimensionals to the back of the images, trimming the dimensionals so that they fit. Place the image on the starred patterned paper with the bottom lined of the stems lined up on the bottom of the paper.
3. Adhere this from #2 on to the Greenhouse Gala patterned paper.
4. Place adhesive on the back of about 5" of ribbon. Place it on the right side of the patterned paper wrapping the ends to the back.
5. Punch a Modern Label out of Old Olive card stock. Stamp your greeting from Teeny Tiny Wishes stamp set in Raspberry Ripple ink on to white card stock. Cut this out with the Word Window punch. Adhere the greeting on to the Old Olive Modern Label. Adhere this to the top right overlapping the ribbon.
6. Add the color dots to the greeting label to look like you've added brads or you can actually add brads if you wish.
7. Adhere the card front onto the card base. Add a greeting or a note to the inside.


Wednesday, February 19, 2014

Tie up a bunch of flowers

Well, we're not really tying up our flowers but I do hope that you think this card has that look.
Materials needed:
Field Flowers stamp set (#122762)
Greenhouse Gala patterend paper (#117167)
Crisp Cantaloupe card stock 3 x 4 5/8"
Coastal Cabana card stock 2 7/8 x 4 1/4"
Wild Wasabi ink
More Mustard ink
Crisp Cantaloupe ink
3/8" Old Olive Stripe Organdy ribbon (#129291)
3/16" Corner punch
Glue dots

1. Use the corner punch to round all the corners on the Crisp Cantaloupe card stock and the Coastal Cabana card stock. Adhere the Coastal Cabana to the top of the Crisp Cantaloupe. Adhere this to the center of the patterned paper.

2. Cut about 5" of ribbon. Place adhesive on the back and place the ribbon across the patterned paper and the layers of card stock.
3. Stamp the flower image from Field Flowers stamp set on white card stock. First stamp the stem and leaves in Wild Wasabi. Then carefully stamp the bud on the top stem in More Mustard ink. Finally, stamp the flower in Crisp Cantaloupe ink. Cut out around the outside edges of the stamped image. Adhere the flower image to the Coastal Cabana card stock and over the ribbon.
4. Tie a bow with more of the ribbon and cut the ends in an angle. Place glue dots on the back of the ribbon. Place the bow on top of the ribbon and flower stem image.

Hopefully, this will have the look that the ribbon is tied around the flower stems.
5. Adhere the card front to the card back. Add your greeting or message to the inside and send to a friend for a special occasion or just because.

Monday, February 3, 2014

Washi Tape Valentine

Here's another Valentine card for you. Hope you like it.

Materials needed:
Blushing Bride or Melon Mambo card stock 4 1/4 x 5 1/2"
Real Red card stock 4 x 4"
White card stock 3 1/2 x 3 1/2"
Hearts a Flutter Framelits Dies (#130159)
Striped Organdy Ribbon Melon Mambo (#129293)
Little Friends stamp set (#122667)
Teeny Tiny Wishes stamp set (#115370)
Washi Tape
    This n That (#131269)
    Gingham Garden (#129314)
Melon Mambo ink

1. Adhere the white card stock in the center of the Real Red card stock. Using the ruffled heart die, place it in the middle of the white card stock and make your sandwich for your Big Shot. Run it through the Big Shot machine cutting both pieces of card stock at the same time.
2. Lay this on top of the pink card stock in the center. Lightly mark where the cut out heart will be.
3. Lay strips of Washi tape about 2 1/2" long across the pink card stock over the heart marks. Place each strip of washi tape touching the next strip so that there are no lines between them.
4. Adhere the red and white card stock with the heart cut out over the pink card stock and the washi tape. Be sure the the washi tape shows through the opening.
5. I stamped the "love you" from the Little Friends stamp set and the "happy valentine's day" from the Teeny Tiny wishes stamp set in Melon Mambo ink.
6. Adhere ribbon across the bottom part of the card. I am not good with bows so I did this in 2 parts. I adhered a strip of ribbon across the bottom of the card front first.
Next, I tied a bow (like tying a shoe), cut it and attached it to the other ribbon with glue dots.
7. Adhere the card front to a card base and send this to someone you love.


Monday, December 2, 2013

Striped Birthday Ribbons

Materials needed:
Bermuda Bay card stock 4 1/4 x 5 1/2"
Whisper White card stock 4 x 5 1/4"
International Bazaar patterned paper (#126920) 3 3/4 x 5"
Best of Birthdays stamp set (#132929)
Every Little Bit stamp set (#120558)
3/16" Corner punch (#119871)
1 1/4" Circle punch (#119861)
3/8" Midnight Muse Satin Stitched ribbon (#126847)
Tangerine Tango ink
Stampin' Dimenionals (#104430)

1. Use the corner punch to round the corners on the white card stock and the patterned paper.
2. Cut pieces of ribbon 2", 2 3/4" and 3 1/4." Place adhesive on the back of the ribbons. Adhere them to the front of the patterned paper as shown in the picture. Wrap the ends around to the back of the paper.
3. Layer the papers with Bermuda Bay on the bottom, then white card stock, and finally the patterned paper.
4. Choose 3 images from the stamp sets to use. Stamp the images in Tangerine Tango ink on white card stock.
5. Punch the images out with the 1 1/4" circle punch. Add Stampin' Dimenionals to the back of each circle. Place these on top of the ends of the ribbons.
6. Adhere the card front to a card base and add a birthday or other greeting to the inside.

Friday, November 22, 2013

Thanks for You card

I just love the First Edition patterned paper as a background. I'm not sure why because I love really bright colors and this is not. I think it must just be my love for the printed word. In the future, we will not have print on paper like we do now. It will all be electronic. Don't get me wrong. I love my Kindle also but the printed word has a special feel that you can't get with a tablet!
Materials needed:
Serene Silhouettes stamp set (#1273324)
Chalk Talk stamp set (#130634)
Coastal Cabana card stock 4 1/4 x 5 1/2" plus
Whisper White card stock
First Edition patterned paper (#121878)
Coastal Cabana ink
Crushed Curry ink
1/4" Daffodil Delight Grosgrain Stitched ribbon (#126872) about 10"
3/16" Corner punch (#119871)
Extra large Oval punch (#119859)
 Stampin' Dimensionals (#104430)
Glue Dots (#103683)

1. Using the Corner punch, round the corners of the patterned paper. Adhere it to the Coastal Cabana card stock leaving a small border all the way around.
2. Stamp the image from Serene Silhouettes in Crushed Curry ink. Cut it out. Add Stampin' Dimensionals to the back and place it on some Coastal Cabana card stock. Cut out around the image leaving a Coastal Cabana border. Adhere this to the left side of the patterned paper.
3. Stamp the greeting from Chalk Talk stamp set on white card stock. Use the Extra Large Oval punch to punch out the greeting. Add Stampin' Dimensionals to the back and place it to the top  right side of the patterned paper.
4. Cut about 10" of ribbon and tie a bow. Use glue dots to adhere it to the bottom right side of the patterned paper.
5. Adhere the card front to a card base. Add a greeting or note and you are done! Find someone to be grateful to today. I'm sure there are many in your life that deserve a thank you.

If you haven't turned in your shoe boxes to your local collection center for Operation Christmas Child, you still have a few days left. The last collection day isn't until Monday, Nov. 25. If you live near a Chick-fil-a, check them out to see if they are collecting shoe boxes for OCC. Our local ones are collecting tomorrow, Nov. 23 until 3 pm. With every shoe boxes you bring, they will give you a coupon for a free Chick-fil-a sandwich.

Wednesday, October 9, 2013

Dahlia Birthday

Materials needed:
Raspberry Ripple card stock 4 1/4 x 5 1/2"
International Bazaar patterned paper (#126920) 4 x 5 1/4"
Perfect Punches stamp set (#120516)
Regarding Dahlias stamp set (#130327)
Satin Stitched Ribbon Raspberry Ripple (#126846)
Raspberry Ripple In Color ink
Candy Dots - Regals (#130932)
Extra Larger Oval punch (#119859)
Stampin' Dimenionals (#104430)
Whisper White card stock
Daffodil Delight card stock

1. Cut card stock and patterned paper to dimensions above.
2. Stamp dahlia on white card stock with Raspberry Ripple ink. Use scissors to cut out.
3. Stamp greeting on yellow card stock with Raspberry Ripple ink. Punch out with extra large oval punch.
4. Adhere adhesive to the back of ribbon and press on to the bottom of the patterned paper about 1" from the bottom edge.
5. Place Stampin' Dimensionals on the back of the dahlia and place the dahlia on the left side of the card, slightly overlapping the ribbon.
6. Adhere the oval greeting to the right side of the card with adhesive.
7. Place adhesive on the back of the patterned paper and adhere to the card stock.
8. Place one Candy Dot to the top right of the oval.
Adhere the card front to a card base and add a greeting to the inside of your card.