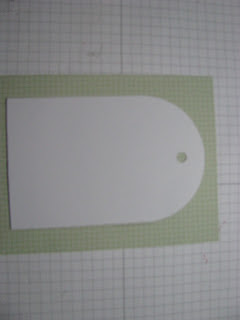
I used an old Original Sizzix die, the Super Crescent Tag, to inspire me to make this fun window card.
It opens to the front for reveal bright & spunky paper and a butterfly but also is put on a card base to allow for a special greeting or a note on the inside.
 3. Stamp the leaves/stem with Gumball Green In color ink and the flowers with Tangerine Tango or another coordinating color. It actually looks better if you stamp your image before you cut it.
4. Using your craft knife, carefully cut the center line, the bottom line and the top curve so that it will open. DO NOT cut the left and right edges of the tag pattern.
Using your Simply Scored Scoring Tool, score the left and right edges of the tag pattern so that they will fold out.
5. Cut a piece of patterned paper (I used some leftover Kaliedscope paper) to card size, 4 1/4 x 5 1/2." Decorate this piece of paper so that it will show through the window. I used the Beautiful Butterfiles die for this and stamped a greeting from my Teeny Tiny Wishes.
6. Place adhesive on the back, outside edges of the window frame. Carefully, place this on top of the decorated patterned paper. When you are happy with it, adhere this paper on to your card base.
7. Ink the open edges of the window and using a sponge dauber, add some extra color around the outside window frame.
You can add a special message or a stamped greeting to the inside of the card base.
Twitterpatted DSP (#125406)
Kaliedoscope DSP retired
Beautiful Butterflies Bigz (#114507)
Original Super Crescent Tag die
Gumball Green In Color ink
Simply Scored Scoring Tool (#122334)
craft knife
thin wire
Fabulous Florets
Teeny Tiny Wishes stamp set (#127802) YES! this is my favorite stamp set. I use one of the sentiments on almost every card that I make!
- Start with a piece white or scrap cardstock. Cut out a Super Crescent Tag with your Big Shot or ther die cut machine. This piece will be your pattern.
2. On a piece of Twitterpatted DSP cut 4 1/4 x 5 1/2." Trace the crescent tag pattern lightly in the center of the patterned paper.
This tag is 3" wide so you will need to measure top & bottom at 1 1/2" and draw a light down the center of the trace pattern.
 3. Stamp the leaves/stem with Gumball Green In color ink and the flowers with Tangerine Tango or another coordinating color. It actually looks better if you stamp your image before you cut it.
Using your Simply Scored Scoring Tool, score the left and right edges of the tag pattern so that they will fold out.
5. Cut a piece of patterned paper (I used some leftover Kaliedscope paper) to card size, 4 1/4 x 5 1/2." Decorate this piece of paper so that it will show through the window. I used the Beautiful Butterfiles die for this and stamped a greeting from my Teeny Tiny Wishes.
6. Place adhesive on the back, outside edges of the window frame. Carefully, place this on top of the decorated patterned paper. When you are happy with it, adhere this paper on to your card base.
7. Ink the open edges of the window and using a sponge dauber, add some extra color around the outside window frame.
You can add a special message or a stamped greeting to the inside of the card base.


No comments:
Post a Comment