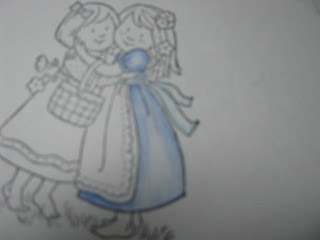
Showing posts with label watercolor pencils. Show all posts

Friday, May 29, 2015

Victorian Lady Pearls and Lace

I always enjoy doing a card that is especially feminine. I like the nice soft colors, the spring tones, and just the frillyness of them. And I'm not even that frilly of a person myself! I just like doing that kind of card. Plus, using watercolor pencils is one of my favorite coloring mediums.
Materials needed:
Hot Off the Press Victorian Lady stamp set
Teeny Tiny Wishes stamp set SU!
Dazzles border stickers, Hot Off the Press
Shades of Spring patterned paper, SU! 4 x 5 1/4"
Melon Mambo card stock 4 1/4 x 5 1/2'
Crushed Curry card stock 1 x 4"
Marina Mist card stock 2 1/2 x 4"
Word Window punch
Marina Mist ink
Basic Pearls
Watercolor pencils
Aqua pen

After you have the pieces cut out, this card is just simple assembly. Start from the bottom with the Melon Mambo and work your way up. It's really an easy card.

Wednesday, March 19, 2014

More to Love

Here is another card that I made using the free stamps I got with my subscription of Quick Cards to Make magazine.
Materials needed:
Somebunny to Love stamp set from Quick Cards magazine
Teeny Tiny Wishes stamp set (#128748)
Pool Party card stock 4 1/4 x 5 1/2"
Patterned paper from Sweet Pea paper stack (#117161) 4 x 5 1/4"
White card stock or watercolor paper 2 7/8x 2 1/4"
Gumball Green card stock 2 1/2x 3 1/8" plus
Watercolor pencils (#101879)
Aqua painter (#103954)
Burlap piece 1 1/2 x 5"
Corner rounder punch
Hole punch
Brights Buttons collection (#119747)
Subtles brads (#119738)
Modern Label punch (#119849)
Word Window punch (#119857)
Additional white card stock
Black ink or Black Staz On ink
Bermuda Bay ink
Glue Dotts

1. Adhere the patterned paper to the Pool Party card stock leaving a 1/8" border all the way around.
2. Place adhesive on the patterned paper in the center. Place the strip of burlap over the adhesive and press. Wrap the ends around to the back of the card and adhere to the back.
3. Stamp the image you choose in black ink on white card stock or watercolor paper. Use watercolor pencils and an aqua painter to color the image with the colors that will go with your background colors. Give it a couple of minutes to dry.
4. Adhere the dry image to the Gumball Green card stock. Place adhesive to the back of this and place it over the burlap strip at an angle.
5. Punch holes in opposite corners of the mounted image. Add brads to this. This will help hold this in place over the burlap and will give it an extra decorative elements.
6. Stamp a greeting to white card stock with Bermuda Bay ink. Punch out with the Word Window punch. Punch out a label from Gumball Green card stock with the Modern Label punch. Adhere the greeting on to the green label. Adhere this to the bottom right corner of the patterned paper.
7. Pull a piece of loose burlap thread from the extra burlap. Thread this through the button and tie. Place glue dots on the back of the button and press in place at the top left corner of the card. Adhere the card front to a card base.

Friday, January 10, 2014

Truck Card

Hey, here's a card any man would love! I think that most men can relate to old trucks, at least, the ones that I know. I know, some like new Corvettes & Mustangs better but still, there's something about an old truck that appeals to a man.
Materials needed:

International Bazaar patterned paper (#126920) 4 1/4 x 5 1/2"
White card stock
Papaya Collage stamp set (#126612)
Countryside stamp set (#120495)
3/8" Satin Stitched Gumball Green ribbon (#126848)
Watercolor pencils (#101879)
Blender pen (#102845)
Wild Wasabi ink
StazOn Black ink

1. Stamp the frame from Papaya Collage stamp set in Wild Wasabi ink on white card stock. Cut it out around the outside lines.
2. Use a blue and a green watercolor pencil and a blender pen to color in sky and grass on the background of the inside frame.

3. Stamp the truck from the Countryside stamp set in StayOn Black ink on white card stock. Color the truck, apples, etc, including sky and grass with the watercolor pencils of your choice. Use the blender pen to blend the colors in. 
4. Cut out the around the truck, cutting close to the front and back edges of the truck image. This barely fits so you have to cut close to the front fender and the back tailgate. Place it on the stamped frame to check for fit. Trim as needed.
5. Place Stampin' Dimensionals on the back of the truck image and place it in the center of the frame. Adhere the frame to the top center of the patterned paper.
6. Cut a piece of Gumball Green ribbon about 9" long. Tie a knot in the center. Add adhesive to the back and press on to the bottom section of the patterned paper. Wrap the ends around to the back.
7. Adhere the card front to a card base and add your sentiment to the inside. This would be a great card to send to a man for most any occasion.

***SU! no longer carries the Watercolor Pencils but you can find similar sets at many craft stores. This is still one of my favorite mediums to use in coloring my images. I haven't used them as much this past year because SU! is no longer carrying them but that's not going to stop me from enjoying a fun medium. I would encourage you to try different coloring mediums to see what you like the best. Which one do I like the best? Hard to say because I like them all!


Tuesday, May 22, 2012

Watercolor Pencils

One of my favorite coloring mediums is Watercolor Pencils. I'm not good with watercolor painting but I can make my images look like watercolor with these great colored pencils.


  1. To do this medium, you will need Watercolor Pencils(#101879), blender pens(#102845) or Aqua Painter (#103954), StazOn Ink(#101406) and your image. Many people use watercolor paper(#122959) which is supposed to make it look really great but I've always just used white cardstock. The image that I used today is from The Nicest Things (#120531) stamp set.
It is best to use StazOn ink or another permanent ink because the blending fluid or water might cause the classic ink outline to smear.


2. Stamp a nice clear image on your white cardstock or watercolor paper with the black StazOn ink. The StazOn is very difficult to get off of your rubber stamp but it doesn't hurt any stamping that you do later.


3. Remember, when you were in elementary school and your teacher taught you how to outline your pictures? While that is what we want to do here. Choose the color pencil that you want to work with and outline in the area. Also, go down any lines that are in the image. Color out a little bit from the outline but do not color the image solid.


4. Next, with a clean blender pen, apply the blending fluid or water onto the color that you applied. Pull the color with the pen into the areas where you didn't not put any color. In this way, you will get the color into the other areas without overwhelming the image. It will give you a lighter color in the center which is what you want to make it look like watercolor.


5. Every so often, you want to wipe the tip of your blender pen on scratch paper to rub the extra color off of the pen. You do not want too much color to build up on the pen or you won't get the subtle shading that you want. You also want to do this between colors to clean the tip of the pen before you start the next color.


6. Finish all of the areas where you want to use that color. Then go on to the next color and repeat the process until you have your entire picture complete. You can then mount it on colored cardstock to use in your card or scrapbook project.


Hope you enjoy coloring as much as I do. On Thursday, I'll talk about another coloring method that I enjoy, pastels or chalks.