Friday, May 29, 2015

Victorian Lady Pearls and Lace

I always enjoy doing a card that is especially feminine. I like the nice soft colors, the spring tones, and just the frillyness of them. And I'm not even that frilly of a person myself! I just like doing that kind of card. Plus, using watercolor pencils is one of my favorite coloring mediums.
Materials needed:
Hot Off the Press Victorian Lady stamp set
Teeny Tiny Wishes stamp set SU!
Dazzles border stickers, Hot Off the Press
Shades of Spring patterned paper, SU! 4 x 5 1/4"
Melon Mambo card stock 4 1/4 x 5 1/2'
Crushed Curry card stock 1 x 4"
Marina Mist card stock 2 1/2 x 4"
Word Window punch
Marina Mist ink
Basic Pearls
Watercolor pencils
Aqua pen

After you have the pieces cut out, this card is just simple assembly. Start from the bottom with the Melon Mambo and work your way up. It's really an easy card.

Monday, May 25, 2015

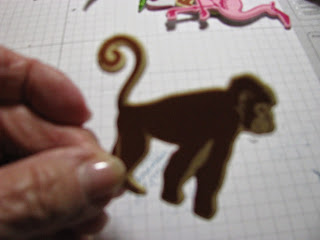
Stick Puppets

I have a friend who makes beautiful finger puppets for her shoe boxes. I tried that. Mine just left something to be desired! I guess I just don't want to put that much time in something that small. Nothing wrong with it. The kids who get her shoe boxes get some really cool things but mine shoe boxes have good things too!
These stick puppets are really easy to make & are super cute too.  They cost a little less than 5 cents to make these, don't take a lot of time and you can put them in a lot of shoe boxes.


Materials needed:
craft/popcicle sticks
foam animal stickers
baby powder

A couple of weeks ago, I was in Michael's and found a tub of foam animals. They were on sale at 40% off plus I had a coupon for an extra 20% off of my entire purchase including sale items.


This is by Creatology and has over 200 foam stickers in the container. In addition to the ones that I've shown, the container also had flamingos, elephants, and hippos. I would suggest that you put the tigers in boxes for the 5-9 year old children instead of the 2-4. They might scare the little ones.


Choose the animal you want. Peel the backing off. It is very sticky so don't lay it down on something that it could stick to.


Place the craft stick on the back of the animal. I usually put it over one of the front legs and part of the body.

To remove the sticky from the rest of the sticker, you will sprinkle or dip it into baby powder.


Hold the sticker over a lid and sprinkle baby powder all over it. After the first one, you will have baby powder in the lid so you can just rub it in the powder. Be sure that the powder cover all of the back, even up close to the craft stick. Shake the excess powder into the lid and you are finished.

You can put 3-5 in a box or you can put a whole set of all the animals in your box. This will make over 200 of these little puppets so plan on packing more than one shoe box! Remember, every shoe box is a gospel opportunity for a child somewhere in the world. 

I am super excited right now. On Wednesday, I will begin my journey to hand out shoe boxes. I get to go on a shoe box distribution to Tanzania. When I get home, I will post pictures and info about my trip here and on my facebook page. I'm looking forward to being able to tell you how shoe boxes change lives for Jesus!


Wednesday, May 20, 2015

Paint and Glimmer

I had fun doing this card. I always like to smear paint around on things. lol I think that this gives you a unique card that no one can copy exactly. It makes it your very own!


 Materials needed:
Acrylic paints, I used Cadmium Yellow, Cerulean Blue Hue, and Cadmium Red Deep Hue
Palette knife
Wild Wasabi card stock 4 1/4 x 5 1/2"
Lost Lagoon card stock 2 x 2 1/2"
Daffodil Delight card stock 2 1/4 x 2 3/4"
White card stock
Glimmer card stock 4 1/4 x 5 1/2" cut in half diagonally
Lost Lagoon ink
Silver patterned brad by Paper Studios
White and silver twine
Perfect Punches stamp set
Butterfly stamps
Stampin' Dimensionals

1. Squeeze a bit of 2 or 3 color of acrylic paints onto a palette or paper plate. Use the palette knife to swish the paints on to the white card stock, one color at a time. If you use blue and yellow, you will probably end up with some green strips on the card. Allow the paint time to dry completely. I let mine dry overnight.
**You can paint on a larger sheet and then cut it down to 4 x 5 1/4" when it is dry or you can paint on the exact size of card stock that you will use. I painted on a little bit larger piece and then I could cut off where I left too much white.

 You can do this several times to see which you like the best or you can make several cards with this idea.

2. Cut the glimmer paper in half, diagonally from tip to tip, as you see in the  picture.


 3.  Adhere the triangle of glimmer paper to the 4 1/4 x 5 1/2" piece of Wild Wasabi card stock.

4. After the painted card stock is completely dry, cut it to be 4 x 5 1/4." Adhere it to the top of the glimmer paper and card stock allowing edges of the papers to show.
5. Stamp your greeting on the small square of Lost Lagoon card stock in Lost Lagoon ink. Adhere this onto the yellow square. 
6. Punch a hole in the top left corner and add your brad.
7. Adhere this greeting piece to the top right corner of the card.


8. Wrap about 42" of twine that has a thread of silver running through it around the card 5 times. Adhere the twine to the back of the card.


 9. Stamp butterflies onto white card stock in Lost Lagoon ink. Cut out close to the wings. Apply Stampin' Dimensionals to the back of the butterflies and place on the bottom of the card.


 Adhere the card front to a white card stock back and add a note or greeting to the inside.

Monday, May 18, 2015

Shoebox Craft Day

There are so many great things that you can make to go in your shoeboxes. I've been posting some ideas on here lately. Saturday we had a shoebox craft day at our church to make things to go in our shoeboxes when we have our packing party in the fall. We had around 20 people, including some great kids, come and help out. You really don't have to have a lot of crafty people, just people who can follow directions!
I spent a few hours a day for 3-4 days getting the crafts together and organized so that everyone that came could just get to work without lots of instructions. Yes, it took a little of my time to get it all organized but then we were able to get so much more done than I would have been able to do by myself! We've got a good start for our shoeboxes.

I had the felt dolls, hair, shoes and clothes all cut out using my Big Shot and dies that I've had for my scrapbooking for years. I had the empty cd cases ready and a picture of the finished product to be put in the front of each case. The people putting them together wrote a scripture or "Jesus love you" on the back of the pictures. I asked them to put in one doll body, 2 types of hair and at least 6 pieces of clothing. They got over 70 put together. That means 70 little girls will have "paper" dolls to play with.

Making sewing cards for little ones was really easy. I started with patterns and rectangles of foam but then I found some foam shaped chickens and rabbits on sale after Easter. The ladies punched holes in each shape and cut lengths of yarn. We will put 2 or 3 in each shoebox.

Making washer necklaces was a bit more time consuming than we had thought that it would be but it still worked our well. Drying was the time consuming part. We painted the inside and outside of the washer and one side with cheap nail polish that I had gotten at Dollar Tree. It took a while to dry but as it was drying, we could paint more. When dried we flipped them over and painted the other side. We did at least 2 coats of polish on each washer. I had found some polish pens at Dollar Tree also and those made decorating the washers easy. When the washers were ready, we looped about 24" of ribbon through the washer and tied a knot in the end.


We now have a whole fleet of clothespin airplanes to delight many little boys. These are super easy to make. Just be careful with the hot glue gun! 


Spinner tops is something that we did last year too. We kept the hot glue guns on one table and had the top supplies at a nearby table. When they had everything together, the kids just turned to the glue table and did what was needed.


Crazy glasses were fun to do. The people who did these could really use their imaginations. We got some cute glasses with this project!


Another great project was the no sew scarves. Just cut 6" strips of fleece and cut fringe on each end. I am always looking for fabric on sale or picking up remnants. This Dora fleece would regularly cost $12-$15 a yard. I bought it as a remnant for just $3 a yd. There was .78 of a yard, so it cost me less than $3. There was enough to make 3 scarves from this one piece.


This project shows the imagination and inguenity of our kids! I had some pony tail bands and ribbons for them to just tie bows on. They took it to the next level and took silk flowers from another table and beads from another to decorate the pony tail bands.


Having several projects helped give people choices of what to do. They could choose what they felt comfortable with. Some people stayed at the same projects the entire time they were there. Others would work on one project for a while and then go to another. It kept everyone busy doing what they enjoyed doing. We had a few more projects but I just didn't get pictures of people working on those. Maybe next time! We will do this again on a Saturday in July. 

We've got a great start on getting our shoeboxes filled.


Friday, May 15, 2015

Butterflies and Poppies


Materials needed:
Greenhouse Gala from SU! 4 x 5 1/4"
Lost Lagoon card stock  2 x 3"
Tangerine Tango card stock 2 1/4 x 3 1/4"
Wild Wasabi card stock 4 1/4 x 5 1/2"
White card stock
Lost Lagoon ink
Lost Lagoon ribbon
Crystal Gem
Perfect Punches stamp set SU!
Butterfly stamps (Sorry, but I honestly don't know where this set came from. I think it came from              Quick Cards Made Easy magazine but I'm not sure.)
Stampin' Dimensionals

Friday, May 8, 2015

Craft Stick Puzzles

I have been having so much fun searching for things to make for my shoeboxes all over the internet. I've spent lots of time on Pinterest and I found these craft stick puzzles there. These are cute, inexpensive items that go great in your Opereation Christmas Child shoeboxes.
I look everywhere for pictures or images that I can use on these simple puzzles. They can be found on the internet, in craft programs, from magazines and color books, you can even use Christmas cards.

Materials needed:
Pictures
Craft sticks
Modge Podge type of glue
Brush, sponge brushes work best
Craft knife
Pen or marker


Line up your sticks and check to see that you have enough for the size of your picture. Add or take away stick to have the number needed.
Totally cover the back side of your image with a Modge Podge type of glue.
Place you image on top of the craft sticks and smooth the paper down.
Coat over the image with more of the Modge Podge. Cover it completely going in two directions.
***Note: I used a stipple brush but the best for this is actually one of the sponge brushes.
Give the project at least 1/2 hour to dry, maybe longer.

After it's dried, I flip it over and number the sticks on the back. This is not necessary but I like to do it to help the kids who may not have done puzzles and to help with counting.


I then use a craft knife to separate the craft sticks. I find it easiest to fold each stick forward and them slice them apart. When finished, I put each puzzle in a separate zip lock bag.

Tuesday, May 5, 2015

May Birthday Card for Women

Here is the card that I made to send to my lady friends who have birthdays in May.

Materials needed:
Old Olive cardstock 5 1/2 x 4 1/4"
Shades of Spring patterned paper (#117160) 4 x 5 1/4", 2 x 5 1/4"
Rich Razzlelberry 1/2" ribbon (115613)
White card stock
Bloom with Hope stamp set (133952)
Old Olive marker
Perfect Plum marker

Have fun making your cards!