Monday, December 30, 2013

Add to your stencil card

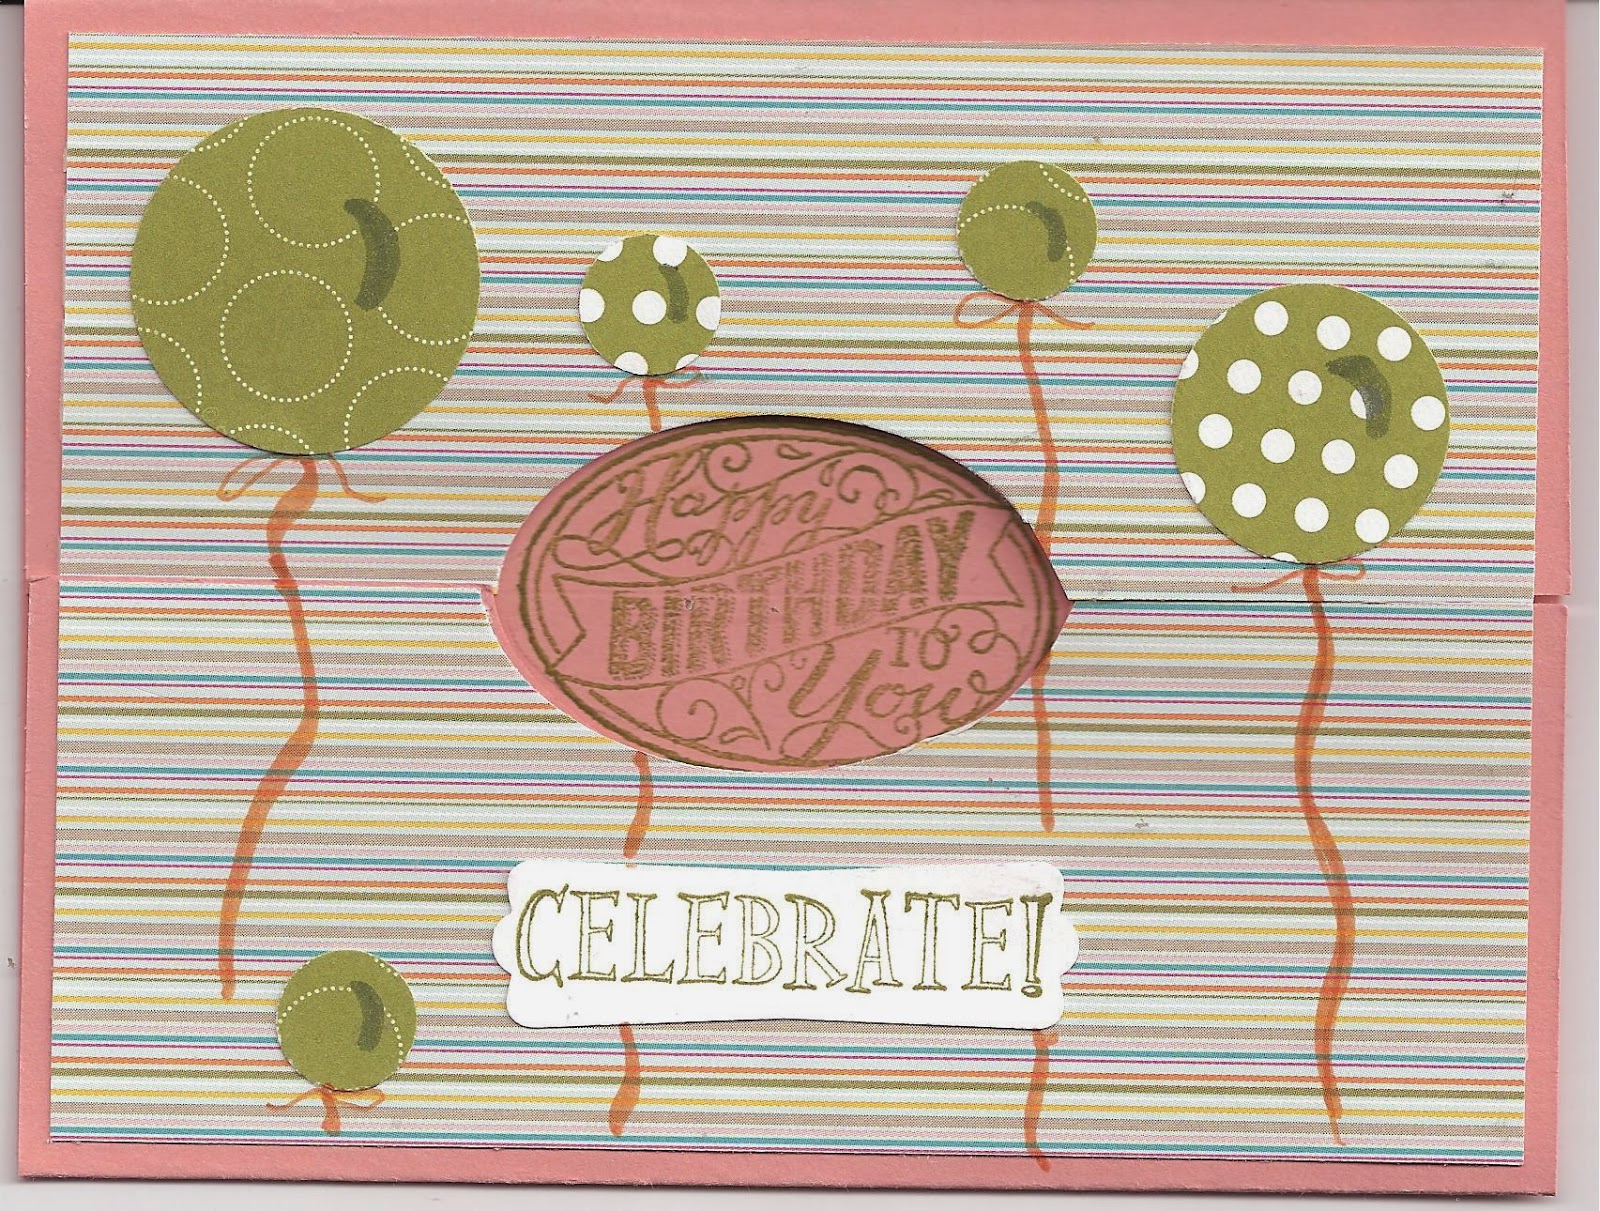
Today, I made another multi media card using the acrylic paint with the stencil that I did on Friday. I used Night of Navy card stock for this one with the tree stencil providing a background.
Materials needed:
Acrylic paint
stencil
stipple brush
First Edition patterned paper (#121878) 2 1/4 x 2 3/4"
Gumball Green card stock
White card stock
Gumball Green ink
Candy Dots, Regals (#130932)
Word Window punch (#119857)
Modern Label punch (#119849)
Teeny Tiny Wishes stamp set (#128748)

1. Prepare the card stock with the background design like we did on Friday. Click here to see that. Let it dry.
2. Adhere the patterned paper to the left side of the card stock about 1 inch from the bottom.
3. Stamp the greeting from Teeny Tiny Wishes on white card stock in Gumball Green ink. Punch this out with the Word Window punch.
4. Punch out a Modern Label punch from Gumball Green card stock. Adhere the white greeting on top of the green modern label. Adhere this to the patterned paper centered near the bottom.
5. Add 2 Candy Dots to give the look of brads to the label.
Adhere the card front to a card base and add your message to the inside.
There are many more ways to dress up this background card stock. Use your imagine and dig into your scrapping and card stash. You can come up with all sorts of things.

Friday, December 27, 2013

The Trees Notecards

Oh, I had fun doing this one. It's simple but I always enjoy when I get to use another media.

Materials needed:
Raspberry Ripple card stock 4 1/4 x 5 1/2 (I've also done it on Night of Navy for a good look)
6 x 6 Stencil, Mini Branches from The Crafters Workshop. com
Liquitex Acrylic paint, Titanium White (actually, any brand will do)
Stipple brush

1. Squeeze out a small amount of white paint onto a paper plate. Place the stencil to totally cover the card stock.
2. Pick up a small amount of paint on your brush. Dap some off on the plate. You don't want the brush too full of paint.
3. Use the stipple motion to put paint onto the stencil and card stock starting at the top. Hold the stencil tightly in the section where you are applying the paint. You will move your fingers/hand down to continue holding the stencil in place as you apply paint to the stencil. When finished, pick the stencil straight up from the card stock. Allow the paint 30 - 60 minutes to dry.
4. Take the brush and stencil to the sink and wash paint from the stencil, brush and your hands.
5. After the paint is dry, apply adhesive to the back and adhere it to a card back.
This makes a cool note card. You can do several like this in different colors as a gift to a friend. Later on, when I have more time, I will try adding ribbons, brads or greetings to the front of the card. Have fun using a new medium!

Hope you don't mind if I give my sister a plug here. Look in the Kindle store on Amazon for her novella "The Trees Have Eyes." Her name is M. J. Henry. She has some very good short stories, children's books and a novel on Amazon right now. They are $2.99 each. If you like off beat short stories, you might be interested in her book of short stories titled "Tales from a Dead Cat." I haven't read her novel that is on Amazon yet. I've downloaded it but have been too busy with Christmas to read it yet.

Wednesday, December 25, 2013

Merry Christmas

Luke 2

New International Version (NIV)

The Birth of Jesus

In those days Caesar Augustus issued a decree that a census should be taken of the entire Roman world. (This was the first census that took place while Quirinius was governor of Syria.) And everyone went to their own town to register.
So Joseph also went up from the town of Nazareth in Galilee to Judea, to Bethlehem the town of David, because he belonged to the house and line of David. He went there to register with Mary, who was pledged to be married to him and was expecting a child. While they were there, the time came for the baby to be born, and she gave birth to her firstborn, a son. She wrapped him in cloths and placed him in a manger, because there was no guest room available for them.
And there were shepherds living out in the fields nearby, keeping watch over their flocks at night. An angel of the Lord appeared to them, and the glory of the Lord shone around them, and they were terrified. 10 But the angel said to them, “Do not be afraid. I bring you good news that will cause great joy for all the people. 11 Today in the town of David a Savior has been born to you; he is the Messiah, the Lord. 12 This will be a sign to you: You will find a baby wrapped in cloths and lying in a manger.”
13 Suddenly a great company of the heavenly host appeared with the angel, praising God and saying,
14 “Glory to God in the highest heaven,
    and on earth peace to those on whom his favor rests.”
15 When the angels had left them and gone into heaven, the shepherds said to one another, “Let’s go to Bethlehem and see this thing that has happened, which the Lord has told us about.”
16 So they hurried off and found Mary and Joseph, and the baby, who was lying in the manger. 17 When they had seen him, they spread the word concerning what had been told them about this child, 18 and all who heard it were amazed at what the shepherds said to them. 19 But Mary treasured up all these things and pondered them in her heart. 20 The shepherds returned, glorifying and praising God for all the things they had heard and seen, which were just as they had been told.

Remember the reason for the season.

Monday, December 23, 2013

Dots and Buttons

Here's a fun birthday card for a December or any time birthday. I've always wondered if December birthday people ever got tired of everything being red and green. Don't know the answer to that but this card used some different colors.

Materials needed:
Polka Dot Parade patterned paper (#126902)
Pumpkin Pie card stock 4 1/4 x 5 1/2" or 5 1/2 x 8 1/2"
White card stock
Best of Birthdays stamp set (#132929)
Designer Buttons Brights collection (#119747)
Extra large oval punch (#
Glue dots (#103683)
Stampin' Dimensionals (#104430)
Baked Brown Sugar ink
scraps of double sided patterned paper, 3 pieces about 1 x 2 1/2"

1. Cut your card stock to the desired size. If you want to use a white base card, then cut the Pumpkin Pie card stock to 4 1/4 x 5 1/2." If you want the Pumpkin Pie card stock to be your base card, then cut it to 5 1/2 x 8 1/2." Then score and fold at 4 1/4".
2. Cut pieces of the Polka Dot Parade patterned paper to measure: blue-1 piece 4 1/4 x 2" and 1 piece to be 1 x 4 1/4," orange - 1 piece to be 1 1/2 x 4 1/4." Cut the double sided patterned paper to be about 1 x 2 1/2". I used scraps from one of last year's Christmas packages.
3. Adhere the scraps in the center of the Pumpkin Pie card stock. Be sure that the bottom ends will be covered by the bottom piece of Polka Dot Parade paper.
4. Adhere the larger blue piece across the bottom even with the bottom edge of the card stock. Adhere the orange paper across the top, even with the top edge. I used the smaller dots on the bottom section and the larger dots (the other side of the patterned paper) to the top. Adhere the smaller piece of blue across the center of the orange patterned paper.
5. Use glue dots to adhere the buttons to the top section of the card. You can add floss or thread to the holes in the button if you wish.
6. Use the greeting stamp from the Best of Birthdays set to stamp in Baked Brown Sugar ink on white card stock. Use the Extra Large Oval punch to punch it out. Add stampin' dimensionals to the back of the greeting tag to the blue Polka Dot Parade paper.
7. Either add this to a card base or just add your note inside and mail.

Friday, December 20, 2013

Stripes and Circles Birthday

Another simple card for this busy time of year.

Materials needed:
Print Poetry DSP stack (#129312) 4 1/4 x 5 1/2"
Brights Collection patterned paper 2012 (#117155) 3 x 3 1/2"
Perfect Punches stamp set (#120516)
Extra large oval punch
2 1/2" Circle punch
Midnight Muse ink
Stampin' Dimensionals (#104430)

Wednesday, December 18, 2013

Christmas Goody Bag

When you're making all those holiday goodies, it's always nice (and fewer calories for you) if you give some of them to family and friends. Here's a cute goodie bag you can make to use for an eatable gift.
Materials needed:
Tag a Bag Gift Bags (#131370)
Very Merry Tags stamp set (#130402)
Framelits Labels Collection ()#125598)
Bigz Top Note die (#113463)
Decorative Label punch (#120907)
various red and green patterned papers
white card stock
Raspberry Ripple In Color ink

1. Run your Top Note die through the Big Shot machine using a red patterned paper. Run a medium die from the Framelits Labels Collection to cut out of green patterned paper.
2. Score and fold the Top Note die in half so that it will fit over the end of the gift bag.
3.Stamp the "naughty nice" greeting on to white card stock with Raspberry Ripple ink.
4. Use the Decorative Label punch to punch out the greeting.
5. Adhere the green Framelits cut out to the folded Top Note die with part of the framelits sticking above the Top Note.  Adhere the "naughty/nice" stamped image to the green framelits.

6. On another piece of green patterned paper, stamp the "to/from" from the Very Merry Tags set in Raspberry Ripple ink. Cut out a rectangle about 1 3/4 x 2 1/2". Adhere it to the back of the folded Top Note Die.
7. Fill your gift bag with homemade goodies. Fold the top over about 1/2."
8. Place the decorated Top Note over the bag fold and staple it down. The staple will hold the goodies inside the bag until ready to be eaten.


Monday, December 16, 2013

Rectangle Patterns Birthday card

Here we have simple card #3.

Materials needed:
Patterns Pack II (#114325, retired) or other double sided patterned paper
Bermuda Bay card stock 4 1/4 x 5 1/2"
Whisper White card stock
Best of Birthdays stamp set (#132929)
Brads Brights Collection (#119740)
Bermuda Bay ink

1. Cut the double sided patterned paper so one piece is 2 x 4 1/4" and the other is 2 x 2  3/4." Adhere the long piece vertically on the left side. Adhere the smaller piece horizontally on the top right side, about 1/2" from the top.
2. Stamp your cupcake greeting from Best of Birthdays on white card stock with Bermuda Bay ink. Cut it to be about a 1 3/4" square. Adhere it on top of the patterned paper as shown in the picture.
3. Use a small hole punch to punch a hole in each corner of the cupcake square. Add a brad to each  corner. I choose the Tangerine Tango brads to bring out the orange in the patterned paper.
4. Adhere the card front to a card base.
Now that you've made some simple and easy December birthday cards, it's time to start baking those Christmas cookies! I've already sent some to my military children who won't be able to come home for Christmas this year.

Friday, December 13, 2013

All Bundled Up Girl

Here's another of the simple cards. These are quick and easy to make on these busy days before Christmas.

Materials needed:
Greeting Card Kids stamp set (#120633)
Teeny Tiny Wishes (# 128748)
Old Olive card stock 4 1/4 x 5 1/2"
Real Red card stock 2 x 41/4" (plus a scrap)
Whisper White card stock
Watercolor Pencils (#101879)
Blender Pen
Word Window Punch (#119857)
Modern Label  Punch(#119849) 
3/16" Corner Punch (#119871
Basic Black ink
Real Red ink
Stampin' Dimensionals (104430)       

1. Adhere the Real Red piece of card stock across the Old Olive card stock as shown.
2.  Stamp the little girl image from Greeting Card Kids on to white card stock. Cut it out to measure about 2 x 2 1/2." Use the Corner Punch to round the corners.
3. Use the Watercolor Pencils and the blender pen to color the image how you like.
4. Put Stampin' Dimensionals on the back of the image and mount over the Real Red card stock.
5. Stamp the happy birthday stamp from Teeny Tiny Wishes on white card stock in Real Red ink. Use the Word Window Punch to punch it out. Punch a Modern Label from Real Red card stock. Adhere this to the bottom center of the card.
6. Adhere the card front to a card base and you are ready to go with another simple birthday card for those December birthdays.                                                                                                                                                                                   

Wednesday, December 11, 2013

Razzleberry Poppies

I decided that with the season being so very busy with parties and events that I would go with some simpler cards that still look nice. I pulled out some old page maps that I haven't used for a while. For a few days, you can have my take on some of these.
Materials needed:
Rich Razzleberry card stock 4 1/4 x 5 1/2"
Baked Brown Sugar card stock
Whisper White card stock
Pleasant Poppies stamp set (#129499)
Best of Birthdays stamp set (#132929)
1 3/4" Circle Punch (#119850)
2 1/2" Circle Punch (#120906)
Dotted Scallop Ribbon Border Punch  (#119275)

1. Stamp a section of the Pleasant Poppies stamp on white card stock with Rich Razzleberry ink. Cut that out with the 1 3/4" circle punch.
2. Cut out a 2 1/2" Circle from Baked Brown sugar card stock. Adhere the poppies circle in the center of the Brown Sugar circle.
3. Adhere the circles in the upper center of the Rich Razzleberry card stock.
4. Using white card stock and the dotted Scallop Ribbon Border Punch, punch out a ribbon strip 4 1/4" long.
5. Stamp the "celebrate" greeting in Rich Razzleberry ink on the center of the punched card stock ribbon.
6. Adhere this on to the bottom of the Rich Razzleberry card stock.
7. Place the card front onto a card base and add your greeting to the inside. Be sure you sign your art work!


Monday, December 9, 2013

Christmas Colored Birthday

This birthday card has shades of reds for a December birthday!
Materials needed:
Raspberry Ripple card stock 4 1/4 x 5 1/2"
Real Red card stock 1 x 5 1/2"
Melon Mambo card stock 1 x 5 1/2"
Pink Pirouette card stock 1 x 5 1/2"
White card stock scrap
Strawberry Slush In Color ink
Best of Birthdays stamp set (#132929)
Subtles Candy Dots (#130933)
1 3/8" Circle punch (#119860)
Small Heart punch (#117193)
Stampin' Dimensionals (#104430)

1. Use the 4 1/4 x 5 1/2" card stock for your base for the card. I put Raspberry Ripple as that size but it can actually be any one of the colors. You will just leave the space for that color empty.
2. Starting at the top with the lightest color, adhere the strip of pink card stock at the top of the card. Adhere the next shade (for mine it's the Melon Mambo) to the card stock with it joining the pink strip, edge to edge.
Do the same with the Real Red. That will leave the Raspberry Ripple without a strip over it.
3. Punch 3 small hearts with 3 different shades of the leftover card stock or with a patterned paper that is the same shade as the card stock. Place a pink Candy Dot on each heart. Put a Stampin' Dimensional on the back of each heart. Place each heart where two shades join each other.
4. On white card stock, stamp your cake slice and greeting in Strawberry Slush ink. Punch it out with the 1 3/8" circle punch. Rub the edge across the stamp pad to leave strawberry ink on the edge of the circle. Adhere it on the bottom right side of the card.
5. Add this to a card base with your greeting or note on the inside. Send out those birthday wishes!
You might be surprised how many people with December birthdays don't get cards, etc for their birthday because it is so close to Christmas. Let them know that you still think about them too.

Friday, December 6, 2013

Dahlias Congratulations

There are many things that we can send "congratulations" for. This one will go to a former student who is getting married in about a month. Her shower is this Saturday so I made this to go with her gift.
Materials needed:
Very Vanilla card stock 4 1/4 x 5 1/2," 3 3/4 x 4" and some extra for stamping on
Coastal Cabana card stock 4 x 5 1/4"
Regarding Dahlias stamp set (#130327)
Perfect Punches stamp set (#120516)
Pretty Print embossing folder (#132175)
Very Vintage Designer Buttons (#129327)
Modern Label punch (#119849)
Coastal Cabana ink
Glue dots (#103683)
Stampin' Dimenionals (#104430)
Embroidery floss, beige


1. Cut the card stock to the dimensions listed above.
2. Place the smallest of the Very Vanilla card stock  in the Pretty Print embossing folder and run it through your Big Shot machine.
3. Layer the 3 card stock pieces and adhere together. Each one will have a 1/8" border around it.
4. Stamp the congratulations greeting from Perfect Punches on Very Vanilla card stock with Coastal Cabana ink. Use the Modern Label punch to punch it out. Adhere it to the top left side of the card.
5. Stamp the dahlia stamp on Very Vanilla card stock with Coastal Cabana ink. Cut it out close to the petal edges. Add Stampin' Dimensionals to the back and place it on the right side of the card.
6. Thread embroidery  floss through the button holes. Add glue dots to the back and adhere it to the bottom left side of the card.
7. Place the card front on to a card base and add a greeting.

Wednesday, December 4, 2013

Simple & Bright Birthday

This is a simple card that conveys a happy message.

Materials needed:
Polka Dot Parade patterned paper (#126902) 4 x 5 1/4"
Whisper White card stock 5 1/2 x 8 1/2"
Bermuda Bay card stock 2 pieces each 1 1/2 x 3 1/2"
Real Red card stock 2 pieces each about 1 x 2"
Hung Up Cute Clips (#129389)
Teeny Tiny Wishes stamp set (#115370)
Bermuda Bay ink

1. Score and fold the white card stock at 4 1/4." This is your base card that we will build on.
2. Adhere the Polka Dot Parade patterned paper on to the front fold of the white card stock. Center it so that you have a border all the way around.
3. Stamp your birthday greeting in Bermuda Bay ink on white card stock scraps. Cut the greeting in half so that one piece says "happy" and the other piece says "birthday."
4. Tear the edges of the Real Red card stock to look rough. Adhere the words from #3 angled in the center of the red card stock. Adhere the red card stock at an angle on the Bermuda Bay card stock.
5. Place a clip from the Hung Up Cute Clips on each piece of Bermuda Bay. Put adhesive on the back of the Bermuda Bay card stock, going over the clips with the adhesive. Angle these to overlap on the Red Polka Dot Parade patterned paper.
6. Now add your greeting or note to the inside and you are ready to mail.

Monday, December 2, 2013

Striped Birthday Ribbons

Materials needed:
Bermuda Bay card stock 4 1/4 x 5 1/2"
Whisper White card stock 4 x 5 1/4"
International Bazaar patterned paper (#126920) 3 3/4 x 5"
Best of Birthdays stamp set (#132929)
Every Little Bit stamp set (#120558)
3/16" Corner punch (#119871)
1 1/4" Circle punch (#119861)
3/8" Midnight Muse Satin Stitched ribbon (#126847)
Tangerine Tango ink
Stampin' Dimenionals (#104430)

1. Use the corner punch to round the corners on the white card stock and the patterned paper.
2. Cut pieces of ribbon 2", 2 3/4" and 3 1/4." Place adhesive on the back of the ribbons. Adhere them to the front of the patterned paper as shown in the picture. Wrap the ends around to the back of the paper.
3. Layer the papers with Bermuda Bay on the bottom, then white card stock, and finally the patterned paper.
4. Choose 3 images from the stamp sets to use. Stamp the images in Tangerine Tango ink on white card stock.
5. Punch the images out with the 1 1/4" circle punch. Add Stampin' Dimenionals to the back of each circle. Place these on top of the ends of the ribbons.
6. Adhere the card front to a card base and add a birthday or other greeting to the inside.

Sunday, December 1, 2013

Sunday Share

Good Morning! I hope everyone had a fabulous Thanksgiving with family, friends, and time to thank God for the blessings He has given you. I am so thankful for my family and friends today. My sweet husband put up with me being basically gone from 8-6 every day from Nov. 18-25 as I worked the Operation Christmas Child National Collection Week at our Mid-Texas area collection center here in Temple, TX. I am so excited to tell you that we collected 12,025 shoe boxes from 5 Central Texas counties to go to children around the world. Every shoe box represents a child who will have the opportunity to hear and learn how Jesus Christ died for our sins and lives in heaven with  the Father and in our hearts every day.
Here are some pictures of our week. Hope you enjoy them. No, I'm not in any of them. I'm the one behind the camera!

 Here's what our room looked like before we got started.
 This is Maye and Lanita getting ready to set things up for our packing party which lasted for 4 of the days.
 Cecelia is dumping candy into a tub to get it ready to be bagged for the shoe boxes.
Monday, Nov. 18. The first day of Collection Week and the first day of our church's packing party. The green and red go boxes on the left & in the back are folded and ready to be packed. The boxes on the right are the ones that have already come in from members and from other churches. The center shows some of the items that we have ready for our volunteers to pack shoe boxes. Our church collects things all year round for our packing party. Immanuel Baptist packing party did 1500 shoe boxes plus the boxes brought in by members who didn't come to the packing party.
 Charles and John did a lot of work putting the shoe boxes in cartons and recording the numbers in each box.
 Two of our lovely volunteers packing shoe boxes.
 Mary looks over the color books to see which one she wants to put in her shoe box.
 We had lots of teddy bears for shoe boxes! Edna is taking all the plastic rings and tags off of each one of them.
 Cathy & Allen are processing our boxes. We had to make sure that every box had a boy/girl label and 2 strong rubber bands to hold them closed.
 At one point during the week, we had shoe boxes everywhere! We had to keep the church groups separate in order to record the numbers accurately. Here there are shoe boxes stacked in the foyer in 4 different places while the volunteers in our room processed the boxes. One gentleman said not to worry about "how many boxes there are. God knows the numbers." That is certainly true but the US government likes to know exactly what non-profits are doing. Therefore, all the numbers have to match!
Milie, from Fellowship Baptist in Morgan's Point, brought her churches shoe boxes in. Like I said above, we had people bring shoe boxes from all over Central Texas to our collection center.
All of these boxes will go to a regional processing center where they will be checked to be sure there are no breakables, liquids, or war toys. Then they will be sent to poor children in over 130 countries around the world. Praise God from whom all blessings flow!

Friday, November 29, 2013

Embossed Frame with Flower card


I hope you had a great Thanksgiving yesterday and haven't been too obsessed with the Black Friday sales! Remember to take time to be thankful for all that you have everyday.


Materials needed:

Flower Shop stamp set (#130942)
Crushed Curry card stock 2 3/4 x 4"
Elegant Eggplant card stock 4 1/4 x 5 1/2"
Whisper White card stock
Designer Frames embossing folder (#123130)
Pretty Print embossing folder (#132175)
Daffodil Delight 1/4" Grosgrain Stitched Ribbon (#126872)
More Mustard ink
Raspberry Ripple ink
Sponge dauber (#102892)
Brights Collection Buttons (#119747)
Stampin' Dimensionals (#104430)
Glue Dots (#103683)
embroidery floss or thread

1. Stamp one of the flowers from Flower Shop stamp set on white card stock with More Mustard ink.
2. Place the oval frame from the Designer Frames embossing folders so that the flower fits inside the frame. Build your sandwich for this and run it through the Big Shot machine. Cut it out around the frame edge.
3. Use a sponge dauber and Raspberry Ripple ink and ink the raised part of the frame. Place Stampin' Dimensionals on the back of the frame.
4. Place the Crushed Curry card stock in the Pretty Print embossing folder and run it through the Big Shot machine.
5. Peel the backing off the dimensionals on the frame and adhere it to the center of the Crushed Curry embossed card stock. Adhere the Crushed Curry card stock to the top left corner of the Elegant Eggplant card stock, leaving a small border on the top and left side.
6. Cut 2 pieces of ribbon. One should be about 6" and the other should be about 5 1/2" long. Adhere those to the Elegant Eggplant card stock allowing the ribbon to cross as shown in the picture.
7. Thread floss through the button holes and tie. Add glue dots to the back of the button. Press the button at the corner where the ribbons cross.
Add the card front to a card back and you are ready for the inside. Add a greeting or a note.

Why do I always add my card front to a card back instead of just using a solid 8 1/2" piece of card stock and folding? Actually, I've got a couple of reasons. My first reason is that I want to be able to add embellishments, like brads, to the card without having the ends or the backs to show through to the inside of the card. My second reason is because I like to use a variety of colors of card stock and I prefer to be able to send my greeting or note on easier to read white card stock. For example, if I had used a sheet of card stock that was 5 1/2 x 8 1/2" with the Elegant Eggplant, I would have to add a lighter color to the inside for my message to be seen. Many of the cards that I send are to senior citizens and I want them to be able to read the message easily. On a dark card stock that would be difficult. My third reason is that that's just how I like to do it. I learned to do it that way years ago and I've just gotten used to doing it that way. What ever you do with your cards, the important part is that you make it be you. Have fun and express yourself to your friends! That's what I do.

Wednesday, November 27, 2013

Cross Word Birthday

Materials needed:
Cross My Heart stamp set (#126582)
This & That Epic Day patterned paper (#130814) 4 1/4 x 5 1/2"
Soho Subway patterned paper (#130140) 2 x 4 1/4"
Raspberry Ripple card stock 2 x 3"
Whisper white card stock
Hung Up Cute Clips (#129389)
Raspberry Ripple 3/8" Satin Stitched Ribbon (#126846)
Raspberry Ripple ink
Stampin' Dimensionals (#104430)

1. Cut your patterned paper to the sizes shown above. Adhere the Soho Subway paper to the top of the Epic Day paper.
2. Cut a piece of ribbon about 6-6 1/2" long. Tie a knot in the middle. Run the ribbon through the Cute Clip. Adhere the ribbon over the paper where the seam comes together. Wrap the ends to the back.
3. Use Raspberry Ripple ink to stamp your cross word greeting on white card stock. Cut out around the edges of it. Place Stampin' Dimensionals on the back of this. Adhere it to the Raspberry Ripple card stock.
4. Adhere the Raspberry Ripple card stock to the Epic Day patterned paper below the ribbon.
5. Stamp a cup cake on right side of the Soho Subway paper with Raspberry Ripple ink.
6. Adhere the card front onto a card base and add your greeting to the inside.

Got Mistletoe?

Here's your last Christmas card before Thanksgiving. Enjoy your family and friends tomorrow and don't forget to give thanks for all you have been blessed with.

Materials needed:
Snow Festival patterned paper (#126908) choose 2 sheets
Real Red card stock 2 1/2 x 3 1/2"
Very Merry Tags stamp set (#130402)
Whisper White card stock
Old Olive marker
Cajun Craze marker
Extra Large Oval punch (#119859)
In Color Brads (#122940)
Old Olive 3/8" Striped Organdy Ribbon (#129291)
Stampin' Dimensionals (#104430)

1. I chose the gumball green with white stars for my background paper. Cut it 4 1/4 x 5 1/2". I chose the patterned paper with Christmas houses, etc in lines for the other piece. Choose the lines that you want to use on this and cut at the natural divides to measure about 3 x 4 1/4." Adhere the smaller paper on the green with stars about 1/2" from the bottom of the paper.
2. Center the Real Red card stock over both pieces of patterned paper.  Adhere.
3. Use the Old Olive marker to color the mistletoe on the stamp. Color the ribbon, words, and border with the Cajun Craze marker. Huff on it and then stamp on white card stock. Punch out the image with the Extra Large Oval punch.
4.
4.Tie the ribbon in a loop.
5. Punch a hole through the center top of the Real Red card stock and the patterned paper. Loosely place aa brad there.
6. Wrap the tied part of the ribbon on the brad. Tighten the brad in place. Place Stampin' Dimensionals on the back of the "mistletoe" tag. Cut the ribbon loop in half. Add adhesive to the top of the back of the tag. Look to see how far down you need the ribbon to fit on the tag. Press the ribbon on to the adhesive. Add one more Stampin' Dimensional on top of the ribbon.

7. Peel the backing off the Stampin' Dimensionals and place the tag so that it looks like it is hanging on the brad.

8. Adhere the card front to a card base and add your greeting to the inside. Sign it and wish your family and friends a very merry Christmas.

Monday, November 25, 2013

Snowman Gift Card

Christmas is one month away today. It's coming soon. Here's a card that you can slip an extra something special in to. You can put a gift card or a cookie in the pouch, depending on who you're giving it too.

Materials needed:
Jolliest Time of the Year stamp set (#116584, retired)
Tag a Bag Gift Bag (#131370)
Real Red card stock 4 1/4 x 5 1/2"
Black Staz On ink
Early Espresso marker
Crumb Cake marker
Cherry Cobbler marke
Gumball Green 3/8" Satin Stitched Ribbon (#126848) 10-12"

1. Score the gift bag at 3 7/8" and fold. Adhere the bottom of the bag to the Real Red card stock.

2. Using the Black Staz On ink, stamp 3 snowmen on the front of the gift bag. Use the markers to color bits of the snowman, as shown. (You can stamp the bag before or after you adhere it to the card stock.)
3. Wrap the ribbon around the gift bag and tie.

You can place a longer item in the bag, if you wish, because the bottom section is not glued together.

4. If you want to place a small item or a gift card in the bag, adhere the top and bottom together so it won't flap open.
5. Place this card front on to a card base. Add your greeting and note inside the card.
That was easy enough! At least, I think so.

Friday, November 22, 2013

Thanks for You card

I just love the First Edition patterned paper as a background. I'm not sure why because I love really bright colors and this is not. I think it must just be my love for the printed word. In the future, we will not have print on paper like we do now. It will all be electronic. Don't get me wrong. I love my Kindle also but the printed word has a special feel that you can't get with a tablet!
Materials needed:
Serene Silhouettes stamp set (#1273324)
Chalk Talk stamp set (#130634)
Coastal Cabana card stock 4 1/4 x 5 1/2" plus
Whisper White card stock
First Edition patterned paper (#121878)
Coastal Cabana ink
Crushed Curry ink
1/4" Daffodil Delight Grosgrain Stitched ribbon (#126872) about 10"
3/16" Corner punch (#119871)
Extra large Oval punch (#119859)
 Stampin' Dimensionals (#104430)
Glue Dots (#103683)

1. Using the Corner punch, round the corners of the patterned paper. Adhere it to the Coastal Cabana card stock leaving a small border all the way around.
2. Stamp the image from Serene Silhouettes in Crushed Curry ink. Cut it out. Add Stampin' Dimensionals to the back and place it on some Coastal Cabana card stock. Cut out around the image leaving a Coastal Cabana border. Adhere this to the left side of the patterned paper.
3. Stamp the greeting from Chalk Talk stamp set on white card stock. Use the Extra Large Oval punch to punch out the greeting. Add Stampin' Dimensionals to the back and place it to the top  right side of the patterned paper.
4. Cut about 10" of ribbon and tie a bow. Use glue dots to adhere it to the bottom right side of the patterned paper.
5. Adhere the card front to a card base. Add a greeting or note and you are done! Find someone to be grateful to today. I'm sure there are many in your life that deserve a thank you.

If you haven't turned in your shoe boxes to your local collection center for Operation Christmas Child, you still have a few days left. The last collection day isn't until Monday, Nov. 25. If you live near a Chick-fil-a, check them out to see if they are collecting shoe boxes for OCC. Our local ones are collecting tomorrow, Nov. 23 until 3 pm. With every shoe boxes you bring, they will give you a coupon for a free Chick-fil-a sandwich.

Wednesday, November 20, 2013

Antiqued Thanks

This card was very easy to make. I was surprised at the antique look that it came out with but I like it.

Materials needed:
Crushed Curry card stock 4 1/4 x 5 1/2"
Whisper White card stock
Holiday Frame Embossing Folder (#127820)
Truly Grateful stamp set (#131733)
Large Oval punch (#119855)
Stampin' Dimensionals (#104430)
Night of Navy ink
Brayer (#102395)

1. Ink up your brayer with the Night of Navy ink and apply to the inside of the embossing folder. For step by step directions for this technique, click here. Run it through your Big Shot machine.
2. Stamp your greeting from Truly Grateful stamp set on white card stock. Punch out with the large oval punch.
3. Add Stampin' Dimensionals to the back of the greeting. Place in the center of the embossed image.
4. Add the card front to a card base and you are finished.
See! I told you this was an easy one!

Monday, November 18, 2013

Fall Birthday


 Materials needed:
Cottage Window stamp set (#127282)
Teeny Tiny Wishes stamp set (#115370)
Beyond the Garden patterned paper (#122342, retired) 4 1/4 x 5 1/2"
Coastal Cabana card stock 2 3/4 x 3 1/2"
Whisper White card stock
Close to Cocoa marker
Summer Starfruit marker
More Mustard marker
Pumpkin Pie ink
Baked Brown Sugar In Color ink
Brights Candy Dots (#130931)
Tangerine Tango Sycamore Street 1/4" Ribbon (130812, retired)
Word Window punch (#119857)
3/16" Corner punch (#119871)
Stampin' Dimensionals (#104430)

1.  Stamp the window from Cottage Window set in Bake Brown Sugar ink on white card stock. Line up the pumpkin with the window sill and stamp in Pumpkin Pie ink. Cut out the window, including the inside.
2. Using markers, color your branch in the Cottage Window set. Stamp it on white card stock. Cut it out.
3. Determine where you are going to put the window on the Coastal Cabana card stock. Place the branch in the window and put a small mark where it will go. Remove the window and adhere the branch over the mark.
4. Place Stampin' Dimensionals behind the window and pumpkin. Adhere it to the Coastal Cabana card stock with it slightly overlapping the right edge of the branch. Adhere this piece to the left top of the patterned paper.
5. Cut 2 pieces of ribbon, one about 6" and the other about 5 1/2." Place adhesive on the back of the ribbons. Place one horizontally  across the bottom of the card. Place the other ribbon vertically on the right side of the card. Allow them to cross.
6. Stamp your greeting in Tangerine Tango ink on white card stock. Punch it out with the Word Window punch. (I just love my Word Window punch with the Teeny Tiny Wishes stamps!) Adhere it on top of the ribbon where they cross.
7. Add Coastal Cabana Candy Dots to the Word Window to give it the look of brads.
8. Adhere the card front to a card base and add your favorite greeting, saying or note to the inside.

Triple Dahlias

Today starts National Collection Week for Operation Christmas Child. If you want to learn more about it way to help children go to www.samaritanspurse.org.
Here is a fun card that could be used for many different occasions. How you use it will depend on what you put on the inside. A birthday or get well greeting or your own personal note would work just fine! Have fun stamping!
Materials needed:
Regarding Dahlias stamp set (#130327)
Crushed Curry card stock 4 1/4 x 5 1/2"
Summer Smooches patterned paper (#125409) 4 x 5 1/4"
Whisper White card stock
More Mustard ink
Pumpkin Pie ink
Really Rust ink
1/2" Grosgrain Striped Ribbon Pumpkin Pie (#110715)
1 3/8" Circle punch (#119860)
3/16" Corner punch (#119871)
Stampin" Dimensionals (#104430)
scissors

1. Stamp the dahlia stamp on white card stock 3 times, once in Pumpkin Pie ink, once in More Mustard ink, and once in Really Rust ink. Cut out each flower image with your scissors.
2. Stamp the "hello, you" greeting in Pumpkin Pie ink on white card stock. Punch out with the 1 3/8" circle punch.
3. Cut a 7" piece of the Pumpkin Pie striped ribbon. Tie a knot in the center. Put adhesive on the back and press 1/2" from the bottom of the patterned paper. Wrap the ends around to the back.
4. Use the corner punch to round the corners of the patterned paper. Adhere the patterned paper to the Crushed Curry card stock centering it so that you have a 1/8" border all the way around.
5. Adhere the Really Rust dahlia image to the patterned paper on the right side. Place 4-5 Stampin' Dimensionals on the back of each of the other 2 dahlia images. Peel the paper off the dimensionals and press onto the Pumpkin Pie image on top of the Really Rust image. You might want to off set the images about 1/8". Repeat with the More Mustard image on top of the Pumpkin Pie image. This will give you the darkest color on the bottom and the lightest color on the top. The idea is to give it a more dimensional look.
6. Adhere the circle greeting to the top left side of the patterned paper.
7. Adhere the card front to a card base and complete by adding your greeting or note to the inside.

Friday, November 15, 2013

Top Flip Gate Fold Birthday

Well, so far so good this week with getting my cards on here. Hopefully, I'll be able to continue getting a card on Mon, Wed, Fri like I've been doing. Things are really getting busy for me now with Operation Christmas Child National Collection Week being next week. We've been getting our collection center ready for receiving all the shoe boxes and for doing our church packing parties. Last year, we collected over 11,000 shoe boxes from 5 Central Texas counties at our Mid-Texas OCC center, here in Temple. Those, along with over 6 million boxes collected in the US last year, went to poor children in over 130 different countries. We hope to increase our number of boxes this year so that even more children can learn about our lord and savior, Jesus Christ.

Ok, for today, we are turning our gate fold card on end... well, just flipping the card around by a quarter so that it opens top to bottom instead of side to side.

Materials needed:
Crisp Cantaloupe card stock 5 1/2 x 8 1/2"
Patterned paper from Patterns Pack II (#114325, retired) 2 pieces 2 x 5 1/4"
Polka Dot Parade pattern paper (#126902) a 1" strip about 8" long will do
Whisper White card stock
Best of Birthdays stamp set (#132929)
Extra Large Oval punch (#119859)
1/2" Circle Punch (#119869)
1" Circle Punch (#119868)
1 1/4" Circle Punch (#119861)
Modern Label punch (#119849)
Old Olive ink
Tangerine Tango marker
Old Olive marker

1. To gate fold your card, lightly score the card stock at 4 1/4". Fold each side in to touch the scored center. You can score the card stock at 2 1/8" from each side and fold there. Every time I do that, I end up with a gap where they meet in the center. It shouldn't but it always does with me, so I fold to the center.
2. Adhere the striped patterned paper on the sides of the gate fold.
3. Use your extra large oval punch to punch a 1/2 of an oval on each side. To do this, turn your punch over so you can see the placement of the card stock.
After you punch the first side, make light pencil marks on the edge of the other side to line up the punch and have the halves look like they were punched at the same time. Punch through the card stock and the patterned paper on both sides.
4. Stamp the oval birthday greeting in Old Olive ink in the center of the oval punch. If you wish, you could mark the oval with a pencil and then punch with the card open. Be sure to erase all your pencil marks.
5. Stamp "celebrate" in Old Olive ink on white card stock. Punch it out with the Modern Label punch. Adhere it to the center of the bottom side of the fold.
6. Punch out circles from the Old Olive Polka Dot Parade paper. I punched 1 circle 1 1/4," 3circles 1" and 3 circles 1/2". Since the paper is doubled sided, it is easy to use both sides of the paper to give you "different" balloons. Adhere the circles on the front of the card as shown. Lay 2 of the 1" circles aside.
7. Use the brush end of the marker to draw balloon strings from each balloon. Use the fine tip to draw ties near the balloons. Use an Old Olive marker to draw crescents on the right side of each circle balloon.
8. Open the card up. Cut 2 stripes of the striped patterned paper to measure 1/8 x 4." Adhere them to either side of the birthday oval placing them fold to fold. Adhere the two 1" circles from step 6 to the tops of these strips of paper, as shown in the picture. Use an Old Olive marker to draw crescents and strings on the circles like we did on the front.
You card is now ready to place in an envelope and mail or give to your best birthday buddy!

Wednesday, November 13, 2013

Flip Label Birthday Card


Materials needed:
Simply Sketched hostess stamp set (129672)
Best of Birthdays stamp set (#132929)
Label Card Thinlits Die (#133479)
International Bazaar patterned paper (#126920)
Crushed Curry card stock 5 1/2 x 6"
Whisper White card stock
1 3/8" Circle punch 119860)
Extra Large Oval punch (#119859)
Old Olive ink
Coastal Cabana In Color ink
Daffodil Delight marker
Baked Brown Sugar marker
Pumpkin Pie marker

1. Build a sandwich with the Crushed Curry card stock  and the Label Card Thinlits Die. Run it through the Big Shot machine. Fold on the score lines.
2. Use the "label" die that comes with the Label Card set to cut out 2 pieces of International Bazaar patterned paper. This paper is double sided so it will be great to decorate both sides of the label.
3. Stamp your greetings from Best of Birthdays stamp set with Coastal Cabana ink on white card stock.
4. Punch out the "happy birthday" greeting with the Extra large oval punch. Punch out the "icing on the cake" greeting with the 1 3/8" circle punch.
5. Adhere the labels from the patterned paper on the flip part of the card. Use one side of the paper on the front and the other side on the back. Adhere the "happy birthday" greeting on the center of the front flip part. Adhere the "icing" greeting on the back or inside flip part.
6. Stamp the leaf images from the Simply Sketched set on the right and left sides of the card, as shown in the picture.
In the pictures here, you can see how the card looks standing, laying closed and laying open. Have fun.