Saturday, June 30, 2012

A Matter of Moments

Elements of Style #120045
Old Olive 1/2" Grosgrain Striped ribbon #113883
2 3/8" Scallop Circle punch #118874
Large Oval  punch #119855
Raspberry Ripple In color ink
Gunball Green In color ink
Floral District DSP #126919
Brights Brads collection #119740

Sorry I don't have time to give you the step by step directions for this today. My very good friend's dad passed away yesterday morning and I've been very busy. I'll try to get back to my regular routine soon.

Friday, June 29, 2012

Priority Birthday

Had fun recreating an envelope for this birthday card. Used my new In Colors for most of this and my punches.
Materials:
Hostess only set Priority Mail(#127044)
Gumball Green 3/8" Stain Stitched ribbon(#126848)
Brights Brads(#119740)
Floral District(#126919) patterned paper
Summer Starfruit cardstock
Curly Label(#119851) punch
1 3/8" Square(#119877) punch
      (Wish I had the Postage Stamp punch(#122344). It would have been perfect! That's the one I get next!)
Modern Label(#119849) punch
Word Window(#119857) punch
Large Oval(#119855) punch
2 1/2" Circle(#120906) punch

This is super easy to put together so go have some fun with it! All the stamps are in the Priority Mail hostess only set.


Thursday, June 28, 2012

Ways to Use Ribbon

These are all ways that you can use ribbon on your cards and/or scrapbook pages. I hope that these ideas will spark your imagination.

1. Tie a bow around your cards
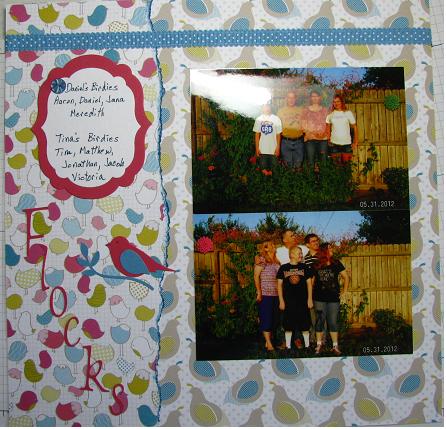
2. Glue a strip acoss your card, horizontally or vertically
3. Outline shapes
4. As a road to stamp cars, trucks, etc on
5. As curtains on a window of a stamped house
6. To make a komono on a paper doll
7. To make a V accent from a small piece

         Adhere it with either a staple or glue dots


8. To decorate a box on your page like a gift
9. Make ribbon flowers
10. To go around a picture as a frame
11. To use in iris folding instead of strips of paper
12. On a balloon as the string


13. To "hang" pictures on a scrapbook page
14. As stems for flowers
15. Tie on a journaling tag
16. Make a clothesline
17. Tie around a snowman's neck like a scarf
18. As a trailer behind a truck


19. For a ruffle on a clown's hat or costume
20. To make photo corners
21. As candles

22. Add to a scallop circle for an award

23. Stripes on a flag
24. Lines for journal words
25. Handles on a purse
26. As a pull tab for hidden journaling


I love to use ribbon on my cards and scrapbook pages. Hope this gives you some ideas!

Wednesday, June 27, 2012

Little Flocks scrapbook page


This is a two page spread for some more pictures of family. I titled this one "Little Flocks" because the pictures are of each of my children's families. The title letters are cut from Rose Red cardstock. Again, I used paper from the Birds of a Feather (#126899) patterned paper set.


  1. Tear 2 pieces of paper from another Birds of a Feather sheet to be about 4" wide each. Ink the torn edge with Marina Mist classic ink.

2. Adhere two pictures to each page with each touching the other.

3.The birds are from the Bird Builder(#117191) punch using Marina Mist and Rose Red cardstock.

4.The journal boxes are cut with Framelits Labels Collection(#125598) from Rose Red and Whisper White cardstock. Write your journaling with a Midnight Muse marker.

5. Place a small Marina Mist button from the designer buttons(#126312) using a glue dot.

6. Place a dahlia from the Adornments In Color Dahlia Assortment(#127556) in one corner of each picture.

7. Adhere a strip of Marina Mist Scallop Dots(#122986) ribbon across the bottom of the left hand page and the top of the right hand page.

Tuesday, June 26, 2012

Another storage idea

I absolutely love the Framelits dies that Stampin' Up! carries these days. They do come in a neat little plastic pouch that I could keep them in but I wanted something a little easier to store. The unmounted or clear stamp sets from SU! come in a nice plastic case that opens easily and can stand up or lay flat for storage. You can purchase empty cases like these from SU!(#119105) in a pack of 4 for $5.95. Each case is 7 1/2 x 5 1/2." The offical name for them is Clear-Mount Stamp Cases and they are found on p. 7 of the new catalog where all the other clear mount accessories are. They are somewhat similiar to cd cases but you don't have to worry about taking out the plastic on the inside and they are a little thicker. IMO, they are perfect for storing many types of things.


I placed the info sheet into the front and laid the dies on the back. I currently have them still on the paper that they come on(it has a piece of double sided tape to hold them in place). I am considering placing a strip of magnetic tape across the back of the case & letting the dies rest on that. I've just got to remember to get some next time I'm at the store.

These cool cases could be used as storage for many types of smaller scrapbook items.

Monday, June 25, 2012

Grandchildren Scrapbook page

Well, I've been working on my scrapbook album for all the pictures that we took when the kids were all home for Jonathan's graduation so that's what you're getting right now. I will be going back to cards again soon. I'll have to get some ready to mail for all my July birthdays.

This is a 5 x 7" photo of all the grandkids & the one great. I ordered 2 packs of Birds of a Feather (#126899) patterned paper for this so they would all go together in the same album. I chose this paper because of the colors that I thought would go good with the pictures & because I like the idea of "birds of a feather" being the whole family.

For this I cut out all of their names & the title from Marina Mist cardstock. Since there are 9 of them, I felt like the names handled both the journaling and the embellishments for this page. The date is already printed on the picture. I did leave Jack, the dog, off. Maybe I should go back & put his name too.

Sunday, June 24, 2012

46 years

Today is mine & my sweetie's wedding anniversary. We've been married for 46 years. The question for me would not be how did I stay married for so many years. It is instead, "how did my sweet hubby put up with me for 46 yrs?" All I can say is that I'm still the luckiest woman in the world. My David has always loved me unconditionally. He has taught me what unconditional love truely means. I thank God for him.

Hope you enjoy Mandisa's song today, Stronger.

Saturday, June 23, 2012

Ribbon Storage Box


Here is a fairly easy box you can make for your ribbon storage. Start with an empty shoe box, whatever size you have. This one was already decorated like a zebra so I'm not covering it. Depending on your box, you may want to cover the box with patterned paper to start with.

Materials needed:
shoebox
patterned paper to decorate
ruler
long reach hole punch or sharp pointed scissors
wooden dowel about 14" long or bamboo skewer
craft knife
wire cutter


 Measure you shoebox and draw a line with pencil about half way down from the top of your box. For this box, it was 2 inches from the top.


Use the line as a guide for making the holes in your box. If you have a long reach hole punch, you should be able to punch the holes about 1" apart. Without a long reach hole punch, you will need to use sharp pointed scissors or an ice pick to make holes along the line. If you use an ice pick, you will have to push a ball point pen or other round object through the hole to make it large enough for the ribbon.


 Your holes should be about 1" apart. You can make the holes on just one side of the box or on both sides, depending on your need.
If you used sharp pointed scissors, then the inside of the holes are going to have cardboard sticking out. I suggest that you use a craft knife to cut the excess cardboard off.


Poke or punch one hole on each end of the shoe box either with you long reach hole punch or scissors. The hole should be at or near the center.  Measure your dowel or skewer to fit through the holes to reach each end of the box and stick out a bit. If you are using a bamboo skewer, you will need to cut off the point on the skewer. This can be done easily with wire cutters. If you are using a thicker dowel, you may need a saw.


Run the dowel or skewer through the hole in the end of the box and through the center of the spools of ribbon that you have. If you cut holes on each side of the box, you can turn the ribbon so that each spool is alternating direction. Pull the ribbon end through the hole and let it hang outside the box on each side. 
You will be able to see each color and style of ribbon that you have and pull the amount needed out of the box. Cut the length you need and the ribbon will still be standing in your box, ready to go the next time. Decorate your box lid and place it on top to keep your ribbon in good order.

I hope that you see this as an easy and inexpensive way to store your ribbon. As you get more ribbon, you can make more boxes to store as much ribbon as you have.

Friday, June 22, 2012

Enjoy Life Peacock SB page


Sorry I didn't get anything on my blog for you yesterday but with canning, going to the dentist and a couple of migraines, it just didn't get done. Sometimes, life just gets in the way of our hobbies! lol

 We had fun taking pictures when all the kids were here. This is one of my sweetie and I playing around.


To hide a bit of the picture behind some of the cool pattern on the Birds of a Feather(#126899) designer paper, decide exactly where you want the picture to sit. Then mark the edges with a pencil. Remember, you'll want to use an artgum eraser to erase the pencil marks later.

With a sharp craft knife, carefully cut around the pattern that you plan to tuck your picture under. Make sure that it is all cut from one pencil mark to the next and then erase the marks.
Slide the picture under the cut space and adhere it to the patterned paper.

This is the back side of the page.


Finish out your layout by adding a title, some journaling and some embellishments


 I'm so excited about SU! now carrying such a great variety of brads. I LOVE brads and SU! now has brads in brights, subtles and regals to match your great SU! classic inks. They also have my favorites, printed brads in the In Colors. The brads on the "enjoy" are from the printed ones(#122940) and the brads on the "life" are from the brights(#119740).The "enjoy life" title and the journal box were stamped from Enjoy Every Moment(#113622) retired stamp set. The words are stamped in Midnight Muse and the journal box is stamped in Marina Mist classic ink.


Wednesday, June 20, 2012

The Whole Flock SB page

This 2 page spread has pictures from a few weeks ago when the whole family was together. I used paper from SU! Birds of a Feather(#126899) patterned paper. I don't often have 8 x 10's printed but I wanted these. I printed another and have it in a frame in the den.

 Cut a piece of anther sheet from the same paper pack to 3 x 12" to use for the side strip. Using the scallop edge border punch (#119882) to scallop one side. Use Marina Mist classic ink and an ink dauber to ink the scalloped edge so it will stand out better.

The title letters and the journal box are cut from Marina Mist cardstock. The birds and leaf sprigs are cut with the Bird Builder(#117191) punch.

Tuesday, June 19, 2012

12 x 12 Paper Storage File Folders

There are many storage unit available to store your 12 x 12" papers and they all cost money! Some of them are very expensive. Here is a fairly inexpensive ways to set up your own paper storage system. I bought this rolling file cart at a local, chain office supply store. It did not come with the file folders. When I bought it the retail price was around $50 but I got it on sale for about $30. I would suggest that you watch for sales for something along this line. It has bars that are adjustable to file any size that you want. The section with the olive green files is for my 12 x 12" papers. The section going the other direction is for my 8 1/2 x 11" papers, mainly cardstock.  
Folders to store 12 x 12" papers can be rather pricey so I made my own. I bought a box of legal size file folders. These were 15" x about 9 1/2." I also bought a roll of packing tape or clear 2" wide tape.    I cut the bottom of each folder down the seam/fold which gave me 2 pieces.


I used old folders that I had on hand to make the larger section or you can buy additional smaller folders or use any heavy paper you have on hand, such as construction paper, old cardstock, etc. I used the old folders the width of the folder (11 1/2") and cut them above the fold about 5" on each side of the fold.
Measure exactly where the folder will fit on the cut larger folder to make it hold the 12" paper. Then place the smaller cut folder on each piece of the larger cut folder. Tape together with the 2" tape so that about 1" of the tape fits on each folder. Do that on each side. Your folder should now hold your 12 x 12" papers without any trouble. You can hang them in any type of hanging file that will accomadate this size. If you don't like or can't find the rolling cart, you should be able to find other types of carts, crates, or cabinets that will hold legal size hanging folders. Any of these will work for you larger patterend papers.
I hope that this is a little bit clearer than mud (lol) and that you can understand how to make these larger folders. It's great to have the paper hanging like this. I have found that with using standing paper storage units, my paper sags and bends. Using the hanging file folders keeps my paper straight, as good as if it were laying flat but much easier to find what I want. I use the little stick up tabs to organize my papers with the color or pattern names and it's easy to find what I'm looking for.

Monday, June 18, 2012

Birthday Convertible

Who wouldn't want a convertible filled with presents for their birthday? Of course, this isn't a '65 Mustang convertible but as they say, "it's the thought that counts."

This card is made using stamps from the Road to Happiness(#126547) set.
  1. Cut Old Olive patterned paper from the Polka Dot Parade(#126902) designer paper pack to 4 1/4 x 5 1/2."
2. Cut Marina Mist cardstock to 3 1/2 x 5" and then use the Scallop Edge border(#119882) punch on the bottom edge. Round the corners with the corner punch(#119871).
3. Cut Old Olive cardstock to 3 x 4 1/4" and round the corners.
4. Cut Whisper White cardstock to 2 1/2 x 3 3/4." Stamp the car from the set in Island Indigo and add presents and balloons to fill the car. To line these up so they fit properly, use the Stamp-a-ma-jig(#101049). 5. Color some "ground" under the car with your Going Gray Stampin' Write marker to anchor the car on the card.
6. One of the new Dahlia Adornments in Raspberry Ripple(#127556) on the right top corner will give the card some extra pop.
Write a note or stamp a birthday saying on the inside and you're done except for the delivery!

Sunday, June 17, 2012

From the Garden

My garden is really producing this year! After last year's drought, everyone in Cental Texas has been happy to see some good spring rains. There have even been a few early summer rains. I've already put up 22 pints of yellow squash & eaten fresh steamed squash and squash casseroles until I'm sick of squash! The tomatoes are producing well. I've put up my goal of 1 pint of tomatoes per week for the year(that's 52) and I've started on making salsa and chutney to use for the coming year. Last year was my first time to make an apple tomato chutney & my sweetie loved it! He said make more of that this year. So, I've done 3 batches of with for a total of 20 pint jars. I've been working on some relishes and other things with my peppers. I hope to do some bbq sauce too. I've also got cantaloupe and will have watermelon in a few weeks. Oh, I almost forgot! We got enough peaches off of our tree (only 2 yrs old) to make 5 1/2 pint jars of jam and have a few for eating. They are a nice sweet peach.

 Looks like a lot of tomatoes but you should see what's still green on the vine!
Getting ready to peel the tomatoes.

 You've got to give them a cold water bath to stop the cooking process.
 They practically peel themselves.
 Cantaloup and watermelon vines take up all the space they want! lol

Talk about fresh! These are still on the vines. Will be ready to eat soon.


It's so easy to see God in the garden of our life when we can watch the new growth and life come to completion. He is in the others parts of our life too. Sometimes we might have to look a little more but if we are close to Him and have a love relationship with the Lord, it's not hard to find Him. The truth is that He seeks us out. He wants to be with us and have fellowship with us. We just have to say yes to Him.

For God so loved the world, that he gave his only Son, that whoever believes in him should not perish but have eternal life. John 3:16


Saturday, June 16, 2012

Punches, stamps & ribbon

This combines some SU! ribbon, papers, punches & a stamp from a retired set with a popular die cutting machine for the flower. It's not hard to combine all of your tools to make some great cards & scrapbook pages. All it takes is a bit of iminagination.

Sorry that I don't have a project and the card is one that I did last year but I've been so super busy all this week with canning. Check out my Sunday post tomorrow to see some canning pictures. I've tomatoes everywhere!

Friday, June 15, 2012

Birthday Flowers

Every woman loves flowers or at least, I do! Here are some 2 step stamped flowers stamped from an older set that is not available any more. SU! has a number of 2 step flowers that could be used. Field Flowers (#122762) is a fun set that has some really pretty flowers. Stamp them and cut them out. Use a few Stampin' Dimensionals to pop 2 of the flowers up. Add some cute ribbon. I used Ice Cream Parlor(#123613) to make both horitizonal and vertical strips. A greeting stamped and punced with the Modern Label punch(#119849) can be placed on the top right to set it off. The edges of the punced label are inked and a cute botton added and you're done.

Thursday, June 14, 2012

More Organizing Ideas

I mentioned several ideas for organizing your craft supplies on Tuesday but didn't cover everything. Actually, I don't think that I could ever cover everything because organizing ideas are as varied as each person's own imagination! Here are a few more tips that you might find helpful.

If you have a room or even a dedicated space, you might consider putting up shelves. I love the metal/plastic shelving units that are designed for closets. They have a shelf with a bar along the bottom designed for clothes hangers to hang from. That bar is great for ribbon!

Of course, you can buy ribbon holders at many craft stores but one cheap alternative for ribbon is to put pieces and small spools in plastic bags. You can get the small craft bags at many stores or just use the zipper style bag that we use for our kids lunches. I use my small handheld hole punch to punch a hole in the thicker top area of the bag. Then I put all of the same color ribbons on one large book ring. These rings will open and then you can put them around the the bar made for clothes hangers. Keep all the same color on one ring. That way when you are working on your project, you simply that the ring off the bar and carry all of that color over to your project to see which will work best.
Another great storage unit is the plastic drawers that come on rollers. These are made in a large number of sizes and often will fit under a table.


Plastic shoe organizers are great for stamp sets, punches, tools and other items. They can be hung on a door or wall or placed inside a closet out of sight. An added bonus with these is that you can see where everything is.

File crates that you can find in office supply stores or general department stores make good storage units also. While this one looks a mess, they can be organized quite easily. These are made with a rim on the inside to hang file folders. You can get hanging file folders to use in organizing your stickers, papers or other flat items. You can also use them to organize your scrap papers. By putting file folders in the crate and labeling with colors or paper types, you can file all of your scrapes so they will be easy to find when you need that little piece of blue or green.


I hope that you've gotten a few ideas on how to organize your paper crafting supplies. When your items are organized you can get a lot more work done than when you have to spend all your time looking for your supplies.

Next week, I'll show you how to make your own folders to hold 12 x 12" paper. Be sure to check back again on Tuesday!                         

Wednesday, June 13, 2012

Doily Gate Fold Card

I do enjoy making fun cards and I think that a gate fold card fits in the fun category! To learn how to make a gate fold check my my earlier tutorial on this technique. Here is today's gate fold card.
This was made using paper from the Floral District(#126919) designer series patterned paper pack. The doily is stamped in Raspberry Ripple using the Delicate Doilies (#122592) stamp set. Punch it out with the 2 1/2" Circle punch(#120906).


When you are punching a stamped design out, turn your stamp over so that you can line up the image in the stamp area. That way, you'll get it stamped like you want it.

I used a piece of Gumball Green cardstock that I cut to 1 1/2 x 5 1/2" to make a scallop border. Punch it with the Scallop Edge Border(#119882) punch. Save the strip of cardstock that the punch cuts off. You can use it later. The Raspberry Ripple strip on the green here was the leftover from punching out a scallop edge on Raspberry Ripple cardstock.

This brad is from the Summer Smooches brad collection (#125589). The greeting is from Teeny Tiny Wishes (#115370) stamped in Gumball Green classic ink. It is punch with the Word Window punch(#119857). The edges are inked with Gumball Green. Don't put adhesives all the way across the greeting tag because you want it to be able to open with the "gate."

 Place Stampin' Dimensionals (#104430) on half of the back of the doily you made earlier.
I find it easier to lay the paper on top of the Dimensionals so that I can see where I'm sticking it.

Here's your completed card. I needed another card so I used some of my leftovers to make the same card again, just a little different.
Have fun making some cards that are a little different than usual.