Wednesday, July 24, 2013

Brand New--Undefinded stamp making kit


Brand new from Stampin' Up! It looks exciting to me. This is called Undefined. It's a kit so that you can make your own stamps. Just think of an idea and you can make the stamp for it to use again and again!  I can't wait to order my own. Here is the link to the video. http://www.stampinup.com/us/enu/24423.asp

Item #                            Description                                           Price
133402                          Undefined Stamp Carving Kit               $19.95

134808                          Undefined Refill Kit                               $9.95

124236                          Clear-Mount Cling Foam*                     $10.95

*Add a sheet of Clear-Mount Cling Foam to create your own clear-mount stamps. Mounting your stamps on the cling foam allows you to make stamps any size you want, not just what will fit on the blocks in the kit.


Included in the Stamp Carving Kit:
•2 carving tools

•3" x 4" rubber

•3" x 4" foam

•4 wood blocks (various sizes)

•1 Island Indigo Stampin' Write Marker

•3 postcards

•Instruction sheet

•Stamp image templates


Included in the Refill Kit:

•3" x 4" rubber

•3" x 4" foam

•4 wood blocks (various sizes)

•Instruction sheet


Express your personality, thoughts, feelings, etc. with a stamp you've carved all on your own! We know you'll have a "look what I made!" moment.


We'd love to see what you make with your kit. Please e-mail us a photo of your creations and any projects you make with your carved stamps to undefined@stampinup.com so we can pin your photos to our Undefined Pinterest board!


Available July 19, 2013.


Monday, July 22, 2013

Hearts & Love card

With a wedding shower to go to yesterday, I needed a card for the bride. I've fallen in love with so many of the new items in the 2013-14 catalog and I finally got an order for some of them. Here's the card I made for Angela.

Materials:
Venetian Romance DSP (#130144) 3 x 5 1/4"
Baked Brown Sugar cardstock 4 1/4 x 5 1/2" & 1 1/2 x 5 1/2"
Bermuda Bay cardstock 1 1/2 x 5 1/2"
Whisper White cardstock 5 1/2 x 8 1/2" + scrapes
Bermuda Bay In Color ink
Very Vintage buttons (#129227)
Best of Love stamp set (#132987)
Epic Day This and That Washi Tape (#131269)
Delicate Designs Embossing Folder (#127023)
Modern Label punch (#119849)
3/13" Corner punch (#119871)
Sponge Dauber (#102892)


1. Emboss one end of the Baked Brown Sugar cardstock with the lacy Delicate Designs embossing folder. Using scissors, trim the edges next to the embossed curves.
2. Emboss the piece of Bermuda Bay cardstock with the lacy Delicate Designs embossing folder. Trim the curved edges and the straight side.
3. Round 2 corners of the patterned paper. Adhere it to the Baked Brown Sugar cardstock just above the edge of the embossed section.
4. Adhere the Bermuda Bay embossed cardstock to the patterned paper, overlapping the Baked Brown Sugar embossed section.
5. Stamp the heart and the "love" from the stamp set in Bermuda Bay ink on white cardstock. Cut out the heart. Punch out the word love with the Modern Label punch. Dab the sponge dauber on the Bermuda Bay ink pad. Rub the ink on the edge of the Modern Label punched word.
6. Adhere the word to the top left side of the patterned paper. Use glue dots to adhere the button overlapping the word. Adhere the heart to the top right side.
7. Score and fold the Whisper White paper in half to be a card base. Adhere the card front to the outside front of the white cardstock. Trim the overhanging white cardstock off below the Baked Brown Sugar embossed section.
8. Place a strip of the Tangerine Tango Washi Tape to the bottom inside of the card. Stamp a heart on the inside and your favorite message.

Friday, July 19, 2013

Cheap & cute headbands

I'm always looking for something inexpensive and cute to put in my Operation Christmas Child shoeboxes. Not only will these headbands be great in a little girl's shoebox, they would be a great gift for any little girl. You might even want to make one to match your child's outfit. This is a longer post than I usually place on here because it's a whole project. I hope that you enjoy making these for some little girl somewhere.


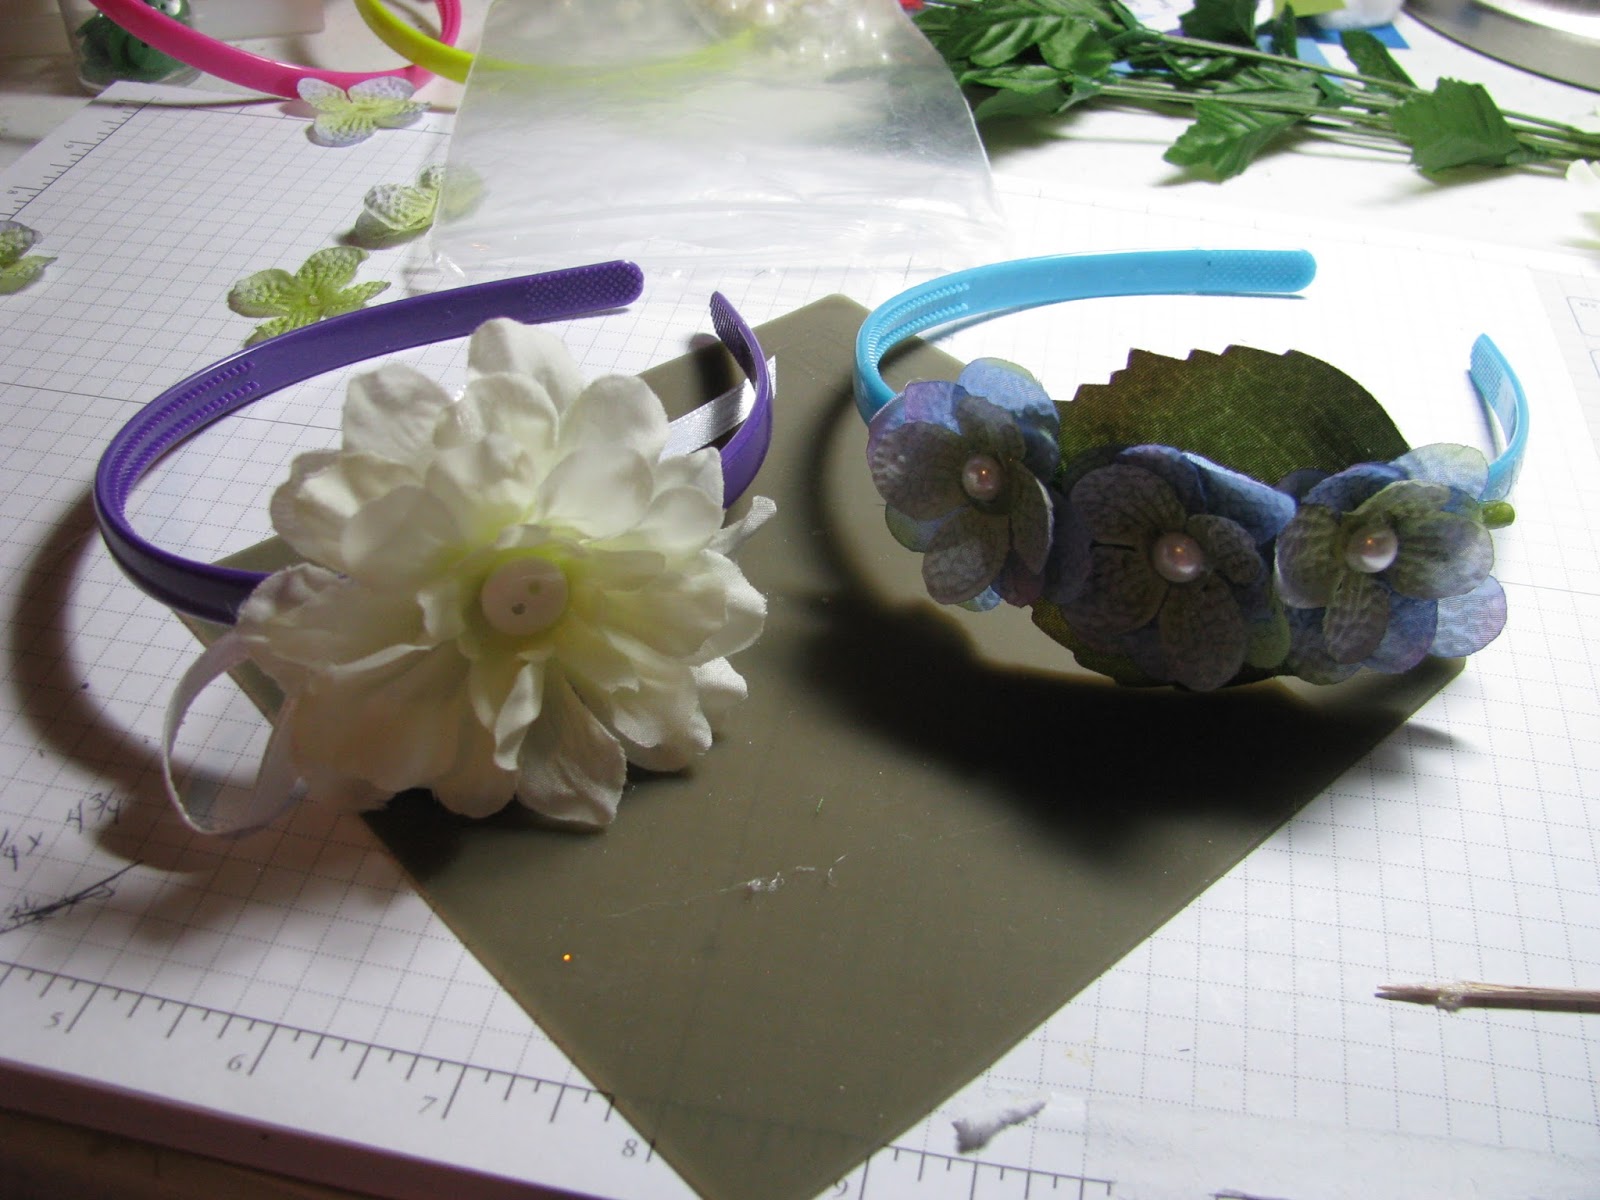
Here are two of the headbands that I have made to go in my shoeboxes. They are so cheap to make, I usually put several in the boxes for the 5-9 year old girls shoeboxes.

Materials:
Plastic or fabric headbands. (You can usually find 4-6 of these for $1 at the Dollar Tree)
Silk flowers
Ribbon
Pearls or gems
Buttons or other embellishments
Silicone Craft Sheet (SU #127853)
Glue gun
Glue sticks
Toothpicks

Plug in your hot glue gun so that it can begin heating. ****Always be careful with a hot glue gun. It can and will burn your fingers with the glue. I have burned my fingers many times with them, even to the point of creating blisters on my hands. A hot glue gun should always be handled by an adult.****


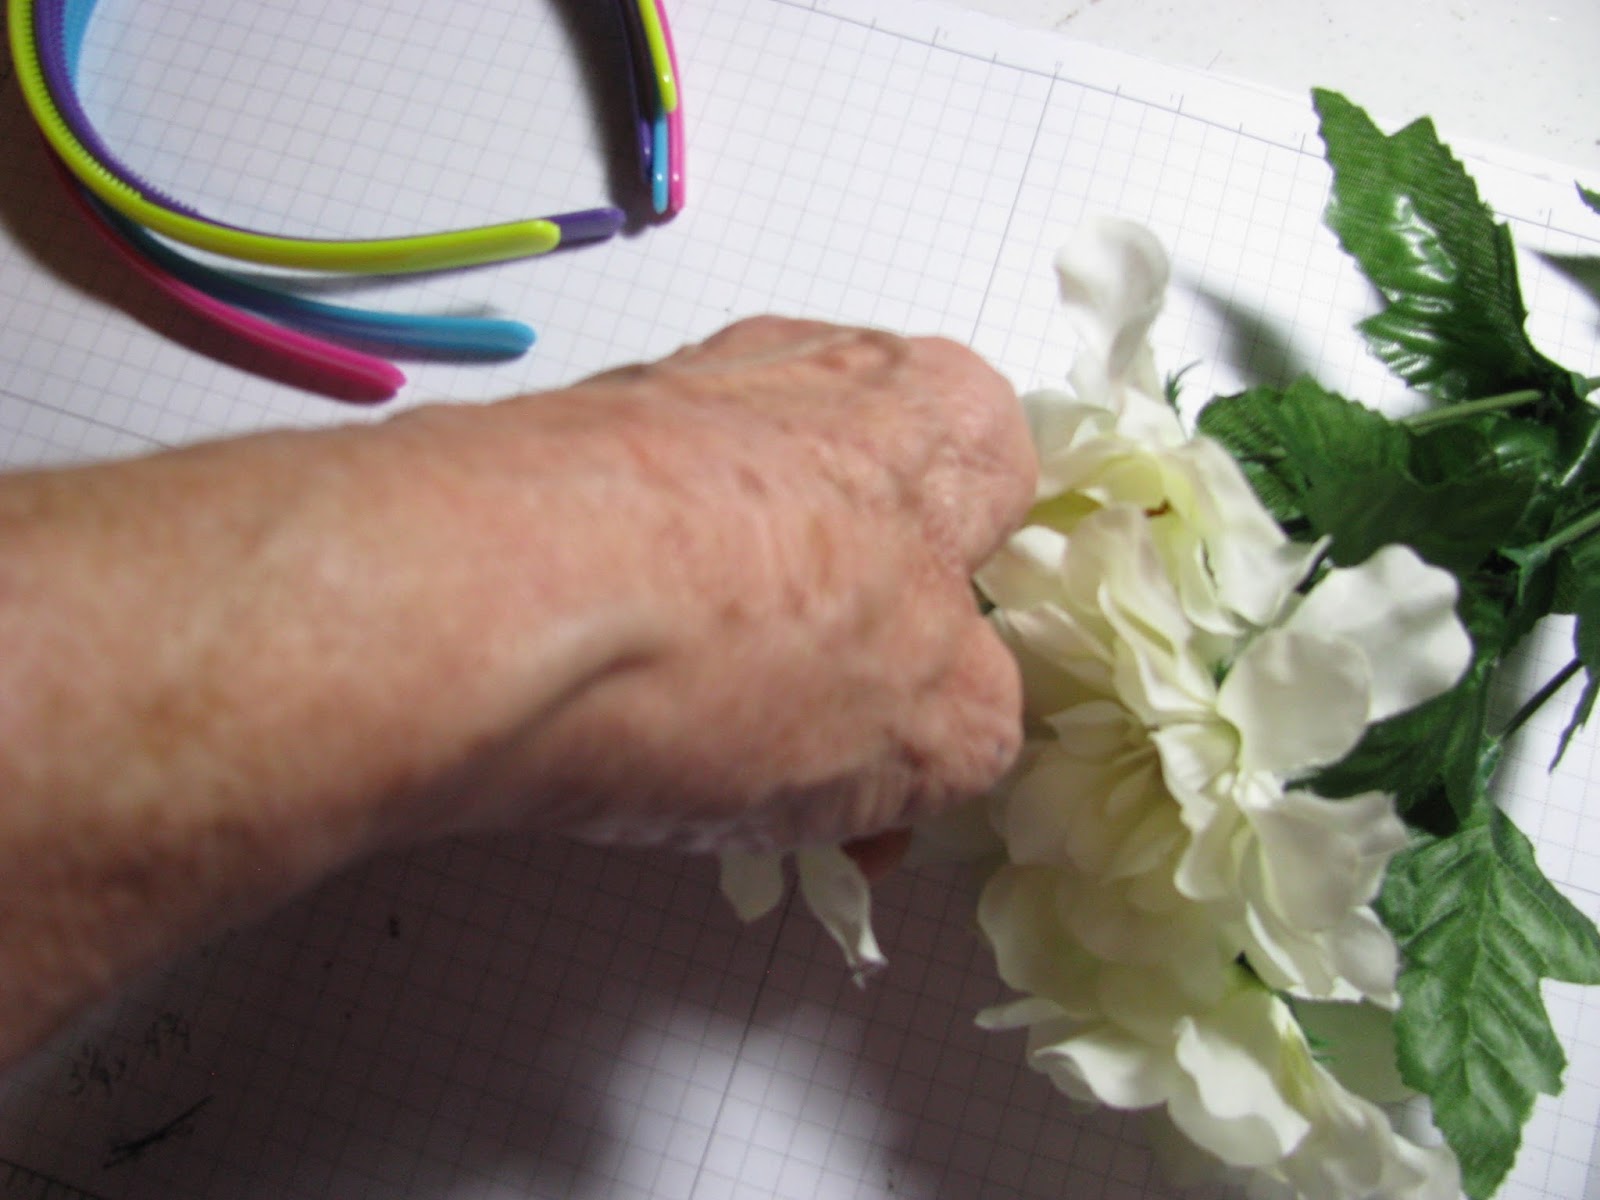
I start with a "bunch" of silk flowers that I have found at 50% off. (I usually get them at Hobby Lobby but any store where you can find them cheap works) Grab a handful of petals and pull them completely off of the stems. Lay the stems aside. I don't throw them away because I might want to use the leaves later. (I'm a bit of a hoarder so I don't throw much away) Most of this type of flower will have a plastic leaf and seman holding the petals together. Pull that apart and do throw this away. You now have several petals to work with.
 Place a small amount of hot glue between the petals and stack 3 or 4 together. Use a toothpick to help push the petals together and not burn your fingers. As you can see, when I first started glueing my petals together, I forgot to  grab my silicone craft sheet. Of course, the hot glue stuck to the paper I had on the table & I had to peel the paper off my flower. It can also stick to your table. That is one reason that I recommend using a silicon craft sheet, like the one you can get from Stampin' Up! under your projects. The glue peels right off of the craft sheet and doesn't damage your project.


Because I decided I wanted a ribbon on this headband, I cut about 12" of ribbon to use. I looped it and place hot glue on to hold it in place. I then hot glued the ribbon to the headband. I usually attach my decorations to the side but the position is up to you.


I also added a white button to the center of the flower. You can use buttons, pearls, gems, color dots, etc to the center of your flower.

I then hot glued the flower onto the headband. The number of flowers you place on a headband is completely up to you. I usually do odd numbers because that gives it a better look. I know that there is a design rule about odd numbers but I can't tell you what it is exactly.

For my next headband, I wanted to add a large leaf that I had. Icould have used smaller leaves also, if I had wanted.


I put hot glue on the back of the leaf and then pressed it carefully (it's hot) on the side of the headband.
I then put together some flowers like I did for the headband above. I used a smaller petal this time and put a group of 3 flowers on the headband, with the hot glue and toothpick.

I used a flat back pearl for the center of these flowers.

There are 2 totally different headbands to place on some adoreable little girl's head. Use your own creativity to make them as many and as different as you like.

I can just picture the little girl in Hiatti who received a children's tiara in her shoebox. As she stood on top of the trash heap by her home, for that moment she was queen of the world and beautiful with her tiara. Perhaps you can help a little girl somewhere feel beautiful with the special headband that you made and placed in a shoebox for her.

Wednesday, July 17, 2013

Note card/pad

These are note pads that I made to go in a packet for our ladies that will be going to the fall Women of Faith conference in Dallas this year. This is 4 of them. I made a total of 36 for the ladies to each have one.

Materials:
Patterned paper at least 8 1/2 x 11", one sheet for each note pad you plan to make
Framelits Labels Collection dies (#125598)
Trust God stamp set (#126702)
Every Little Bit stamp set (#120558)
Solid cardstock, color of your choice
Ink pad, color of your choice
Magnetic tape

For the title on the front cover, I typed the theme and theme scripture on my computer and used a computer graphic from Print Shop. I sized it to fit in a space 1 1/2 x 2." I dulipicated this design 12 times on my paper. Then I printed it out and cut it with my Framelits Labels die and my Big Shot. I cut the next larger size of the Framelits Labels die out of the solid cardstock. I used a purple because that is the color the church group has chosen for their conference t-shirt. The theme and scripture was chosen by the Women of Faith organization.


After cutting out the pattern here I scored, folded and glued the tab to form a pocket on the inside.

I stamped the verse from the Trust God stamp set in Rich Razzleberry ink on the inside.

I cut 2 small piece of magnetic tape and placed on the inside as shown. This provides a closure for the note card.

I slipped a hand made note pad measuring 3 1/4 x 4 3/4" in the pocket of each card. The note pad is simple to make. If you want lined paper, use notebook paper. If you want plain paper, use type or computer paper. I put 12 sheets on each pad but the number of sheets on the pad is up to you. I stamped a cute stamp in different spots (top, bottom, left, right) on the note papers.

To make the note pads stick together, I cut a piece of white cardstock the same size as the note paper, 3 1/4 x 4 3/4." I placed the card stock on the bottom of my 12 sheets and stacked several of them together. Be sure to tamp the end and side down so that the pads will be even.

When there are several pads stacked together (one on top of the other), place a heavy book or other heavy items that will cover the entire pad on top of the stack. You might want to place a piece of waxed paper between the pads and the book to protect the book.

Pour about an inch circle of Elmer's glue on a plate. Use an old paintbrush or sponge brush to dip into the glue. Paint the glue onto the top end (one end only) of the stack of note pads, covering completely. Allow 1 -2 hours for the glue to dry before you remove the heavy weight. After they have dried, gently peel each pad from the others in the stack behind each piece of cardstock.

You are ready to put the note pad in the pocket of the note card. These are simple & fun to make and will make a cute add on to a gift or gift packet for friends, teachers, etc.

Friday, July 5, 2013

Nobody But You

I used only the new In Colors for 2013 on this card.

Bermuda Bay cardstock
Crushed Curry cardstock
Pistachio Pudding cardstock
Baked Brown Sugar In Color ink pad
Crushed Curry In Color ink pad
Vine Street Textured Impressions Embossing Folder (#130492)
Serene Silhouettes stamp set (#127324)
Really Good Greetings stamp set (#130333)
Framelits Windows Frame Collection dies (#129021Gingham Garden Washi Tape (#129314)
Sponge Daubers (#102892)
3/16" Corner rounder punch (#119871)

Wednesday, July 3, 2013

Shower Flower

Brides in the 21st century are choosing so many colors for their weddings. I went to one wedding where each of the 10 bridesmaids were wearing a different color dress. It was beautiful but very different from my wedding 47 years ago. Back then we had white and one other color. My how things have changed. Very much for the better, I think.

Very Vanilla cardstock 4 1/4 x 5 1/2" plus 3 x 2 3/4"
Strawberry Slush In Color cardstock 4 x 5 1/4"
Bermuda Bay In Color cardstock 3 3/4 x 5"
Striped organdy Ribbon Melon Mambo (#129293)
Raining Flowers stamp set (#122767)
Teeny Tiny Wishes stamp set (#115370)
Strawberry Slush In Color stamp pad
Word Window punch (#119857)
3/16" Corner rounder punch (#119871)

IMO, doing the multiple layers of color really makes a card pop!

Monday, July 1, 2013

Best In Life

The best things in life aren't things. They are people. People who are important enough to stay around for a while. My sweet husband has now stayed around and put up with me for 47 years. He's definately one of the best things and is the BEST thing in my life. I'm so glad he's stuck around.


Very Vanilla cardstock 4 1/4 x 5 1/2" plus extra
Bermuda Bay cardstock 4 x 5 1/4"
Bermuda Bay ink
Stampin' Dimensionals (#104430)
Textured Impression Embossing Folder Chevron (#127749)
Feel Goods stamp set (#129684)
Framelits Labels Collection die (#125598)
1 1/2" wide lacy ribbon from local craft store