Showing posts with label pop up. Show all posts

Friday, January 3, 2014

A Little Bird Pop up card

So you don't see the little bird until you open up the card!
On the inside you can see the little birdie's open mouth with a message inside! I think this is just too cute!

Materials needed:
Regarding Dahlias stamp set (#130327)
White card stock 5 1/2 x 8 1/2"
Birds of a Feather patterned paper (#126899) 5 1/2 x 8 3/4"
Bermuda Bay ink
Tangerine Tango marker
Wiggly eyes from your craft or dept. store
Sycamore Street 1/4" Island Indigo ribbon (#130812)
Glue dots (#103683)
Stampin' Dimensionals (#104430)
Decorative Label punch (#120907)
Sponge Dauber (#102892)
scissors
pencil
art gum eraser

Ok, so I learned the hard way that you should do all the decorative elements first, before you make the pop up element! You'll find it much easier that way.

1. Using Bermuda Bay ink, stamp the dahlia and the "hello you" greeting on white card stock. With scissors, cut out the dahlia around the outside edges of the image. Using the Decorative Label punch, line up the greeting on the inside of the punch and punch out. 
2. Fold the decorative label greeting in half. Unfold.  Rub a sponge dauber on the Bermuda Bay ink and ink the edges of the decorative label greeting. Lay aside.
3. Lay the inside of the white folded card stock up. Use the dahlia stamp and stamp portions of 3 flowers on the bottom of the inside of the card.
4. Cut a piece of ribbon about 12" long. Lay the patterned paper with the front side up. Put adhesive on the back of the ribbon. Lay it across the patterned paper about 1" from the bottom. Fold the edges around to the back of the patterned paper. Next, get the dahlia that you stamped earlier. Add dimensionals to the back of it and then place it on the front right hand side of the card.

 Fold the white card stock and the patterned paper in half. Lay the decorated front part of the card to the side.
5. Mark your folded white card stock at about 3" from the top. Draw a line 2" long in pencil. Mine is in ink so that it will show up better in the picture.

Cut on the 2" line that you drew. Use the art gum eraser to erase your pencil marks.
6. Fold from the cut line at an angle to make a triangle on the top portion. Use your bone folder to press it down for a solid fold.
Now, make a smaller angled fold to the bottom section so it will look like the picture.
Fold these back and forth a few times so that they will fold easier.
7.  With the white card stock closed with the angled folds on the outside, lay this on top of the inside of the patterned paper, lined up with the edges. Lightly draw pencil lines to show where the mouth will be.

Adhere the decorative label greeting to the inside of the drawing. Erase the pencil lines.


8. Using one finger, push these folds to the inside where you have already stamped dahlias.


9. Decorate your bird face. I put glue dots on the back of 2 wiggly eyes and placed on the upper part. I used my Tangerine Tango marker to make the orange mouth/beak. I did that by lightly sketching a small triangle on the top and bottom parts. When I was satisfied with those, I used the brush end of the marker to fill it in with color. The wiggly eyes do make this card a little thick. If you prefer not to have the thickness, you might want to just draw eyes on the face.

10. Place adhesive on the inside of the patterned paper on 3 sides as shown in the picture. Do NOT put adhesive on the inside folded part. It will not open right if you do.
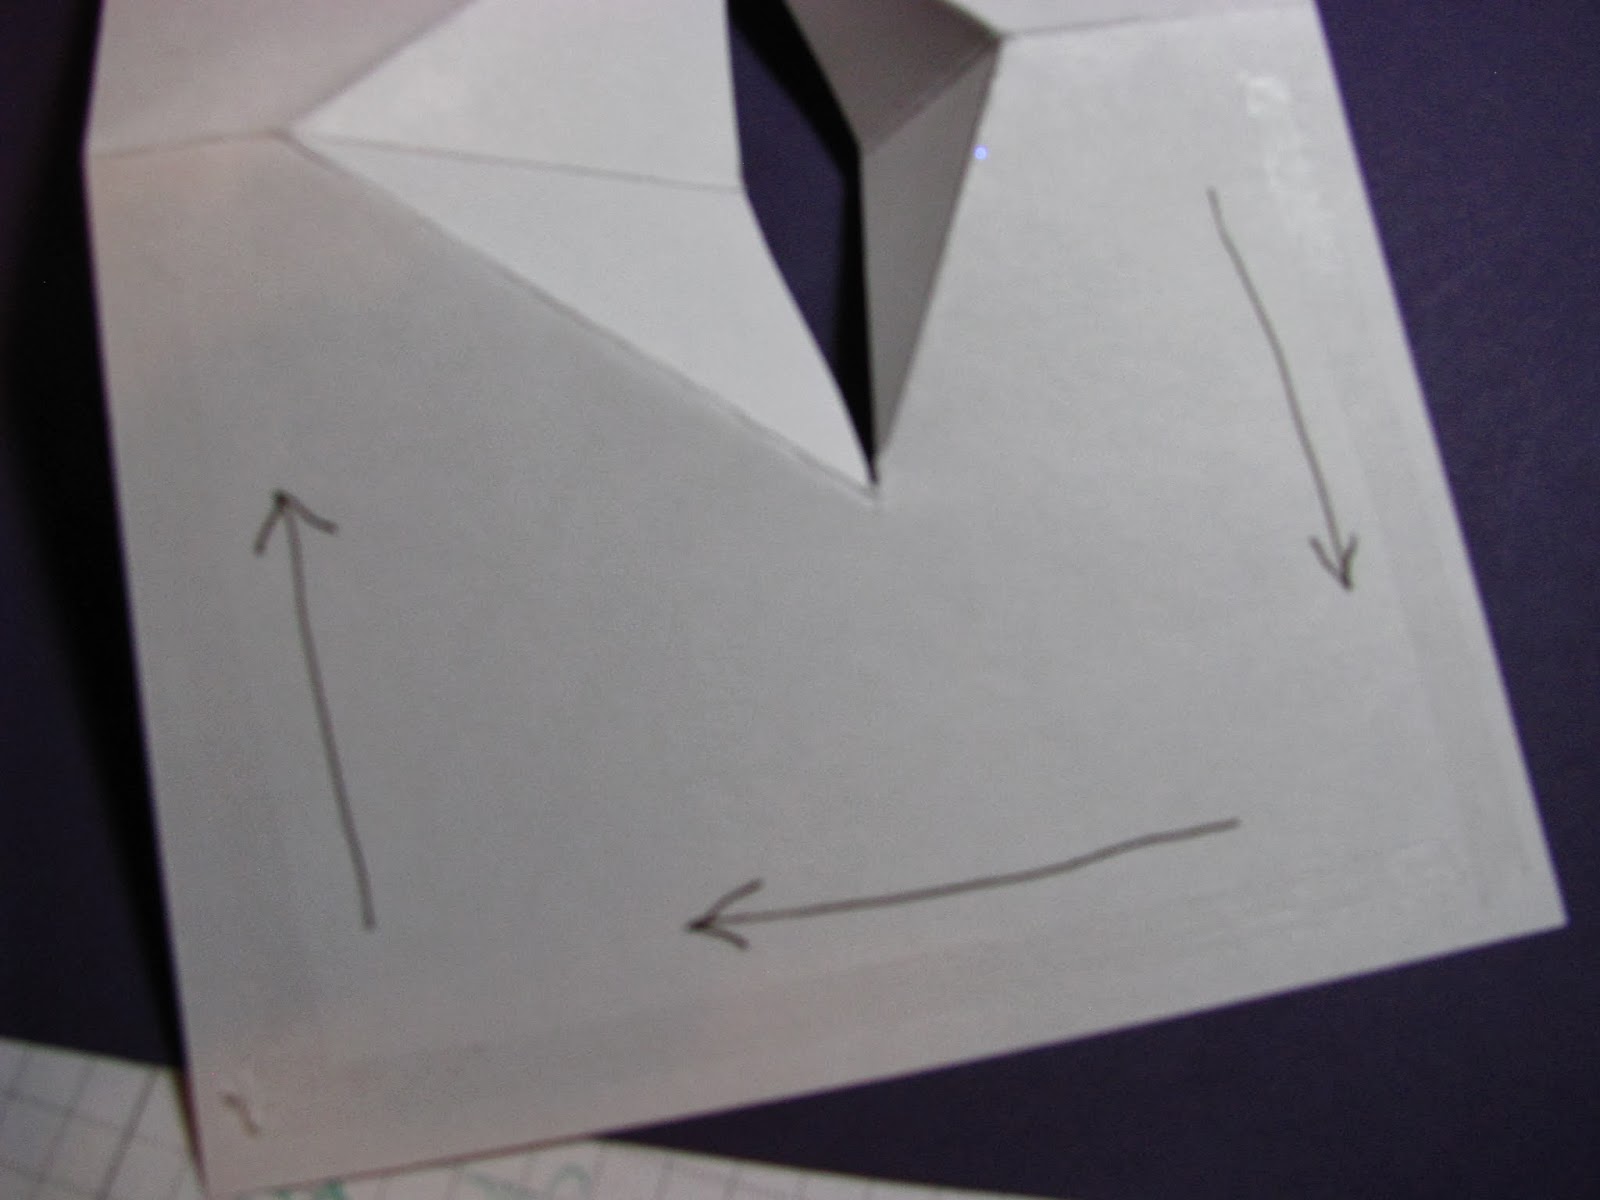
11. Do one side at a time. Place the white card stock inside the patterned paper and carefully line up the edges. Press in place. Then, add adhesive to the other side and stick the card stock to the patterned paper.

12. You can add an additional greeting or note to the inside if you wish. There is plenty of room to write or stamp on the inside. Since I send so many birthday cards, I stamped a birthday greeting on the inside. It would be cute for many different occasions. This would be great to send to a child but adults will get a kick out of it too.


Wednesday, January 1, 2014

Tri-fold Popped Balloons

I hope everyone is having a wonderful new year and you've gotten a great start to 2014. I pray that it will be a wondrous year for everyone.  Here in Texas we all make sure that we eat our black-eyed peas on New Year's Day for good luck. You get one day of good luck for each pea you eat, or at least, that's what everyone tells me. I've never been too crazy about black-eyed peas so I usually don't eat too many of them. It hasn't seemed to effect me one way or the other as far as my luck goes! I just look at Jeremiah 29:11 and know that God already has everything planned for me so I don't depend on luck! I do hope that you all have a glorious 2014!


Ok, here is a little more complicated card but I know you can do it. It is using the same pop-up technique that I used to use with my second graders. We would make 2 or 3 pop up books each year to help increase learning about different topics. So, if my second graders could do it, I know that you can too.
This is the card laying flat.
Here it is standing up. You can see the balloons "flying" in the sky.
(***I am no longer a Stampin' Up! demonstrator which means that I can use anything that I want on my blog. Previously, I could not name any brand item other than SU! in my blog. I will continue to give you the SU! item numbers when appropiate. I will also try to give you other brand info on the items that I use. It is not unusual, when I dig into my paper stash, that I will have papers that have been with me a while and I may not know where it actually came from.)

Materials needed:
Best of Birthdays stamp set (#132929)
Teeny Tiny Wishes stamp set (#
Patterned Pack II patterned paper (#114325)
Other patterned paper (I think this is a Doodle Bug design that I used here.)
Coastal Cabana card stock
white card stock 5 1/2 x 8 1/2"
1/2" Circle punch (#119869)
1" Circle punch  (#119868)
Modern Label punch (#119849)
Stampin' Trimmer with scoring blade (#126889)
Rose Red marker
Primrose Petals ink
embroidery floss

1. Cut 2 pieces of patterned paper to measure 3 x 5 1/2". Cut one piece for the front of card to measure 3 1/4 x 5 1/2". Lay aside.
2. Use the trimmer with a scoring blade to score the white card stock 3" from each end. Fold on the score lines so that it opens as a tri-fold card.

3. Turn your folded white card stock so that you are working on the outside of the second fold. Measure and mark with a pencil from the top at 1", 1 1/2", 1 3/4", and 2 1/4". Cut on the first 2 measurements 1/2" into the card, cutting both folds. Cut on the 3rd & 4th measurements 1/4" into the card, cutting both folds.
4. Fold the cut tabs back and forth 2 or 3 times.
5. Using a finger, poke the folds to the inside of the card.

 The top tab fold will stick out 1/2" and the bottom one will stick out 1/4".
6. Cut 2 Coastal Cabana card stock pieces to measure 1/2" x 2". Place a small amount of adhesive on the top side of the tabs. Lay and press the Coastal Cabana card stock pieces onto the tabs.
7. Turn the patterned paper that you will use for this part onto the back side. Measure and cut out the pieces of paper to match the tabs.
Lay the paper to fit on this section of the card. Then add adhesive to it to stick to the card.
8. Cut two 1" circles and three 1/2" circles from patterned paper.Cut 5 pieces of floss 2 to 3" each for balloon strings. Add adhesive to the back of a circle. Fold the floss so that 1/4 to 1/2" of floss hangs down and stick it to the adhesive on the back of the circle. Adhere two of the 1" circles to the front (1/2") tab and 3 of the 1/2" circles to the back (1/4") tab. Allow the floss to hang loose. Using the smaller circles on the bottom tab will give it the look of being farther away.

9. Adhere the other 3" piece of patterned paper on the back of the card to cover up the cut out tab sections. Not only will this look better, I will give the tabs more strength.
10. Adhere the 3 1/4" piece of patterned paper to the front of the card, lining the right edge up with the fold. This makes your card look a little wider and more balanced. Punch two 1" circles and one 1/2" circle to use for balloons on the front of the card. If one of the balloons on the tabs is sticking out, you can place a balloon on the front overlapping the inside balloon. Do some pen work to give the balloons dimension and to make the "strings" on the balloons on the front of the card.
11. Stamp the "celebrate" greeting from Best of Birthdays stamp set with Primrose Petals ink on Coastal Cabana card stock. Punch it out with the Modern Label punch. Adhere it to the front of the card with about 1/4" overlapping the front edge.
12. Stamp a slice of birthday cake from Best of Birthdays and a greeting from Teeny Tiny Wishes in Primrose Petals ink on the inside, center section of the card.
This card will fit in a standard invitation sized envelope. Have fun and let the balloons fly to wish your friends a happy birthday in the new year.


Saturday, May 12, 2012

Doilies, Flowers & twirling Butterfly


For this card, I used a whole sheet of 8 1/2 x 11" white cardstock and a whole sheet of 8 1/2 x 11" Wisteria Wonder cardstock. I also used a sheet of Wisteria Wonder doily paper from the Flirtatious Speciality (#122360) patterned paper.

There are a lot of steps to this card, so if you don't normally print out the instructions for it, you might want to consider doing that for this one.

 Score and fold both sheets of cardstock at 5 1/2." Put the white cardstock aside for now.
Score and fold the Wisteria Wonder cardstock at 2 3/4" from each end. When you fold this, you will want it like an accordian fold.

With a pencil, mark the center fold of the Wisteria Wonder cardstock at 4 1/4" to show you the center. Mark the fold at 1 1/4" from the top and the bottom. These marks will help you in lining up your punch. Use the 2 1/2" Circle Punch(#120906) to punch the hole in the center. Line up your punch, looking at the back side, so that you will be punching a half circle.

The punch a half circle at the top and bottom on the fold line.


Lay the cut piece of Wisteria Wonder on top of the white cardstock. Lightly trace the 3 circles that you made. Using a doily stamp from the Delicate Doilies (#122592) set, stamp a doily in Melon Mambo classic ink in each of the openings. If you are using clear mounted stamps, it will be easy to see where to stamp. If you are using wood mounted stamps, you might want to use the Stamp-a-ma-jig(#101049) to help you line them up. After you have them stamped, use an art gum eraser to erase the pencil lines.
Now, you are ready to decorate the inside of the card. For mine I used Melon Mambo classic ink and Wild Wasabi ink. I used images from the Fabulous Florets (#123027) stamp set.
My greeting is from the Teeny Tiny Wishes(#115370) set. I stamped it in Wisteria Wonder ink on white cardstock. I used the Word Window (#119857) punch to punch it out. I punched out a label from Melon Mambo paper with the Modern Label (#119849) punch. I adhered the greeting to the label and attached it to the cardstock with some brads I had on hand.


Cut out 2 of the smallest butterflies on the Beautiful Butterflies(#114507) die and your Big Shot cutting machine. Cut one from left over Wisteria Wonder patterned paper and one from Melon Mambo patterned paper.

Cut a piece of sewing thread about 6" long. Place adhesive all over the back of one of the butterflies. Lay the middle of the thread across the center of the butterfly. Place the other butterfly on top of the first one.


Lay the butterfly in the center of your circle. Pull the thread taunt above and below the circle. Tape each end to the cardstock.

You are ready to attach the inside Wisteria Wonder to the outside white cardstock. Pay close attention to your folds. You want to adhere the two ends/left and right panels of the Wisteria Wonder to the white cartdstock. Put adhesive ONLY on the back of the left and right panels, like is shown in the picture. Do not put adhesive on the center parts of either cardstock.
Turn the Wisteria Wonder over and carefully line up the edges. Be sure that the center fold comes out.
You can now decorate the front of your card. I used a sheet of Wisteria Wonder patterned paper from the Flirtatious Speciality paper, listed above. This piece had a doily pattern in the center of the paper that I wanted to use. To make my paper measure 5 1/4 x 8 1/2" like the front of my card, I cut 3 1/4" off of the left and right sides. That made it 5 1/4" wide.
Next, I rotated the paper and cut 1 3/4" off of each end to make it 8 1/2" and leave the doily in the center.

I stamped 4 flowers with Melon Mambo ink and one stem with leaves Wild Wasabi ink from the Fabulous Florets(#123027) stamp set onto white cardstock. I cut each one out closely around the edges, leaving a small amount of white.

Cut a piece of Melon Mambo cardstock to 5 1/2 x 2 1/2." Use the Eyelet Border (#119853) punch to punch the long edge.
Cut a piece of Wild Wasabi cardstock to 5 x 2." Use the Scallop Edge Border (#119882) punch to punch the long edge of the Wasabi cardstock. Layer the Wasabi on top of the Mambo cardstock and adhere. Place 3 flowers that you cut out earlier down the center of the Wasabi scalloped cardstock. Adhere these along the left edge of the card front.

Cut a piece of 3/8" Wisteria Wonder Ruffled Ribbon (#122973) to about 6" long. Put adhesive on the back and press it to the card front about 1" from the bottom. Wrap the ends of ribbon around to the back.

Place SU! Dimensionals (#104430) on the back of the stem with flowers. Leave a part of the stem without anything so that it will fit over the ribbon. Stick it above the ribbon on the right side of the card front.

Place Dimensionals on the last flower. Stick it to the top right side.

You are ready to adhere your card front to the card base.

Check to make sure that all of your folds go the right direction. When closed, you will have to fold (do not crease) the butterfly in half or it will stick out of the card. When you open the card, the butterfly should straightened back out, if you didn't crease it.

This would make one dynamite Mother's Day card, if you still have enough time left. I am using mine for an anniversary card. The Teeny Tiny Wishes stamp set has greetings for both.


Wednesday, April 25, 2012

Pull Up Card Surprise

Since I'm a very tactile, touch, feely person, I always enjoy things that have movement. Maybe it's also because I'm never still for very long. lol Anyway, here is a card with a pull tab to give the receiver a surprise.


1. I used some of my Summer Smooches patterned paper (# ) for the background on this card. Using the 1/2" circle punch, I punched out a half circle at the top of the patterned paper. For the layers, I used Marina Mist cardstock at 2 1/2 x 3", Daffodil Delight cardstock at 3 x 3 1/2" and another Summer Smooches patterned paper at 3 1/2 x 4."

2. For the stamping on the Marina Mist, I stamped the daisy from the Fifth Avenue Floral (#113734) in Daffodil Delight classic ink using the masking technique. I stamped the saying from that set on Whisper White cardstock in Marina Mist and then cut it out with the extra large Oval Punch(#119859). I rubbed Marina Mist ink on the edges of the oval and adhered it to the lower section of the stamped layer.

3. I cut out the doily with the triple doily layer punch(#122465) out of Marina Mist, Daffodil Delight and Whisper White. I attached it to the bottom corner of the layered box with a brad from the Everyday Enchantment brads(#126126).

4. Carefully, put adhesive on 3 sides of the back patterned paper and press it to the center of the background paper. Be sure your 1/2 circle punch is at the top.

5. Punch out a circle with the 1/2" circle punch to put at the top of a piece of Daffodil Delight cardstock that is 2 1/2 x 3." Write "Pull" on the blue pull circle. Decorate this card as you please. I put a butterfly cut with the Beautiful Butterflies(#114507) die and my Big Shot. Slide this into the pocket you made with the layers. Now adhere the whole thing to your card base. This gives you a fun card with some movement.

You can put any kind of special picture or message on the card that pulls out to give the recipient a special surprise. Consider add a love note or a note of encouragement, a picture of a baby, or other special person and just something fun on your card.