

On the inside you can see the little birdie's open mouth with a message inside! I think this is just too cute!
Materials needed:
Regarding Dahlias stamp set (#130327)
Regarding Dahlias stamp set (#130327)
White card stock 5 1/2 x 8 1/2"
Birds of a Feather patterned paper (#126899) 5 1/2 x 8 3/4"
Bermuda Bay ink
Tangerine Tango marker
Wiggly eyes from your craft or dept. store
Sycamore Street 1/4" Island Indigo ribbon (#130812)
Glue dots (#103683)
Stampin' Dimensionals (#104430)
Decorative Label punch (#120907)
Sponge Dauber (#102892)
scissors
pencil
art gum eraser
Ok, so I learned the hard way that you should do all the decorative elements first, before you make the pop up element! You'll find it much easier that way.
1. Using Bermuda Bay ink, stamp the dahlia and the "hello you" greeting on white card stock. With scissors, cut out the dahlia around the outside edges of the image. Using the Decorative Label punch, line up the greeting on the inside of the punch and punch out.
2. Fold the decorative label greeting in half. Unfold. Rub a sponge dauber on the Bermuda Bay ink and ink the edges of the decorative label greeting. Lay aside.


Fold the white card stock and the patterned paper in half. Lay the decorated front part of the card to the side.
5. Mark your folded white card stock at about 3" from the top. Draw a line 2" long in pencil. Mine is in ink so that it will show up better in the picture.

Cut on the 2" line that you drew. Use the art gum eraser to erase your pencil marks.
6. Fold from the cut line at an angle to make a triangle on the top portion. Use your bone folder to press it down for a solid fold.


7. With the white card stock closed with the angled folds on the outside, lay this on top of the inside of the patterned paper, lined up with the edges. Lightly draw pencil lines to show where the mouth will be.


8. Using one finger, push these folds to the inside where you have already stamped dahlias.


9. Decorate your bird face. I put glue dots on the back of 2 wiggly eyes and placed on the upper part. I used my Tangerine Tango marker to make the orange mouth/beak. I did that by lightly sketching a small triangle on the top and bottom parts. When I was satisfied with those, I used the brush end of the marker to fill it in with color. The wiggly eyes do make this card a little thick. If you prefer not to have the thickness, you might want to just draw eyes on the face.

10. Place adhesive on the inside of the patterned paper on 3 sides as shown in the picture. Do NOT put adhesive on the inside folded part. It will not open right if you do.
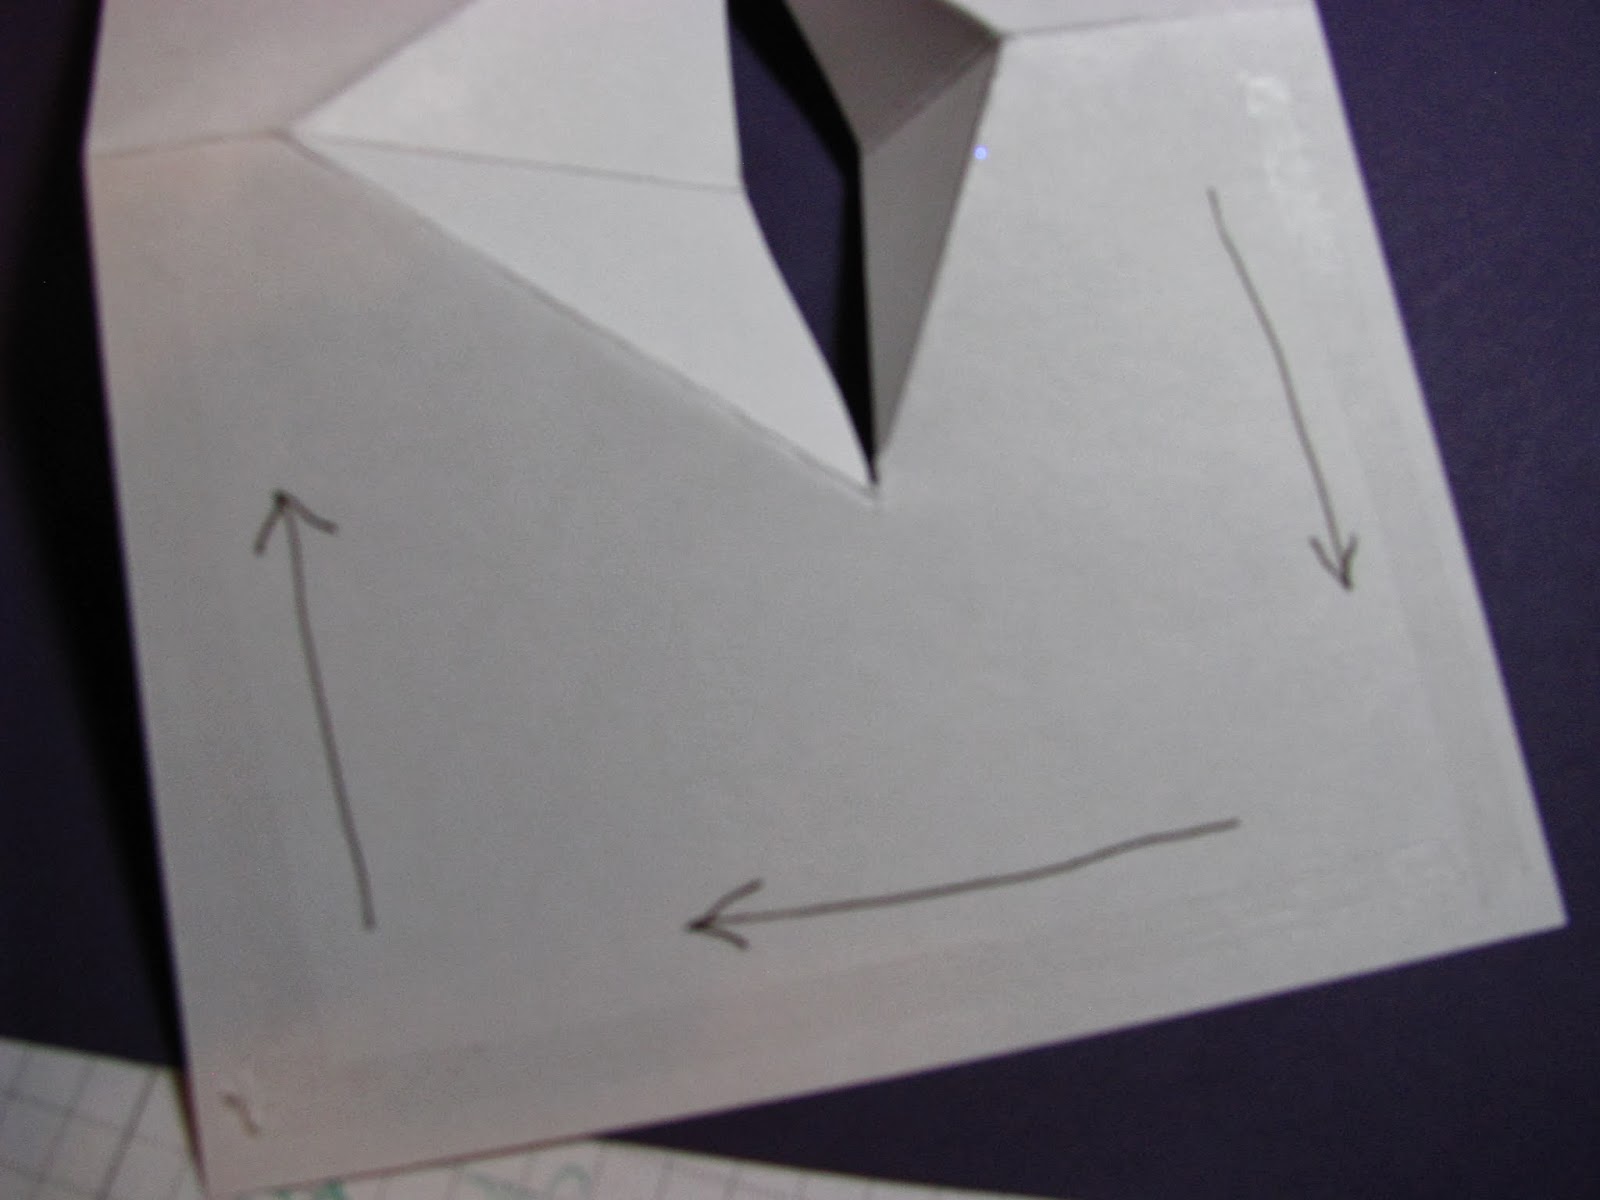
11. Do one side at a time. Place the white card stock inside the patterned paper and carefully line up the edges. Press in place. Then, add adhesive to the other side and stick the card stock to the patterned paper.

12. You can add an additional greeting or note to the inside if you wish. There is plenty of room to write or stamp on the inside. Since I send so many birthday cards, I stamped a birthday greeting on the inside. It would be cute for many different occasions. This would be great to send to a child but adults will get a kick out of it too.
No comments:
Post a Comment