Showing posts with label buttons. Show all posts

Monday, July 21, 2014

Blooming Birthday

Here is a femine cards made largely with old, retired or left over materials. Of course, you can always use new materials for your cards, but all those things you've been saving can make great cards too.

Materials needed:
Bloom with Hope stamp set (hostess, # 133952)
The Good Shepherd patterned paper from Flair Designs 3 7/8 x 5"
Raspberry Ripple card stock 4 1/4 x 5 1/2"
Certainly Celery card stock 1 3/4 x 3 7/8"
White card stock
Raspberry Ripple marker
Old Olive marker
Raspberry Ripple ink pad
Doilies (SU # 129399 or Wilton's smallest)
Stampin' Dimensionals (#104430)
Certainly Celery 5/8" Grosgrain Ribbon (#109050, retired) about 7"
Very Vintage buttons (#129327)
Glue dots

1. Cut all your papers to the sizes listed. Use the markers to ink up the flower and leaf parts on the image. On a piece of white card stock, stamp this image from the Bloom with Hope stamp. Cut it loosely around the edges.
2. Adhere the patterned paper on to the Raspberry Ripple card stock.
3. Place adhesive on the back of the ribbon. Press it over the patterned paper on the right hand side about 1/2" from the right edge. Wrap the ends around to the back of the card stock.
4. Place adhesive on the solid part of the back of the doily. Center it on the card and press it down.
5. Stamp the greeting from the Bloom with Hope stamp set with Raspberry Ripple ink on the top left side of the Certainly Celery card stock piece. Adhere this piece of card stock to the center of the doily. You  might like a slightly off center look. If so, place the card stock just below the center of the doily as I did.
6. Place Stampin' Dimensionals to the back of your stamped image. Adhere it over the ribbon and doily on the card. Place glue dots on the back of the button and press it on the bottom left side of the Certainly Celery card stock.
7. Adhere the card front to a card base. Decorate the inside as you please being sure to add a nice message either from a stamp or hand written.

Be thinking about Operation Christmas Child. I know it's still a long ways until collection week in November but if you start buying items for your shoeboxes now, you can be way ahead of the game come collection week. You  might even pack more shoeboxes this year if you start early. For more info about Operation Christmas Child, go to Samaritans Purse..
 

Wednesday, May 7, 2014

Special Blues & Greens Embossed

This card uses the embossing technique that I used early in April. Instead of the pinks I went with blues and greens for this one. Check out here to see how to do this.

Materials needed:
Elements of Style stamp set (#120045)
Trust God stamp set (#126702)
Bermuda Bay card stock 3 x 3 3/4" and 4 1/4 x 5 1/2"
White card stock 4 x 5 1/4," 2 3/4 x 3," and 2 x 2 1/2"
Crushed Curry ink
Gumball Green ink
Bermuda Bay ink
Versa Mark ink
Crystal Clear embossing powder
Heat tool
Sycamore Street 1/4" ribbon, Island Indigo (#130812)
Very Vintage buttons (#129327)
Corner Rounder punch
Sponge Dauber (#102892)
Glue Dots

1. Emboss the larger 2 white card stock pieces according to the directions found here.On this card I used the Crushed Curry, Gumball Green and Bermuda Bay inks in that order. Stamp the flurish image on to the colored card stock with Versa Mark ink. Follow the directions on the card link listed here.
2. Round all the corners. Adhere the embossed card stock pieces to the Bermuda Bay card stock pieces.
3. Wrap the Island Indigo ribbon around the card front and tie a bow. Use glue dots to hold in place.
4. Stamp the saying that you want on the smallest piece of white card stock in Bermuda Bay ink. Use sponge daubers to sponge the edges around the saying with Bermuda Bay ink.  Adhere this piece to the center of the 2 3/4 x 3" embossed piece.
5. Add a button to the bottom right side of the saying piece.
6. Adhere the card front on to a card base and add a note or greeting on the inside.

Monday, April 21, 2014

Spring Blooms Card


Materials needed:
Elements of Style stamp set (#120045)
Teeny Tiny Wishes stamp set (#115370)
Beyond the Garden patterned paper (#122342) 3 x 4," 4 x 5 1/4"
White card stock 5 1/2 x 8 1/2," 3 1/4 x 4 1/4" plus
Labels Collection Thinlits Dies (#125598)
Textured Impressions Designer Frames embossing folder (#123130)
1/2" Melon Mambo Polka Dot Grosgrain Ribbon (#115611) 2 pcs. one about 3 1/2" and one about 6"
Sherbet Buttons (#116312)
Glue Dots
Stampin' Dimensionals (#104430)
1" Circle punch
Gumball Green marker
Melon Mambo marker
Marina Mist ink pad
Melon Mambo ink pad
Sponge dauber

1. Cut the white card stock and the patterned paper the dimensions listed above.
2. Choose a die from the Labels Collection that is about 2 3/4 x 3 1/4." Using white card stock and the Labels die, cut the card stock with the Big Shot machine. Next, place the embossing folder so that the oval frame is centered in the die. Run this through the Big Shot machine. 
3. Use a sponge dauber and Marina Mist and Melon Mambo ink to color the outer edge of the die cut as shown in the picture. Put blue around most of the die cut with pink at the bottom. I've found that a sponge dauber gives a softer color on card stock than doing a direct to ink pad method of coloring. 

4. Using the Melon Mambo and the Gumball Green markers, color the floral stamp from the Elements of Style stamp set. It is not necessary to color the entire stamp. Look to see how much of this will fit on the die cut. Huff some breath on the ink and then stamp on white card stock. Cut the image out around the outer edges of the image.  Place Stampin' Dimensionals on the back of the flowers and then place them on top of the prepared die. Set aside.

5. Adhere the smaller rectangle of patterned paper to the smaller rectangle of white card stock. Adhere this to the larger piece of patterned paper, placing it slightly to the right side.
6. Adhere a strip of about 6" of ribbon across the patterned paper and card stock rectangles. Wrap the ends around to the back. Score and fold the largest piece of white card stock at 4 1/4."  Adhere the piece with the ribbon wrapped on it to the white base card. You will have a small frame border around the edge of the patterned paper.
7. Get the decorated die cut and apply adhesive to the back. Press  it down to the patterned paper on the right hand side over the ribbon. 
8. On the 3 1/2" piece of ribbon, apply glue dots to the center on the front and back. Then pinch the sides together.

Cut the ends of the ribbon to be even and add an angled cut. Add more glue dots on the back of the pinch. Press this on top  of the ribbon on the card on the left hand end of the ribbon. Place glue dots on the back of a pink button and press on to the knot area of the ribbon.
9. Put glue dots on the back of two more buttons and place them at the top  left hand corner of the card.
10. Punch a circle of white card stock with a 1" circle punch. Dab blue and pink ink around the edge of the circle. Choose a simple greeting from Teeny Tiny Wishes and stamp in the center of the circle. Adhere the circle to the bottom left of the card.
Finish by adding a greeting to the inside or a special note.

Monday, April 7, 2014

Springy Pink & Embossed

This card has a spring like feel to it with a feminine touch. If you want a card that is real girly girl, this is the one for you.
You'll spend most of the time to make this card with inking and embossing. It takes a while but you get a really pretty look. If you've never done any heat embossing before, you might find this project a little difficult.

White card stock 5 1/2 x 8 1/2" for base card, 4 x 5 1/4", 3 x 3 3/4", 2 3/4 x 3 1/2",1 3/4 x 2 3/4",
                           1 3/8 X 2 3/8"
Pale pink card stock2 X 3", 1 1/2 X 2 1/2"
Marina Mist ink
Regal Rose ink
More Mustard ink
Versa Mark ink
Clear Embossing Powder
Regarding Dahlias stamp set (#130327)
Trust God stamp set (#126702)
3/8" Melon Mambo Striped Organdy ribbon (#129293)
Sherbet Buttons (#116312) or other buttons that has a pale pink
Paper Piercing Pack
Paper Piercing Tool
Paper Piercing mat or mouse pad
Glue Dots

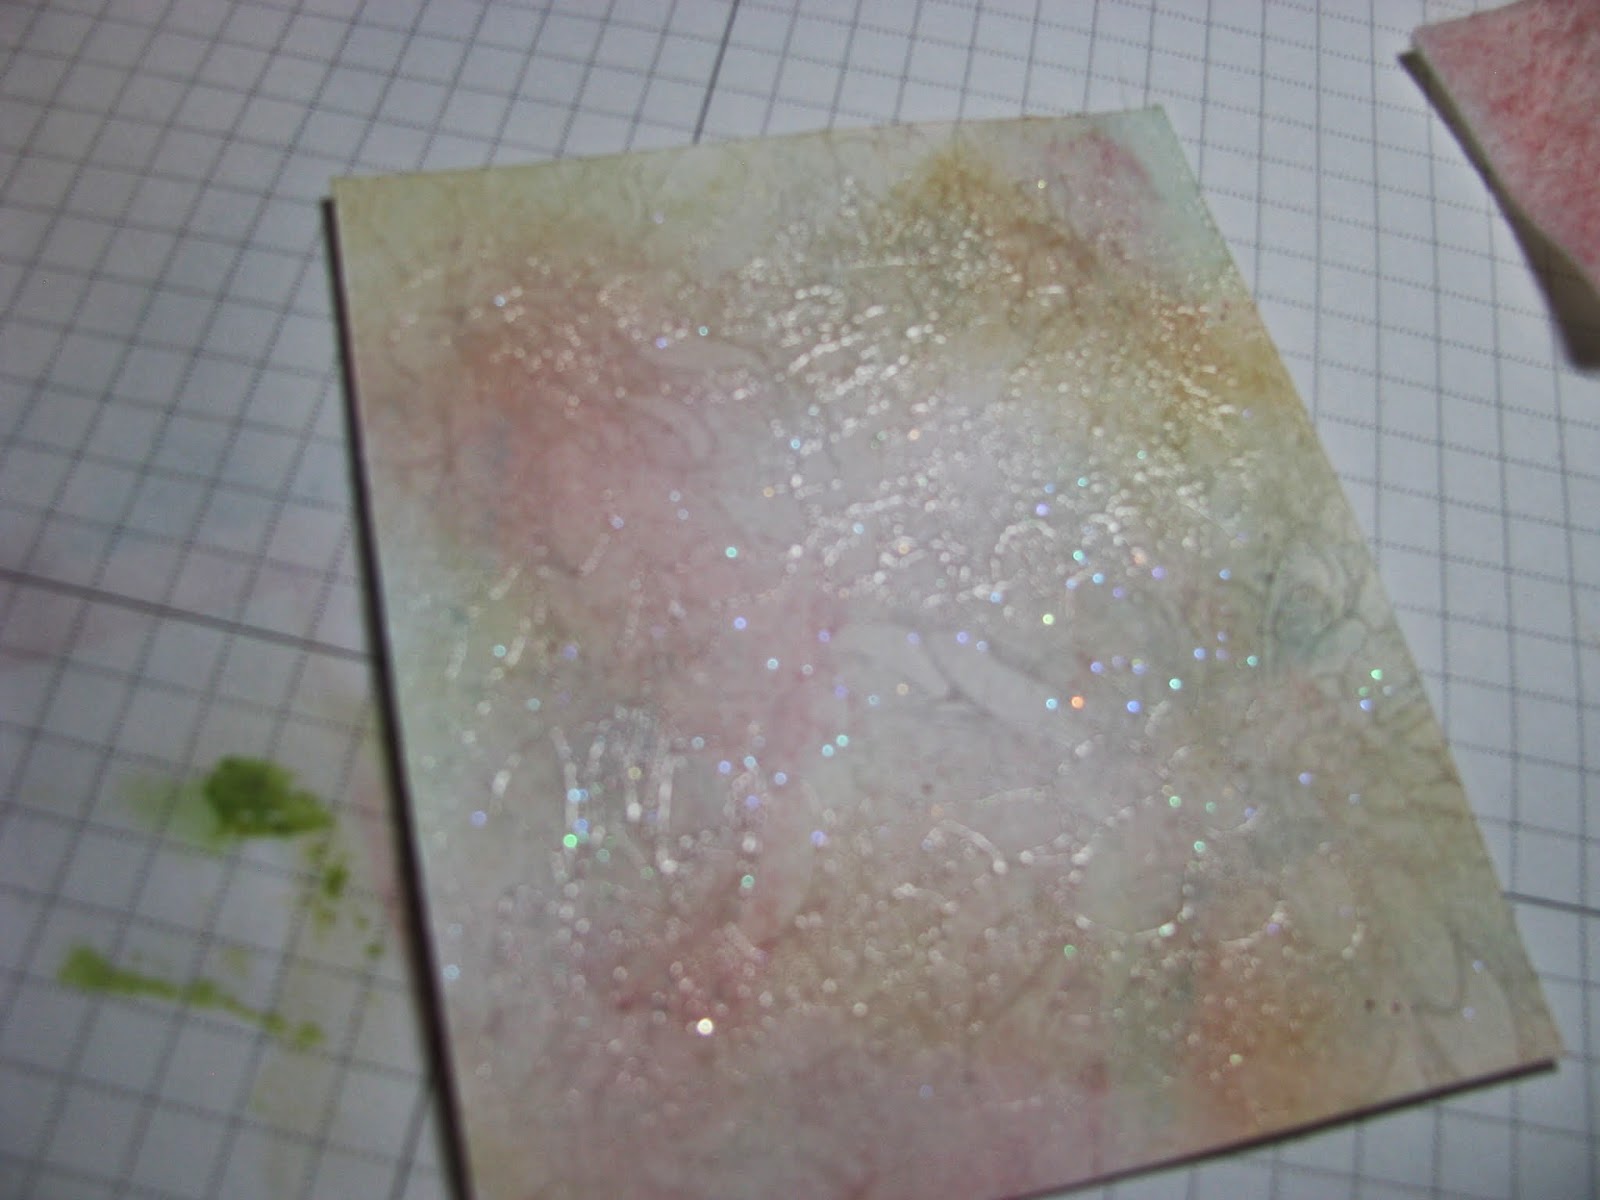
1. Distress the 4 x 5 1/4" piece, the 2 3/4 x 3 1/2" piece and the 1 3/4 x 2 3/4" piece of white card stock. I start with the yellow ink. Dab the felt or other distressing medium on the More Mustard ink pad and then directly onto the white card stock. Next, do the same thing with the Regal Rose ink going over top of the More Mustard. Finish with the Marina Mist ink over the Regal Rose. You will not cover the card stock solid with any one color. As you dab the ink onto the card stock, use a rubbing motion to get a good coverage around the card stock.


 2. Ink your image (I used the dahlia from the stamp set) with the Versa Mark ink. Stamp it randomly around the distressed card stock.
3. Place the card stock in a tray, on a lid or a sheet of paper. Sprinkle clear embossing powder to cover the card stock.

Shake off any excess powder. Return excess powder to the jar to use in your next embossing project.
4. Heat the entire card stock until the embossing powder melts.
When it is melted, it will have a glossy, shiny look.
Repeat this technique with the 3 pieces of white card stock.
5. Adhere the embossed card stock on to the plain white card stock leaving about 1/8" border all the way around each piece. The smallest embossed piece should be adhered to a piece of pale pink card stock. Layer the layers according to size with the smallest on top.
6. With the smallest piece of card stock, stamp a greeting from the Trust God stamp set in the center with Regal Rose ink. Use Marina Mist ink to distress with the blue around the outer edge of the card stock. Adhere it to the other piece of pale pink card stock with a border around the greeting piece.
7. Using the Paper Piercing tool or a very sharp needle(not recommended but it will work) punch holes all the way around the white card stock with the saying. Adhere this to the bottom right side of the card, overlapping the other layers.
8. Wrap ribbon around the right side of the card and tie in a bow. Sometimes I use glue dots to keep my bow in place.
9. Place glue dots on the back of a large pink button and adhere to the top left rectangle as shown in the picture.
10. Adhere the card front on to the card base, leaving a white border all the way around the card.


Monday, October 28, 2013

Baby Best Wishes

This is for a soon to be born baby named Olivia Joy. I know she will be beautiful just like the rest of her family.

Materials needed:
Flirtatious Specialty patterned paper (#122360, retired) 2 x 3 1/4"
Crushed Curry card stock   4 1/4 x 5 1/2"
Whisper White card stock 2 x 3"
Animal Stories stamp set (SU retired)
Cross My Heart stamp set (#126582)
Strawberry Slush In Color ink
Regals Candy Dots (#130932)
Candy Dots Brad Bases (#132293)
Stripes Textured Impessions embossing folder (#123128)
Hung Up Cute Clips (#129389)
Brights Collection Designer Buttons (#119747)
Glue Dots (#103683)
Stampin' Trimmer (#126889)
Big Shot

1. Place your Crushed Curry card stock into the Stripes embossing folder. Run it through your Big Shot machine.
2. Stamp the giraffe in Strawberry Slush ink (if you want a card for a boy, Bermuda Bay would be a great color) on the Whisper White card stock. Carefully place the giraffe image in your trimmer. Cut vertically at 1" and horizontally at 1" and 2." This will give you 6 one inch squares. Arrange the giraffe image in the correct order so as not to be confused later. (At least, I would be!) Place a glue dot on the back of each piece. Line them up about 1/4" apart, using the embossed stripes to help keep them even. Press down.
3. Stamp your greeting on white card stock. Trim around the edges. Adhere it to the patterned paper.
4. Place a clip on the top left hand corner. Adhere the entire piece to the right hand side.
5. Add a Candy Dots brad to the top left corner and an Olive Green button to the bottom right side. Adding the greens helps to tone down all the warm colors.
6. Adhere this to a card base and place your greeting or note inside.
Be sure you add your name or initials to some place on the back. Remember, an artist always signs her work!

Wednesday, August 21, 2013

Colored Lace

After learning to color and emboss at the same time from Wednesday, Aug. 14 post, I had fun playing around with the ink on my other embossing folders. These are using the Delicate Designs (#127023) embossing folder. I wondered what it would look like with  the opposite side colored. The top picture is using Bermuda Bay ink the way I showed you last Wednesday. Apply the ink inside the side with the Stampin' Up logo. The bottom one would be the debossed side. I applyed the ink to the opposite side to get this effect. I think both of them are pretty but it just depends on what you want on your project.

For this card, I used the embossed look with the ink applied to the logo side.

Materials needed:
So Saffron cardstock 5 1/2 x 8 1/2" scored and folded at 4 1/4"
Whisper White cardstock
Bermuda Bay cardstock
Bermuda Bay ink
Taken with Teal marker
So Saffron marker
Daffodil Delight marker
Delicate Designs embossing folder (#127023)
Secret Garden stamp set (#129144)
Secret Garden Framelits Dies (#129372)
Very Vintage Designer Buttons (#129327)
Mini glue dots (#103683)
Stampin' Dimensionals (#104430)
Beige or Ecru floss

1. Color and emboss the lace from the Delicate Designs embossing folder with Bermuda Bay In Color ink using the technique from last Wednesday. Trim the embossed area and attach to the bottom edge of the folded So Saffron cardstock. Trim the So Saffron around the edge of the embossed design.
2. Using markers, color the flower stamp from the Secret Garden stamp set. I colored the outer petals Taken with Teal and the inner ones with Daffodil Delight or So Saffron. Stamp one with Bermuda Bay ink on Bermuda Bay cardstock.
3. Use the Secret Garden Framelits Dies and your Big Shot machine to cut out the 3 flowers. Use adhesive to place two flowers on the card as shown. Trim the edge that hangs over the card even with the edge of the card. Put 3 Stampin' Dimensionals on the third flower and place it above the other two.
4. Thread the floss through the Very Vintage button. Place glue dots on the back of the button and press onto the card just about the lacey strip on the left hand side.
5. Since I used the So Saffron for my card base, it is not necessary to attach the card front to the card base. With a light colored cardstock like So Saffron, you can stamp or write a greeting or note on the inside of your card.
Have a scrappy good day and God bless you as you make cards for others.