Showing posts with label flowers. Show all posts

Wednesday, September 9, 2015

Birthday Flowers


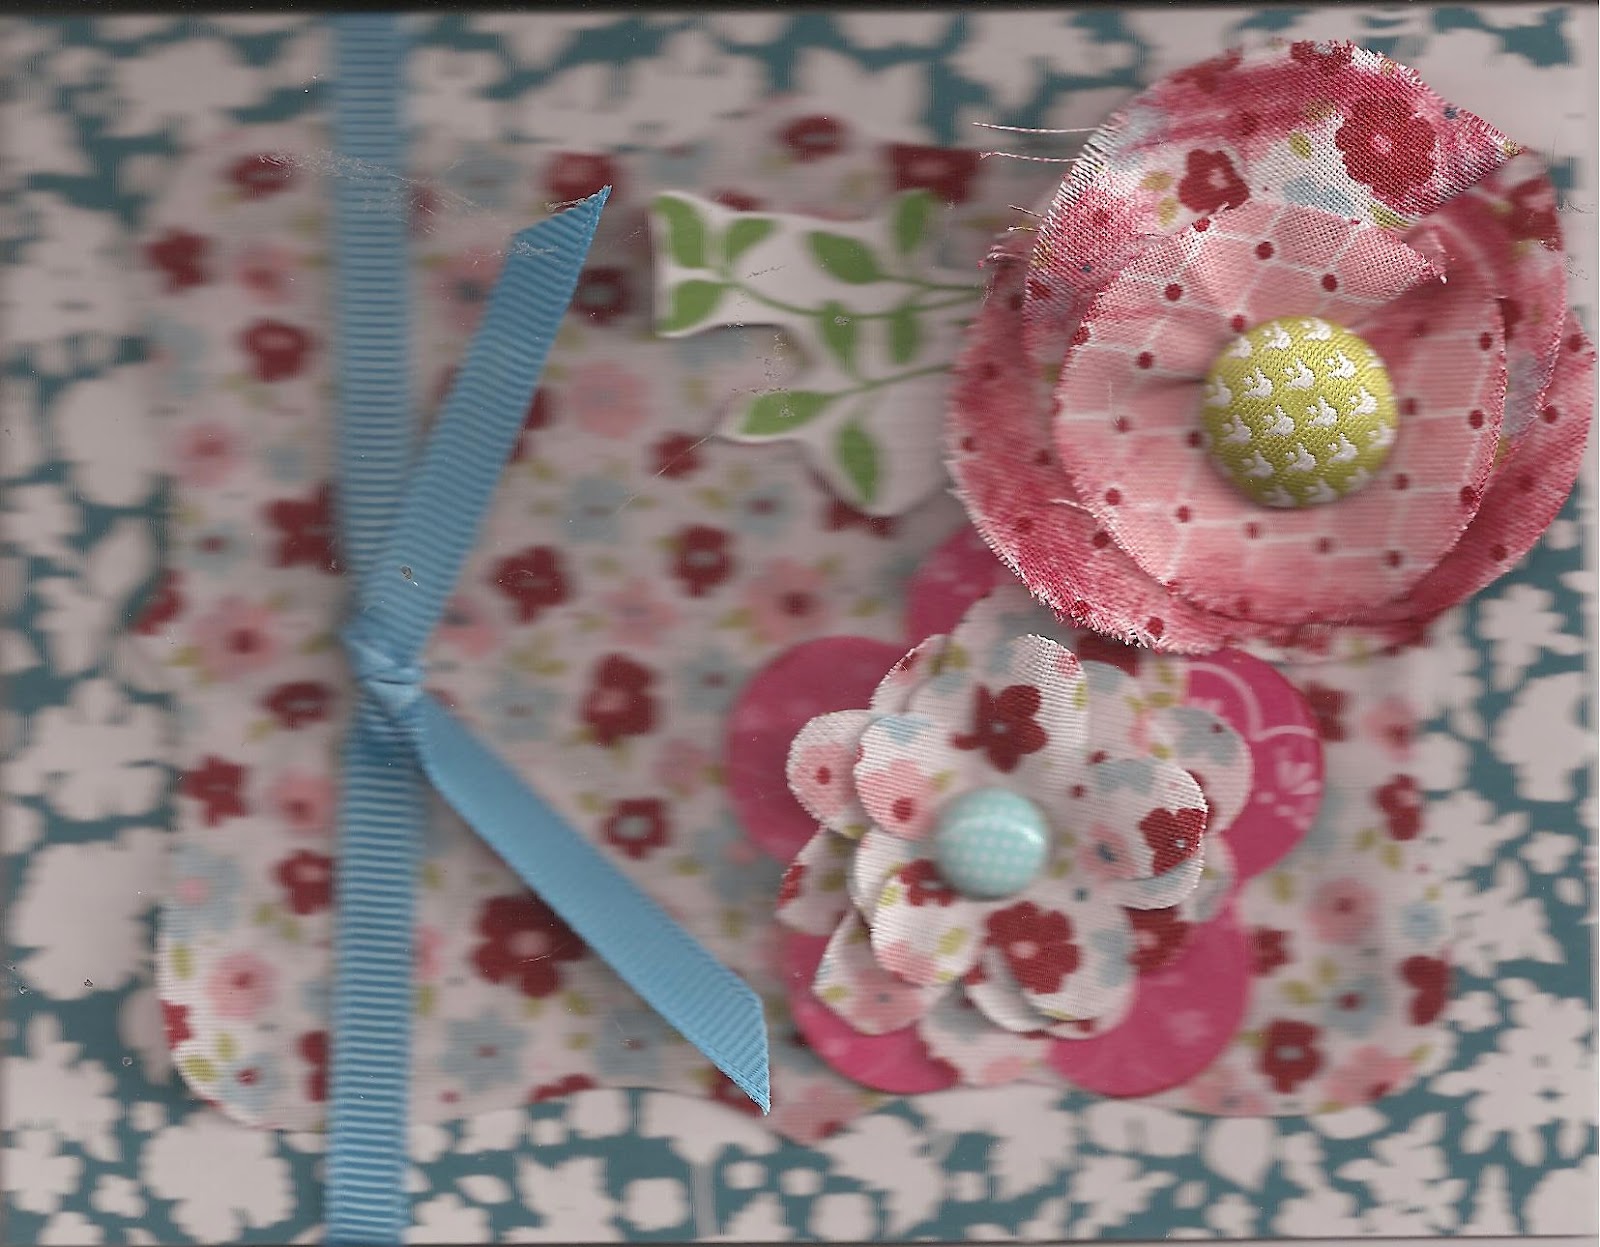
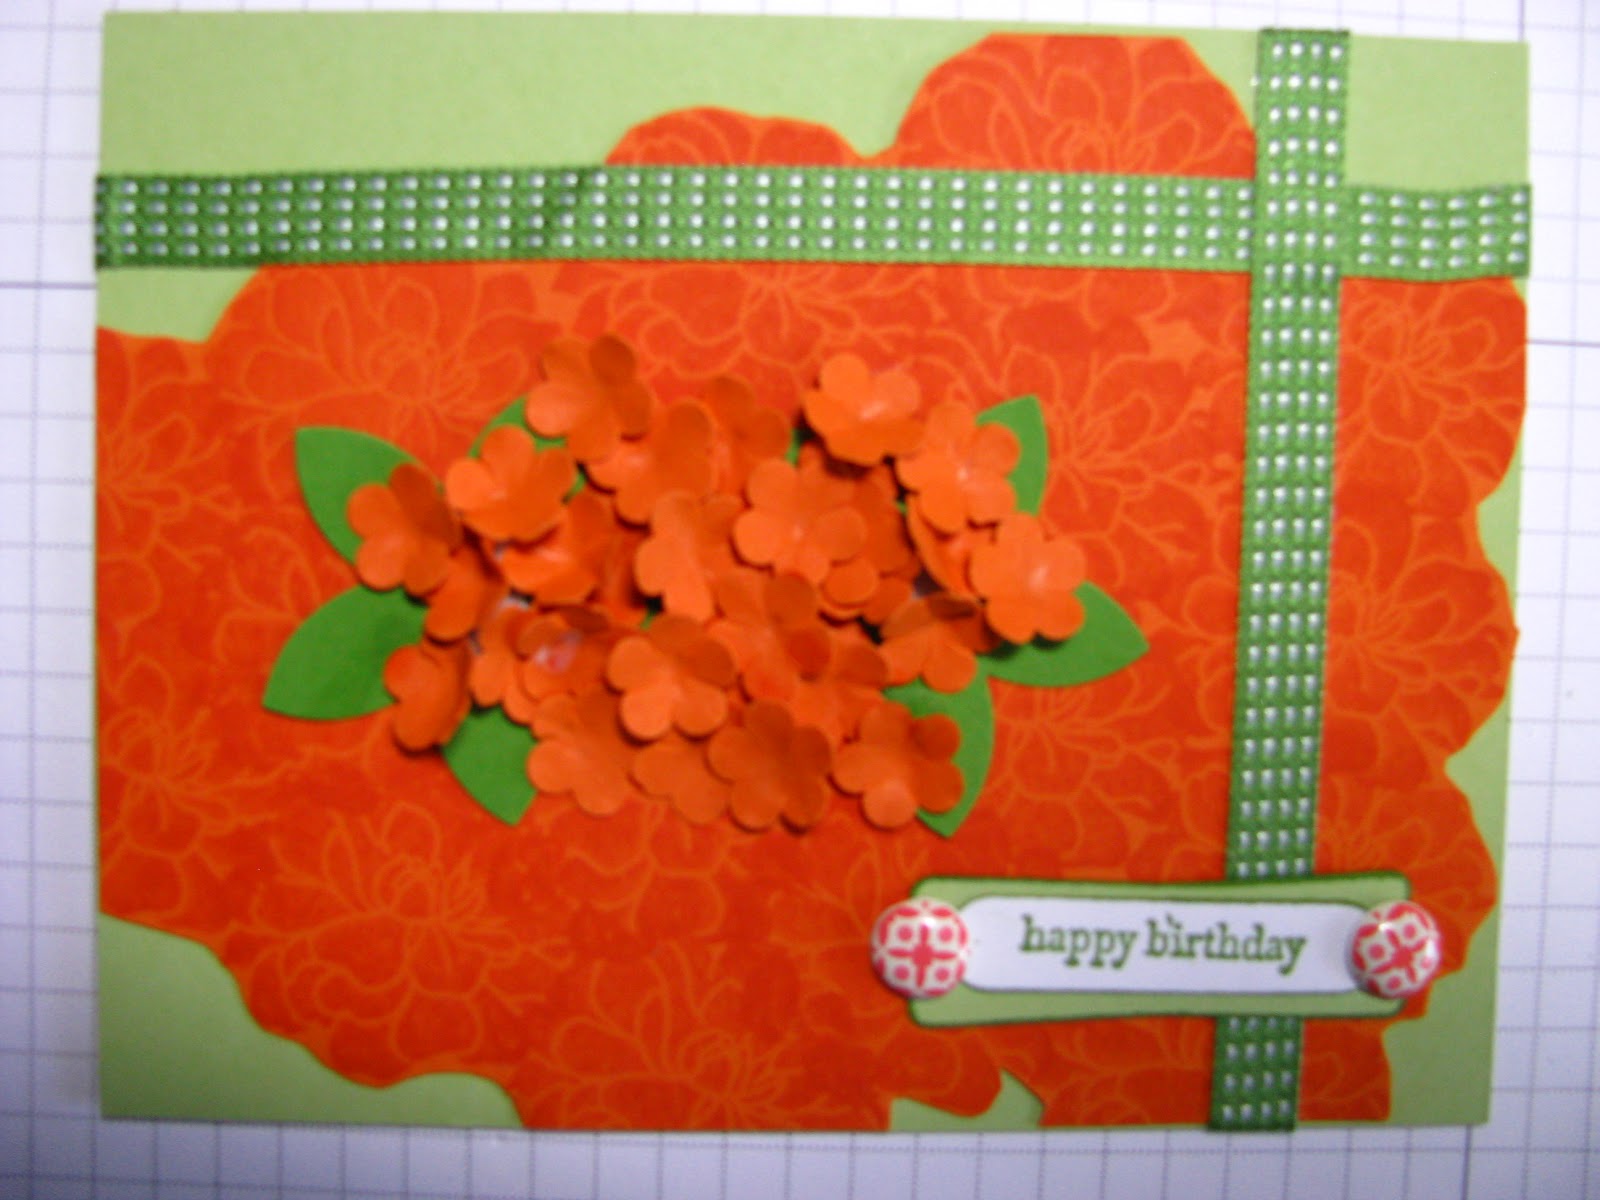
It's been a while since I've put silk flowers on my cards. When I came across these in my closet, I thought it would be fun to use some on a card again.

Materials needed:
Flower Shop stamp set (SU #130942)
Gingham Garden patterned paper  4 1/4 x 5 1/2"
Primrose Petals ink
Wild Wasabi ink
5 Petal punch
Framelits labels dies
Brads
Sponge Dauber
Stampin' Dimensionals
Birthday stamp


There are lots of places where you can get silk flowers for your cards and other projects. My favorite way to get these is to buy a large bunch of flowers when I can find them for 50% off, usually at Hobby Lobby. When I get them home, I tear them to pieces. I pull all the petals away from the plastic stems. If they have a leaf that I like, I pull some of them off too. I take out any left over plastic bits and throw away the plastic stems. I then put the flowers and leaves in large zip lock style plastic bags. There are other places that you can buy flowers. Often you can find them in packages or bottles at your local craft store. They have some that are beautiful. It just depends on what your needs are for these.

1. Stamp several flower images and cut them out with scissors or with the 5 petal punch. Lay them aside.
2. Stamp your greeting on white card stock. Choose the framelits die that fits over your greeting nicely and cut it out with your die cut machine. Mine is a Big Shot.
3. Using a sponge dauber and Wild Wasibi ink, gently brush the edges of the label die cut. 
4. Place a small silk petal on top of a larger petal to make your flower. Insert a brad in the hole that is in the center of the silk petals or flowers. Punch a hole in the top left and the bottom right corners of your patterned paper. You might want to lay the flowers down on the paper first to see exactly where you will need your hole punched.  Insert the brad through the flowers and the hole. Bend over on the back side. Adhere this to your card base.
5. Place 3 to 5 stamped petals on the card to see a pleasing arrangement. Glue them down.
6. Place Stampin' Dimensionals on the back of the greeting on the die cut. Adhere this over the center of the card and over some of the stamped flowers. 
That's all there is to it. Have fun!

Monday, April 6, 2015

Felt Flowers and Butterflies

It's April already and I'm running behind, as usual. lol I spent my afternoon a few days ago getting my April birthday cards made. I had made a few last week for the first few days of the month but didn't get them scanned for you. So now, that I've got my cards for the rest of the month done, I'll share them with you.

Today, I'm sharing the one that I did for the ladies I know with April birthdays. It's spring time now and we've had some beautiful days here in Central Texas. We've had some cool ones too but nothing too bad. I wanted to do springy so here is the card.


Materials needed:
Pool Party card stock 4 1/4 x 5 1/2
Shades of Spring patterned paper 2 1/2 x 3"
Butterfly stamp (this is one I've had from years. I'm pretty sure it's from SU! but I don't know which set)
Felt
Secret Garden Framelits dies
Jewels Basic Pearls
White satin ribbon 5/8"
Strawberry Slush ink
Teeny Tiny Wishes stamp set
Word Window punch
Pretty Birds embossing folder by Jennifer Ellory
Stampin' Dimensionals
Glue dots

It's pretty easy to just look at the card and see how it's made. The only thing you might not be sure of it the felt flower. I took of piece of felt and cut it with one of the Secret Garden flower dies. The original dies will cut up to 4 pieces of felt with no problem but the Framlits dies will only cut 2 at a time and sometimes only one does good.  After you cut out the felt flower, place a glue dot in the center of the flower. Pinch the felt around the glue dot and it will look a bit more like petals. Then you can put the felt on the flower with glue dots. The rest of the card is pretty much like it looks. Easy peasy! Have fun.

Wednesday, September 24, 2014

Fall Butterflies and Flowers

I found these butterflys at Dollar Tree when I was in there a few days ago looking for items for my Operation Christmas Child shoeboxes. There were 2 butterflies on a card for a dollar. I used papers from my scrap box, adhesive, glue dots, and brads to put these together in just a few minutes.


Materials needed:
Burlap & feather butterflies
Mellow Moss and Lost Lagoon card stock, each 4 1/4 x 5 1/2"
Night of Navy card stock 3 1/2 x 3 1/2"
Old Olive card stock 2 x 2 1/2"
Patterned paper from Greenhouse Gala
Tangerine Tango card stock
Tangerine Tango ink
White card stock
Word Window punch
Modern Label punch
Teeny Tiny Wishes stamp set
Brads
Glue dots

1. I cut the card stock and patterned paper to fit from the scraps that I had and adhered them to the background card stock.
2. I placed several glue dots to the body of the butterfly and a couple to one wing. These butterflies have a heavy body so I put 5 or 6 glue dots on each one to hold it in place.
3. Stamp the greetings on white card stock and punch out with the word window punch. Put out a modern label from Tangerine Tango card stock. Adhere together.
4. Adhere the greeting to the top right of the card and secure in place with brads. The brads on the blue background are brads that I've had for several years.The ones on the green background are from SU and I've had them a couple of years. These were the last ones I had so that's why I didn't use the same brads on each card.

Friday, August 29, 2014

A Different Way to Use a Doily

I love the look of doilies. It always reminds me of the Victorian age when ladies were always very proper. Not that ladies have to always be proper! I'm certainly not! But sometimes, I just like that look.
Materials needed:
Flower Shop stamp set (#130942)
Patterned paper (This is from Kalioscope from SU! It's been retired for a few years. I'm just trying       to use up some of my papers.)
Pumpkin Pie ink
Melon Mambo ibnk
Brights Brads (#119740)
Word Window punch
Teeny Tiny Wishes stamp set

On this first card, I have the doily set in the center which is what you will see most often. I placed the flowers with colors to match my patterned paper in the center. This looks perfectly fine but sometimes, I want something different.

On this card, I didn't want to cover up the beautiful butterfly on the paper but I still wanted to use a doily. I folded the doily in half and place it on the patterned paper. After adhering it, I cut the excess half off even with the paper. It gives a different look using the same stamps and colors.

I hope you like seeing things a little different some times.

Wednesday, April 30, 2014

Bouquet for Mom


So much simpler than it looks. Just score and fold accordion style.

Materials needed:
Secret Garden stamp set (#129144)
Simply Sketched stamp set (#129672, hostess, retired)
Secret Garden framelits dies (#129372)
Kraft card stock 10 1/2 x 5"
White card stock
Washi tape
Crisp Cantaloupe ink
Crushed Curry ink
Raspberry Ripple ink
Coastal Cabana ink
Primrose Petals ink
Midnight Muse ink

1. Measure, score and fold your Kraft card stock at 1 1/4, 2 1/2, 4 1/4, 6, and 8 1/4." Fold at the scores accordion style.
2. Stamp 2 or more of the flower images from the Secret Garden stamp set on white card stock. Use the colors listed or your favorite ink colors. You need 15 flowers.
3. Cut the flower images with the Secret Garden framelits that fit that image and your Big Shot machine. This is what makes this so easy!
4. Place a strip of Washi tape across the front panel. Place adhesive on the bottom half of each flower image and place on the top of each "mountain" fold. Allow the images to overlap. Do this on all 3 mountain folds.
5. Near the "valley" of the last fold, stamp your greeting for mom. For this card, I stamped a birthday greeting but there are so many mother's day stamps out there it will be easy to find one. If not a stamp then write your happy mother's day greeting on the fold.

You can make this card using any flower stamps that you have on hand but without a matching die, it will take a lot more time having to cut our each flower, unless you have punches to match them.
Be sure you give your mom or mom-in-law something nice for Mother's Day. Both of mine have now been gone for several years. I miss their sweet smiles.

This was in the latest Card Maker Magazine but I've seen this style card around for years now.

Monday, April 28, 2014

Flowers on the Horizon Mother's Day


Flowers are always good for Mothers or any woman. Recently, as my grandson was leaving the house to go to his other grandmother's for a birthday celebration, I asked him if he had a gift for her. Of course, he hadn't even thought about it. So I told him to stop somewhere and pick up some flowers for her. Flowers are always good on matter what the occasion.

I found this card in the summer, 2014 issue of Card Maker Magazine. There were several different folded cards that I plan to try so be watching for them. Some of them I've done before but some not. I found the directions for this card a bit confusing but maybe it was just me. I'll try to make my directions clear for you.

Materials needed:
Wisteria Wonder card stock 11 x 5 3/8" scored & folded at 2 1/2 & 8 3/8"
Certainly Celery card stock 3 1/2 x 4 1/8"
Pansy punch (#130698)
3 pieces of patterned papers, I did some digging in my scrap box here
            1 piece 4 1/8 x 5 1/4", 1 piece 4 x 5", 1 piece 3 1/2 x 4"
Flower Shop stamp set(#130942)
Teeny Tiny Wishes stamp set (#115370)
Card stock and/or patterned paper for punching 8 pansies
Word Label punch (#119857)
Modern Label punch (#119849)
Brad
various colors of ink, I used:
Strawberry Slush
Bermuda Bay
Marina Mist
Midnight Muse
Ruler

1. Fold on the score lines so the the smallest section is in the front and the full card size section is at the back.
2. Take the piece of Certainly Celery card stock. Measure one short side at 1 3/4." Cut an angle from the 3 1/2" side to the 1 3/4" side.  Adhere this to the short Wisteria Wonder front.
3. Mark the short side of the smallest piece of patterned paper, the one that is 3 1/2 x 4", at 1 3/4." Cut a diagonal from the 3 1/2" side to the pencil mark at 1 3/4." Adhere this to the front of the folded card.
4. With the second piece of patterned paper, measure one 5" side to 3 1/2." Cut a diagonal from the 5" side to the mark for the 3 1/2." Adhere this to the center section of the card. You should have a small border of Wisteria Wonder showing on all sides.
5. Adhere your last piece of patterned paper to the final section of the card. You can place a sentiment on this part of the card. You can either stamp something of cut a piece of white card stock about 3 x 3" and write a short note. Then adhere the white card stock to the center.
6. Punch out 8 pansies. You can stamp and punch using pansies from the Flower Shop stamp set or you can punch them out of patterned paper. I did some of both.
7.  Place adhesive on the bottom half of each pansy. Place each pansy so that it is sticking over the top, as you see in the pictures. I placed one flower shaped brad in the center of one of the  patterned paper pansies. Adhere 4 flowers to each diagonal line.
8. Stamp your Mother's Day greeting to a piece of scrap card stock in a color that will go with the rest of the card. Punch it out with the Word Window punch. Use some of the left over Certainly Celery to punch out a Modern Label punch. Adhere these together and then place on the front of the card.

I hope that these directions are clear for you. Look at the front and back pictures above to help you in understanding how to make this card. When you give this card to that special mother in your life, you might want to include a bouquet of some real, sweet smelling flowers!

Monday, April 21, 2014

Spring Blooms Card


Materials needed:
Elements of Style stamp set (#120045)
Teeny Tiny Wishes stamp set (#115370)
Beyond the Garden patterned paper (#122342) 3 x 4," 4 x 5 1/4"
White card stock 5 1/2 x 8 1/2," 3 1/4 x 4 1/4" plus
Labels Collection Thinlits Dies (#125598)
Textured Impressions Designer Frames embossing folder (#123130)
1/2" Melon Mambo Polka Dot Grosgrain Ribbon (#115611) 2 pcs. one about 3 1/2" and one about 6"
Sherbet Buttons (#116312)
Glue Dots
Stampin' Dimensionals (#104430)
1" Circle punch
Gumball Green marker
Melon Mambo marker
Marina Mist ink pad
Melon Mambo ink pad
Sponge dauber

1. Cut the white card stock and the patterned paper the dimensions listed above.
2. Choose a die from the Labels Collection that is about 2 3/4 x 3 1/4." Using white card stock and the Labels die, cut the card stock with the Big Shot machine. Next, place the embossing folder so that the oval frame is centered in the die. Run this through the Big Shot machine. 
3. Use a sponge dauber and Marina Mist and Melon Mambo ink to color the outer edge of the die cut as shown in the picture. Put blue around most of the die cut with pink at the bottom. I've found that a sponge dauber gives a softer color on card stock than doing a direct to ink pad method of coloring. 

4. Using the Melon Mambo and the Gumball Green markers, color the floral stamp from the Elements of Style stamp set. It is not necessary to color the entire stamp. Look to see how much of this will fit on the die cut. Huff some breath on the ink and then stamp on white card stock. Cut the image out around the outer edges of the image.  Place Stampin' Dimensionals on the back of the flowers and then place them on top of the prepared die. Set aside.

5. Adhere the smaller rectangle of patterned paper to the smaller rectangle of white card stock. Adhere this to the larger piece of patterned paper, placing it slightly to the right side.
6. Adhere a strip of about 6" of ribbon across the patterned paper and card stock rectangles. Wrap the ends around to the back. Score and fold the largest piece of white card stock at 4 1/4."  Adhere the piece with the ribbon wrapped on it to the white base card. You will have a small frame border around the edge of the patterned paper.
7. Get the decorated die cut and apply adhesive to the back. Press  it down to the patterned paper on the right hand side over the ribbon. 
8. On the 3 1/2" piece of ribbon, apply glue dots to the center on the front and back. Then pinch the sides together.

Cut the ends of the ribbon to be even and add an angled cut. Add more glue dots on the back of the pinch. Press this on top  of the ribbon on the card on the left hand end of the ribbon. Place glue dots on the back of a pink button and press on to the knot area of the ribbon.
9. Put glue dots on the back of two more buttons and place them at the top  left hand corner of the card.
10. Punch a circle of white card stock with a 1" circle punch. Dab blue and pink ink around the edge of the circle. Choose a simple greeting from Teeny Tiny Wishes and stamp in the center of the circle. Adhere the circle to the bottom left of the card.
Finish by adding a greeting to the inside or a special note.

Friday, April 11, 2014

Layers with Wisteria Wonder and Crushed Curry

I really like how this card turned out. It could be used for an Easter card, a birthday card or just to celebrate spring. It takes a little while to do all the layers but it's not really hard, just time consuming.

Materials needed:
Afternoon Picnic patterned paper (#131390) Use two different patterns, 4 x 5 1/4" and 2 pieces
                  2 x 3  1/2" each
Wisteria Wonder card stock 4 1/4 x 5 1/2", 2 x 5 1/2", 2 1/4 x 3 3/4"
1/4" Daffodil Delight Grosgrain Stitched ribbon (#126872) 2 pieces each 6" long
White card stock for oval and for flower images and greeting
Flower Shop stamp set (#130942)
Fabulous Florets stamp set (#123027)
Eyelet Border punch (#119853, retired)
Stampin' Dimensionals (#104430)
Old Olive ink pad
Wisteria Wonder ink pad
Crushed Curry ink pad
Coluzel ovals or other oval cutting item
Craft knife

1. Cut all the paper pieces the sizes listed. Adhere the patterned paper on the correct size Wisteria Wonder card stock.You will have 3 pieces now.
2. With the Wisteria Wonder card stock that is 2 x 5 1/2" use the Eyelet Border punch to punch on each of the long sides of this.
3. Place adhesive on the back of each of the pieces of ribbon. Press them to the Eyelet Border that you just punched out. Place them straight across the card stock so that each piece is just beside the eyelets. You will have about 1/4" card stock showing between the ribbon. Wrap the ends around to the back of the card stock.
4. Adhere the 2 smaller pieces of layer paper and card on the large piece. Leave about 1/4" between each of them and about 1/4" border around each of them. Place adhesive on the back of the eyelet border and ribbons. Adhere it across the layers so that the bottom border is about 1" from the bottom of the card.
5. Cut an oval from white card stock. Stamp some leaf or stem images on to the oval using Old Olive ink. 
6. Stamp 4 flower images, 2 with Crushed Curry ink and 2 with Wisteria Wonder ink. Punch out or cut out each image. Adhere them to the center section of the oval. Leave some of the stems or leaves sticking out behind the flower images. Rub the edges of the oval across the Old Olive ink pad to distress it a bit and to make the oval pop off the card. Add Stampin' Dimensionals to the back of the oval and place across the center of the card, covering the layers.
7. Stamp the greeting in the stamp set or choose a greeting of your own and stamp on white card stock with Crushed Curry ink. Cut out around the words of the greeting. Place a Stampin' Dimensional to the back of the left end of the greeting. Place adhesive to the rest of the card. Press it onto the card with part of the saying extending over the oval.
8. Adhere the card front to a card base and place a note or greeting on the inside of the card.

Friday, February 28, 2014

Cutting and Stamping

I've done some things a little bit differently with today's card. When I was a Stampin' Up demonstrator, I felt like I had to use mainly SU! products. While I still love SU, not being a demo any more means I can use any products that I want! And I have lots of products!!
For today's card, I wanted to have something a bit lacy. I looked but found that my supply of doilies was totally empty so I started looking at what else I had available. That led me to my Cricut Expression. I mean, why have a machine, if I'm not going to use it? This is what I came up with combining my Cricut and my Stampin' Up!

Materials needed:
Field Flowers stamp set (#122762)
Melon Mambo card stock 4 1/4 x 5 1/2"
Coastal Cabana card stock, at least 5 1/2 x 6"
White card stock
Cricut Expression machine
Wild Card Cricut Cartridge p. 39
Dahlia Adornments (#127556)
White fiber or yarn
Wild Wasabi ink
Bermuda Bay ink
Baked Brown Sugar ink
Glue Dots (#103683)
Stampin' Dimensionals (#104430)

1. Place the Coastal Cabana card stock on the Cricut sticky mat. Set the machine up for the Wild Card cartridge and use a 5 cutting depth. The cut that I used is found on p. 39 of the Wild Card book. It cuts an oval on both sides.
Cut the two ovals apart and remove all the cut pieces from the design.
2. Place adhesive on the back of the oval frame. It's not necessary to completely cover the design with adhesive. Place it in the center of the Melon Mambo card stock.
3. Stamp the images from the Field Flowers stamp set using Wild Wasabi for the stem and leaves, Bemuda Bay for the flower and Baked Brown Sugar for the seeds.(These are 3 separate stamps.) Stamp this on white card stock. Cut out around the image. Place dimensionals on the back and stick this to the top of the lace oval.
4. Place adhesive directly on to the card stock about 1" from the bottom of the card.
Press the fiber on to the adhesive going across the bottom of the oval and the tip of the flower stem. This is some fiber that I have had for a number of years & I do not remember the name of it. It's real fuzzy and light and sticks easily to the adhesive. Wrap the ends around to the back of the card front.
5. Add some Dahlia Adornments to the top left using glue dots under them.
6. Adhere the card front to a card base to complete your card.


Wednesday, February 19, 2014

Tie up a bunch of flowers

Well, we're not really tying up our flowers but I do hope that you think this card has that look.
Materials needed:
Field Flowers stamp set (#122762)
Greenhouse Gala patterend paper (#117167)
Crisp Cantaloupe card stock 3 x 4 5/8"
Coastal Cabana card stock 2 7/8 x 4 1/4"
Wild Wasabi ink
More Mustard ink
Crisp Cantaloupe ink
3/8" Old Olive Stripe Organdy ribbon (#129291)
3/16" Corner punch
Glue dots

1. Use the corner punch to round all the corners on the Crisp Cantaloupe card stock and the Coastal Cabana card stock. Adhere the Coastal Cabana to the top of the Crisp Cantaloupe. Adhere this to the center of the patterned paper.

2. Cut about 5" of ribbon. Place adhesive on the back and place the ribbon across the patterned paper and the layers of card stock.
3. Stamp the flower image from Field Flowers stamp set on white card stock. First stamp the stem and leaves in Wild Wasabi. Then carefully stamp the bud on the top stem in More Mustard ink. Finally, stamp the flower in Crisp Cantaloupe ink. Cut out around the outside edges of the stamped image. Adhere the flower image to the Coastal Cabana card stock and over the ribbon.
4. Tie a bow with more of the ribbon and cut the ends in an angle. Place glue dots on the back of the ribbon. Place the bow on top of the ribbon and flower stem image.

Hopefully, this will have the look that the ribbon is tied around the flower stems.
5. Adhere the card front to the card back. Add your greeting or message to the inside and send to a friend for a special occasion or just because.

Wednesday, September 25, 2013

Layered Poppies

I just love the Simply Sketched Hostess stamp set! Here's a card I made with it today.

Materials needed:
Simply Sketched hostess stamp set (#129672)
Framelits Window Frame Collection dies (#129021)
Island Indigo cardstock, 4 1/4x 5 1/4"
First Edition Specialty DSP (#121878) 4 x 5 1/4"
Marina Mist cardstock 4 1/2 x 4 1/2"
Whisper White cardstock
Watercolor paper (#122959)
Staz On Black ink
Melon Mambo marker
Gumball Green marker
Primrose Petals marker
Rose Red marker
Stampin' Dimensionals (#104430)
Blender pen (#102845)
3/16" Corner punch (#119871)

1. Use your corner punch to round the corners of your patterned paper. Adhere the patterned paper on top of the Island Indigo cardstock.
2. With your Big Shot and Framelits die, cut the Marina Mist cardstock. The die I used is 3 3/4" square. Adhere this in the center of the patterned paper.
3.  Stamp the flowers with the Staz On ink onto watercolor paper. Use the marker layering technique to color the image. Cut this out with your scissors. Place Stampin' Dimensionals on the back of this image.
4. Use the brush end of the Melon Mambo marker to color the flower part of the stamp. Use the brush end of the Gumball Green marker to color the stems. Huff your breathe on the stamp to moisten it. Stamp 2 images with this on white cardstock. Using the stamp the second time will give you a dark image and a lighter image, as you see on the card.  Cut these out with scissors.
5. Adhere the 2 stamped flowers on the Marina Mist Framelits Window on each side. Pull the protective covering off of the Stampin' Dimensionals on the 3rd flower. Place it in the center of the Window, between the other 2 flowers.
6. Adhere the card front on top of a card base and be ready to send it at your next occassion!

Monday, September 2, 2013

Coloring with Markers

Coloring my images is not my strongest point and especially coloring with markers. I love my SU! markers because all the colors match the paper which matches the brads, which matches the ribbon, etc, etc. You get the idea. But I've always had problems with coloring with markers because I get those yucky marker lines. Well, I found a great tutorial on Split Coast Stampers recently that showed how to color with markers and blender pens. For my first try, I don't think I did too bad.

I've thought about trying the Copic markers and actually bought a couple but I really couldn't see spending all that money for more markers when I already the whole line of SU! markers. This tutorial from Split Coast is good. I like it because it has both the instructions written out and a video. I'll tell you some direcions for it but for a more through tutorial, go to Split Coast Stampers and search for Marker Layering.

Materials needed:
Patterned paper, I used a piece from Twitterpated which is retired 4 x 5 1/4"
Gumball Green cardstock 4 1/4 x 5 1/2"
White cardstock or white watercolor paper
Fabulous Florets (#123027)3/8"
Striped Organdy ribbon, Melon Mambo (#129293)
Pink Pirouette marker
Regal Rose marker
Melon Mambo marker
Basic Gray marker
Black Staz On ink pad
Gumball Green ink
Melon Mambo ink
Aqua Painter (#103954) or Blender Pens (#102845)
Spong Dauber (#102892)
Stampin' Dimensionals (#104430)

1. Stamp your outline images on white cardstock or watercolor paper with black Staz On ink. The watercolor paper will do a better job but cardstock will work.
2. Start with your lightest color marker, Pink Pirouette, and begin coloring your petals. Work with one petal at a time. Use the blender pen or aqua painter to spread the color over the entire petal. Remember, you can always add more color but once the color is there, you can't take it away. Start the petal near the center of the flower and work outward.
3. Next add color to the same petal with the next lightest color, Regal Rose. Don't cover the entire petal but start with a small amount near the flower center. Use the blender pen to make small circles and blend in the marker lines on the petal. Add your final color closest to the center of the flower. Again, use your blender pen to work the color in with the other colors so that the color is lighter at the outer edge of the petals and darker toward the center of the petal.
4. Go to the next petal and repeat the same process. Working one petal at a time, complete all the petals on the flower. Use the Basic Gray marker to outline the petals. This will help them to pop a bit more.
5. Cut out the petals and lay them aside for a bit.
6. On the green patterned paper, stamp 5 of the long stemmed leaves in Gumball Green ink.
7. Wrap the ribbon around the bottom of the piece and tie a bow. Adhere with your adhesive to the paper.
8. Use Stampin' Dimensionals on the backs of two of the flowers that you've colored. Place them on the leaves stamped. The third flower can be place flat with adhesive.
9. Stamp the saying from the set on white cardstock in Melon Mambo ink. Cut around the saying. Use a sponge dauber to add Gumball Green to the edges of the saying. Adhere it to the top right corner of the patterned paper.
10. Adhere this to the larger green cardstock. Place the card front on to a card base and add your greeting or note to the inside.

Hope you had fun coloring with your markers today. If you don't like how they came out, try again. Michangelo probably didn't like his first try either!

Wednesday, August 28, 2013

Doily and Daisy

Yes, I'm using what was still on my work table for today's card.

Materials Needed:
Tangerine Tango cardstock 4 1/4 x 5 1/2"
Old Olive cardstock
Patterned paper 1 x 4 1/4"
Whisper White cardstock scrap
Secret Garden stamp set (#129144)
Really Good Greeting stamp set (#130333)
Doilies (#129399)
Simply Scored Scoring Tool (#122334)
Simply Scored Borders Plate (#126192)
1 3/4" Scallop Circle punch (#119854)
Old Olive ink
Tangerine Tango ink

1. Line your Borders Plate onto your Simply Scored Scoring Tool /board. Line your cardstock up with the embossing border that you want for your card. Place the plastic overlay (that comes with the border plate) over the cardstock. Use your scoring tool to emboss the border that you wish onto your cardstock. Turn the cardstock over to see the embossed border.
2. Adhere your patterned paper (I used some a retired scrap that I had) vertically on the right side about 1/2" from the edge.
3. Crumple the center of the doily somewhat to make pleates in the doily. Adhere this to the center of the card, overlapping the patterned paper.
3. Stamp a flower from the Secret Garden stamp set onto Old Olive cardstock with Old Olive ink. Stamp the same flower on the left hand side of the card within your embossed border. Punch out the flower on Old Olive cardstock with the Scallop circle punch. Adhere this to the center of the doily.
4. Stamp your greeting in Tangerine Tango ink on white cardstock. Cut it out around the outside of the greeting. Adhere it to the bottom left side of the card.
5. Adhere your card front onto your card base and add a note or greeting to the inside of the card.
Have fun stamping today! 

Wednesday, August 21, 2013

Colored Lace

After learning to color and emboss at the same time from Wednesday, Aug. 14 post, I had fun playing around with the ink on my other embossing folders. These are using the Delicate Designs (#127023) embossing folder. I wondered what it would look like with  the opposite side colored. The top picture is using Bermuda Bay ink the way I showed you last Wednesday. Apply the ink inside the side with the Stampin' Up logo. The bottom one would be the debossed side. I applyed the ink to the opposite side to get this effect. I think both of them are pretty but it just depends on what you want on your project.

For this card, I used the embossed look with the ink applied to the logo side.

Materials needed:
So Saffron cardstock 5 1/2 x 8 1/2" scored and folded at 4 1/4"
Whisper White cardstock
Bermuda Bay cardstock
Bermuda Bay ink
Taken with Teal marker
So Saffron marker
Daffodil Delight marker
Delicate Designs embossing folder (#127023)
Secret Garden stamp set (#129144)
Secret Garden Framelits Dies (#129372)
Very Vintage Designer Buttons (#129327)
Mini glue dots (#103683)
Stampin' Dimensionals (#104430)
Beige or Ecru floss

1. Color and emboss the lace from the Delicate Designs embossing folder with Bermuda Bay In Color ink using the technique from last Wednesday. Trim the embossed area and attach to the bottom edge of the folded So Saffron cardstock. Trim the So Saffron around the edge of the embossed design.
2. Using markers, color the flower stamp from the Secret Garden stamp set. I colored the outer petals Taken with Teal and the inner ones with Daffodil Delight or So Saffron. Stamp one with Bermuda Bay ink on Bermuda Bay cardstock.
3. Use the Secret Garden Framelits Dies and your Big Shot machine to cut out the 3 flowers. Use adhesive to place two flowers on the card as shown. Trim the edge that hangs over the card even with the edge of the card. Put 3 Stampin' Dimensionals on the third flower and place it above the other two.
4. Thread the floss through the Very Vintage button. Place glue dots on the back of the button and press onto the card just about the lacey strip on the left hand side.
5. Since I used the So Saffron for my card base, it is not necessary to attach the card front to the card base. With a light colored cardstock like So Saffron, you can stamp or write a greeting or note on the inside of your card.
Have a scrappy good day and God bless you as you make cards for others.

Monday, August 27, 2012

Twitterpated Fabric Flowers

More fun playing with my Twitterpated Designer Fabric (#125412)!

  1. The background paper is from the Twitterpated DSP (#125406). I just love how all the colors go together so well with my SU! products. I don't have to worry if they will match or not!

2. Using the Top Note Bigz Die (#113463) and my Big Shot, I punched my fabric with the die to add to the background. It adhered it with my regualar adhesive.

3. To make this cute art deco flowers, I cut circles using an Original Sizzix Circle die. I cut several circles of 2 different sizes and fabrics. Layer them together with each one off center a bit. I rubbed the top ones on my Primrose Petals In Color ink pad to give a bit more color. The brad is from the Summer Smooches designer fabric brads (#125589). I pulled a few threads on the circles to distress it just a bit.

4. The other flower is fabric cut with an Original Flower Power Sizzix die. I punched a Fancy Flower(#118073) punch through some designer paper from the Brights Collection (#117155) paper stack for my bottom petal. The other petals are fabric petals cut from the Twitterpated Designer Fabric.  This brad is from the In Color Printed Designer Brads (#122940).

I hope you like what I've done with adding the fabric element to my cards. Give it a try to yours for something a little different!

The ribbon tied around the left side is Marina Mist 1/4" grosgrain ribbon (#120929).

Saturday, July 7, 2012

A Mound of Petals

For today, we've got a mound of orange flowers sitting on an orange flower background.

  1. Use a 4 1/4 x 5 1/2" piece of Certainly Celery cardstock for your background.

2. On a piece of 4 1/4 x 5 1/2" Tangerine Tango cardstock, stamp repeated flowers all over the cardstock with Tangerine Tango ink. This tone on tone look gives you a nice solid garden look.

3. Cut around the flower edges.


4. With the Trio Flower punch (#109183) from the 2009 SU! catalog, punch about 36 flowers. Since this punch is no longer available, if you don't already have it, you could use the Itty Bitty Shapes Punch(#118309). This punch has 3 shapes on it, one of which is a bitty scallop circle. It is very close to the same size as the trio flower. It will probably give you a slightly different look, but I think that it would still work fine.

5. Punch 2 flowers with the 5 petal flower punch (119880). This punch is designed for flowers but I've always thought it made great leaves. This punch is retired also but SU! has a punch called Blossom Petals Builder(#121808). It has several shapes on it that would be good for leaves also.
6. Place the leaves on top of the Tangerine Tango images that you stamped. You will want them to be a bit to the right of center.


7. Place 2 Stampin' Dimensionals(#104430) on each leaf. They do not have to be center. With a little experimenting, I found that 2 works a lot better than just one for the dimension that you want for this project. 

8. Using the end of an embroidery hook and a soft  mouse pad, push into the center of each petal. You want to give the petals some curve to make them somewhat concave in shape. There may be tools especially made for this purpose, but I've found my embroidery hook works just as well.

9. Doing the petals one at a time, place 2 or 3 petals on each of the dimensionals that you placed on the leaf. With the other petals, place a dot of liquid or school glue on the back of each petal, still working one at a time. Place the petal around the petals that you've already put on the dimensionals. You will want to overlap these and even place some on top of others until you have the look you want. I have some tweezers that I've had for years that I just love to use for working with small pieces.

10. Allow the petals about a 1/2 hour for the glue to dry before you continue.

11. Cut 2 pieces of 3/8" Gumball Green Satin Stitched Ribbon(#126848), one piece about 4 1/2" and the other piece about 6." Apply adhesive to the back of the ribbons and place them on the right and top of the card, overlapping at the corner.

12. Stamp a greeting from Teeny Tiny wishes stamp st(#115370) in Gumball Green ink onto white cardstock.

13. Punch it out with the Word Window punch(#119857). Ink the edges with Gumball Green ink.

14. Punch out a Modern Label punch(#119849) from Certainly Celery cardstock. Ink the edges wotj Gumball Green ink.

15. Adhere the greeting on top of the Modern Label punch.

16. Punch a hole at each end with your 3/16" circle punch.

17.Add a brad from the Everyday Enchantment Brad set (#126126) that was in the 2012 Sale-a-Bration catalog. If you don't have those, SU! has some fabulous new brads available this year in patterns. I just love, love, love patterned brads!

18. Attach this onto you Whisper White card base and you are ready to give it away!

Friday, July 6, 2012

Roses and Doilies

I do like it when I can use more than one stamp set on a card. I actually used 3 different stamp sets for this card, Delicate Doilies(#122592), Elements of Style (#120045) and On Your Birthday (#111664, retired).

  1. Cut a 4 1/4 x 5 1/2" piece of paper from Summer Smooches DSP(#125409) for the background piece.

2. Stamp 2 different doilies in Raspberry Ripple and Gumball Green In Color ink. Stamp the birthday greeting from Raspberry Ripple ink on Whisper White cardstock.

3. Using Raspberry Ripple and Gumball Green brush tip markers, color the roses and leaves directly onto the stamp. If you've not done this before, check out my tutorial on it here. 

4. Pop out the doilies using the 2 1/2" Circle punch(#120906). Adhere one to the bottom right of the background paper, going slightly off the edge. Adhere the other doily to the top left of the background paper, again going slightly off the edge. Trim the parts that go off the edge.

5. Cut around the edges of the roses that you stamped.

6. To make the roses pop, add SU! Stampin' Dimensionals (#104430) to the back of the image. For larger images like this, I like to use up my edges that are left on my dimensionals sheet. Just snip the length that you need from the edge and apply in the same way you do regular dimensionals.


7. Cut the greeting out with the Large Oval punch (#119855) and ink the edges with Raspberry Ripple In Color ink. Apply adhesive to the back and place on the bottom left corner below the roses.

8. Cut 2 pieces of Marina Mist 1/2" Scallop Dot ribbon(#122986) each about 6" long. Apply adhesive to the back of one piece and place it on the card front over the lower doily.

9. Tie the other piece in a bow. Using glue dots (#103683), put 3 on the back of the bow. Press it down over the other ribbon at the top right of the card.

10. Adhere the card front to the card base and add a greeting to the inside of your card.

Wednesday, June 6, 2012

Life's Moments card

I don't do a lot of pinks but I was just in a pink mood today. Maybe the greens will off set the pink enough so that you don't feel like you've got to find some of that pink medicine for your stomach! lol

For this card, you use pink patterned paper from the Brights Collection Paper Stack(#117155). Cut the background paper to 4 1/4 x 5 1/2," the stripe paper(which is the reverse side of the other pink) to 3 1/4 x 2 1/2." The green layer is 3 x 5."

Use the scallop trim border punch(#118402) to make the border on the green and the pink stripe. Only punch one end because the other end is even with the edge of the card.

Tie a bow in a strip of Old Olive 1/2" grosgrain striped (#113883) ribbon and adhere it to the center portion of the card, on top of the layers.

Stamp 3 flowers from Printed Petals (#120444) stamp set in Melon Mambo, Regal Rose and Pink Pirouette classic ink. Cut the flowers out. The center flower can be punched with the 1 3/4" scallop circle (#119854) punch.

Punch a hole in the center of the flowers and add a small brad.

Using Certainly Celery cardstock, cut a framelit from the labels collection(#125598) and your Big Shot.

Stamp your greeting on the label frame in Melon Mambo ink and use a sponge dauber to ink the outside edge with Melon Mambo ink. The saying here is from the Elements of Style(#120045) stamp set.

Place SU! Dimensionals(#104430) on the back of the framelit and adhere above the ribbon. Place onto your card base and put a special note on the inside of your card.

Saturday, May 5, 2012

Hummingbird

Sorry I don't have a project or technique for you today. The truth is that I've been super busy. Between grandchildren, church & my garden, I'm doing good to have time to even think. I even had to start putting up my summer crookneck squash this week. I mean, I love fresh squash but how many days in a row can you eat it! lol Hope you enjoy this card.
  1. The background paper for this card was made using the waxed paper technique. To see how to do this click here.

2. The floral image and the hummingbird is from the Elements of Style(#120045) stamp set. The hummingbird is stamp with Melon Mambo classic ink and cut out around the outside edges of the image.


3. The floral image was colored with Melon Mambo, Pixie Pink, Old Olive and Wild Wasabi Stampin' Write Markers. To see how to stamp multiple colors with one stamp click here.

4. Tie 1/2" Old Olive striped grosgrain ribbon(#113883) around the card in a knot. Adjust the ribbon so that the knot is in the upper 1/4 of the card.

5. Adhere your colored image overlapping the ribbon. Place the hummingbird so that is beak is near one of the flowers. Use Stampin' Dimensionals (#104430) on the back of the bird so that he pops above the flowers.

6. The "Thanks" greeting is from Perfect Punches (#120516) stamp set in Melon Mambo classic ink. It was punched out with the scallop oval (#119856) punch. One of the advantages of using SU! punches with SU! stamps is that so many of them go together. It's much easier to use the punch to cut something like this out than it is to use your scissors!

7. Again, this was popped up with some Stampin' Dimensionals on the back.

8. Now adhere the entire card front to your card base and you are ready for a super stamped greeting on the inside or one of your own handwritten greetings.

Saturday, March 21, 2009

Happy Spring!


Happy Spring everyone!
I know I'm a day late but that just shows you how much attention I pay to the calendar. Here in Central Texas we have been having beautiful weather this week. We had rain last week but that was the first time in quite a long time. The "people who know" have said that it wasn't enough to break the drought so we'll all have to pray for more rain. The farmers need it badly. We all do really!

This great spring weather makes me feel like going for a ride in a pick up truck with all the windows rolled down. That's what I was thinking as I put this card together. The bluebonnets are doing very well this spring because we haven't had enough rain for them but the ones in my front yard & flower bed look really nice! So let's load the back of the pickup with some flowers & take them over to visit friends.

This card is made with a Tempting Turquoise background. I inked my Stampin' Around Fast Flowers wheel with Tempting Turquoise classic ink and ran it across the background paper. Looks like we're trucking through a field of flowers. I made my Stampin' Pastels pop with my blender pens. Just use your blender pen to dip onto the color of pastel that you want to use. Then put it onto your card. Do this lightly & gradually blend the color out onto the image. You'll get a great watercolor look.

I love this Loads of Love stamp set and the accessories set too. That's where this cool pickup came from and the girl & flowers in the bed. This set has some cool phrases with it including "friends for the long haul," "driving by with a birthday hi" and "thought you could use a little pickup!" I'll use the "loads of love!" to send a big hug to all my friends!