Wednesday, April 16, 2014

Mimi's Cupcake

I picked up a few cute stamps at Hobby Lobby a couple days ago. I just thought the little "Mimi" girl was so cute!
Materials needed:
Sweet Thing stamp by Penny Black
Mimi in Paris stamp set by Penny Black
Melon Mambo card stock 2 3/4 x 3" & 4 1/4 x 5 1/2", 1 1/4 x 1 x 1 1/2"
Blue Dot patterned paper from Quick Cards Magazine 4 x 5 1/4"
International Bazaar patterned paper SU 3 1/2 x 4 1/2"
White card stock
Eyelet Border Punch SU
Corner Rounder punch
Watercolor pencils
Blender pen
Brights Collections Buttons
Floss or thread
Glue dots
Early Espresso ink

1. Use the Eyelet Border punch to create the border on one short side of the green patterned paper.
2. Adhere the blue dot paper to the Melon Mambo card stock. Adhere the green patterned paper on top of the blue dot paper.
3. Round each of the corners on the 2 3/4 x 3" Melon Mambo card stock. Adhere it on top of the green patterned paper about 1/2" above the top edge of the card.
4. Stamp Mimi on white card stock with Early Espresso or Basic Black ink. Use the watercolor pencils and the blender pen to color the stamped image. Cut it out around the edge of the stamped image. Adhere it to the center of the Melon Mambo card stock.
5. Round the corners on the smallest piece of Melon Mambo card stock. Stamp "for you" from the Mimi in Paris stamp set in Early Espresso ink on the Melon Mambo card stock. Adhere it to the bottom right hand corner of the card, over the eyelet border.
6. Thread floss or thread through the eyes of the button and tie. Use glue dots to adhere the button to the top right of the greeting square.
7. Adhere the card front to a card base and you are ready to send Mimi's cupcake to someone special.

Monday, April 14, 2014

Hybrid Easter Bunny

I recently discovered www.daisytrail.com. At this sight, you can find loads of cute digital items for cards & scrapbooking. You can also get the Serif Craft Artist program for free. They do have a more complete program for sale but the freebee is a good start. They also have several digikits for free. When you download the program, they also give you a voucher for $10  of free stuff.

Here is the card that I made tonight.
Materials needed:
Serif Craft Artist program
FM Occasions digikit
White card stock
Certainly Celery card stock 5 1/2 x 8 1/4"
Afternoon Picnic patterned paper (#131390) 4 x 5 1/4" plus
Pool Party card stock 2 x 4"
Melon Mambo card stock 1 1/2 x 3 1/2"
Windows Frames die set
Corner Rounder
Stampin' Dimensionals (#104430)

1. Using the Craft Artist program, choose a bear from the FM Occasions digikit. Move it the to project area and size. Use the font that comes with the digikit to make your greeting. Print them on white card stock and then cut them out.
2. Score and fold  the Certainly Celery card stock at 4 1/4." Adhere the patterned paper to it.
3. Adhere the Pool Party card stock next about 3/8" from the bottom of the card.
4. Use your Big Shot machine to cut out 2 of the window dies that will fit on top of each other. Use the patterned paper for this. I made the reverse side the larger window and then the same side as the background paper for the smaller one. Adhere both of these pieces on to the card front. The wisteria checked window will overlap the pool party card stock. Then adhere the smaller one on top of it.
5. Adhere the Melon Mambo card stock on the Pool Party card stock. This time you will overlap the bottom of the window die cut piece slightly.
6. Cut out the greeting to measure 1 1/2 x 2 1/2". Round the corners. Adhere this above the Melon Mambo card stock. I let the bottom of the greeting go over onto the Pool Party.
7. Place Stampin' Dimensionals on the back of the Fizzy Moon bear and place on top of the window die cuts.
8. Add a special note to a special child on the inside and you are ready for Easter.

Friday, April 11, 2014

Layers with Wisteria Wonder and Crushed Curry

I really like how this card turned out. It could be used for an Easter card, a birthday card or just to celebrate spring. It takes a little while to do all the layers but it's not really hard, just time consuming.

Materials needed:
Afternoon Picnic patterned paper (#131390) Use two different patterns, 4 x 5 1/4" and 2 pieces
                  2 x 3  1/2" each
Wisteria Wonder card stock 4 1/4 x 5 1/2", 2 x 5 1/2", 2 1/4 x 3 3/4"
1/4" Daffodil Delight Grosgrain Stitched ribbon (#126872) 2 pieces each 6" long
White card stock for oval and for flower images and greeting
Flower Shop stamp set (#130942)
Fabulous Florets stamp set (#123027)
Eyelet Border punch (#119853, retired)
Stampin' Dimensionals (#104430)
Old Olive ink pad
Wisteria Wonder ink pad
Crushed Curry ink pad
Coluzel ovals or other oval cutting item
Craft knife

1. Cut all the paper pieces the sizes listed. Adhere the patterned paper on the correct size Wisteria Wonder card stock.You will have 3 pieces now.
2. With the Wisteria Wonder card stock that is 2 x 5 1/2" use the Eyelet Border punch to punch on each of the long sides of this.
3. Place adhesive on the back of each of the pieces of ribbon. Press them to the Eyelet Border that you just punched out. Place them straight across the card stock so that each piece is just beside the eyelets. You will have about 1/4" card stock showing between the ribbon. Wrap the ends around to the back of the card stock.
4. Adhere the 2 smaller pieces of layer paper and card on the large piece. Leave about 1/4" between each of them and about 1/4" border around each of them. Place adhesive on the back of the eyelet border and ribbons. Adhere it across the layers so that the bottom border is about 1" from the bottom of the card.
5. Cut an oval from white card stock. Stamp some leaf or stem images on to the oval using Old Olive ink. 
6. Stamp 4 flower images, 2 with Crushed Curry ink and 2 with Wisteria Wonder ink. Punch out or cut out each image. Adhere them to the center section of the oval. Leave some of the stems or leaves sticking out behind the flower images. Rub the edges of the oval across the Old Olive ink pad to distress it a bit and to make the oval pop off the card. Add Stampin' Dimensionals to the back of the oval and place across the center of the card, covering the layers.
7. Stamp the greeting in the stamp set or choose a greeting of your own and stamp on white card stock with Crushed Curry ink. Cut out around the words of the greeting. Place a Stampin' Dimensional to the back of the left end of the greeting. Place adhesive to the rest of the card. Press it onto the card with part of the saying extending over the oval.
8. Adhere the card front to a card base and place a note or greeting on the inside of the card.

Wednesday, April 9, 2014

Easy Peasy Bunny

This is an easy card that you can make in 20 minutes or less.

Materials needed:
Marina Mist card stock 5 1/2 x 8  1/2" scored and folded at 4 1/4"
Delicate Dots patterned paper (retired) 4 x 5 1/4"
Birds of a Feather patterned paper (#126899) 2 1/2 x 3 3/4"
White card stock
Watercolor pencils
A Little Bit of Spring stamp set (#126011, retired)
Regarding Dahlias stamp set (#130327)
Framelits Labels dies (#125598)
1 3/8" Circle punch (#119860)
Stampin' Dimensionals (#104430)
Decorative scissors
Marina Mist ink

1. Run a medium sized die centered on the delicate dots patterned paper through your Big Shot machine.
2. Cut the top edge of the patterned paper with the decorative scissors. I used a grass cut. Adhere this to the back of the 4 x 5 1/4" paper positioning it at the middle of the label die cut.
3. Adhere this to the Marina Mist card stock leaving a small border around the edge.
3. Stamp a bunny on white card stock. Color the bunny with watercolor pencils. Cut the bunny image carefully around the outer edge. Stamp a greeting with Marina Mist ink on white card stock. Punch out the greeting with the circle punch. Rub the edge of the circle on the ink pad to ink the edges.
4. Place the bunny above the paper in the center of the card. You may overlap some of the bunny on the paper, if needed.
5. Place Stampin' Dimensionals on the back of the greeting circle and adhere to the bottom left side of the card.

Monday, April 7, 2014

Springy Pink & Embossed

This card has a spring like feel to it with a feminine touch. If you want a card that is real girly girl, this is the one for you.
You'll spend most of the time to make this card with inking and embossing. It takes a while but you get a really pretty look. If you've never done any heat embossing before, you might find this project a little difficult.

White card stock 5 1/2 x 8 1/2" for base card, 4 x 5 1/4", 3 x 3 3/4", 2 3/4 x 3 1/2",1 3/4 x 2 3/4",
                           1 3/8 X 2 3/8"
Pale pink card stock2 X 3", 1 1/2 X 2 1/2"
Marina Mist ink
Regal Rose ink
More Mustard ink
Versa Mark ink
Clear Embossing Powder
Regarding Dahlias stamp set (#130327)
Trust God stamp set (#126702)
3/8" Melon Mambo Striped Organdy ribbon (#129293)
Sherbet Buttons (#116312) or other buttons that has a pale pink
Paper Piercing Pack
Paper Piercing Tool
Paper Piercing mat or mouse pad
Glue Dots

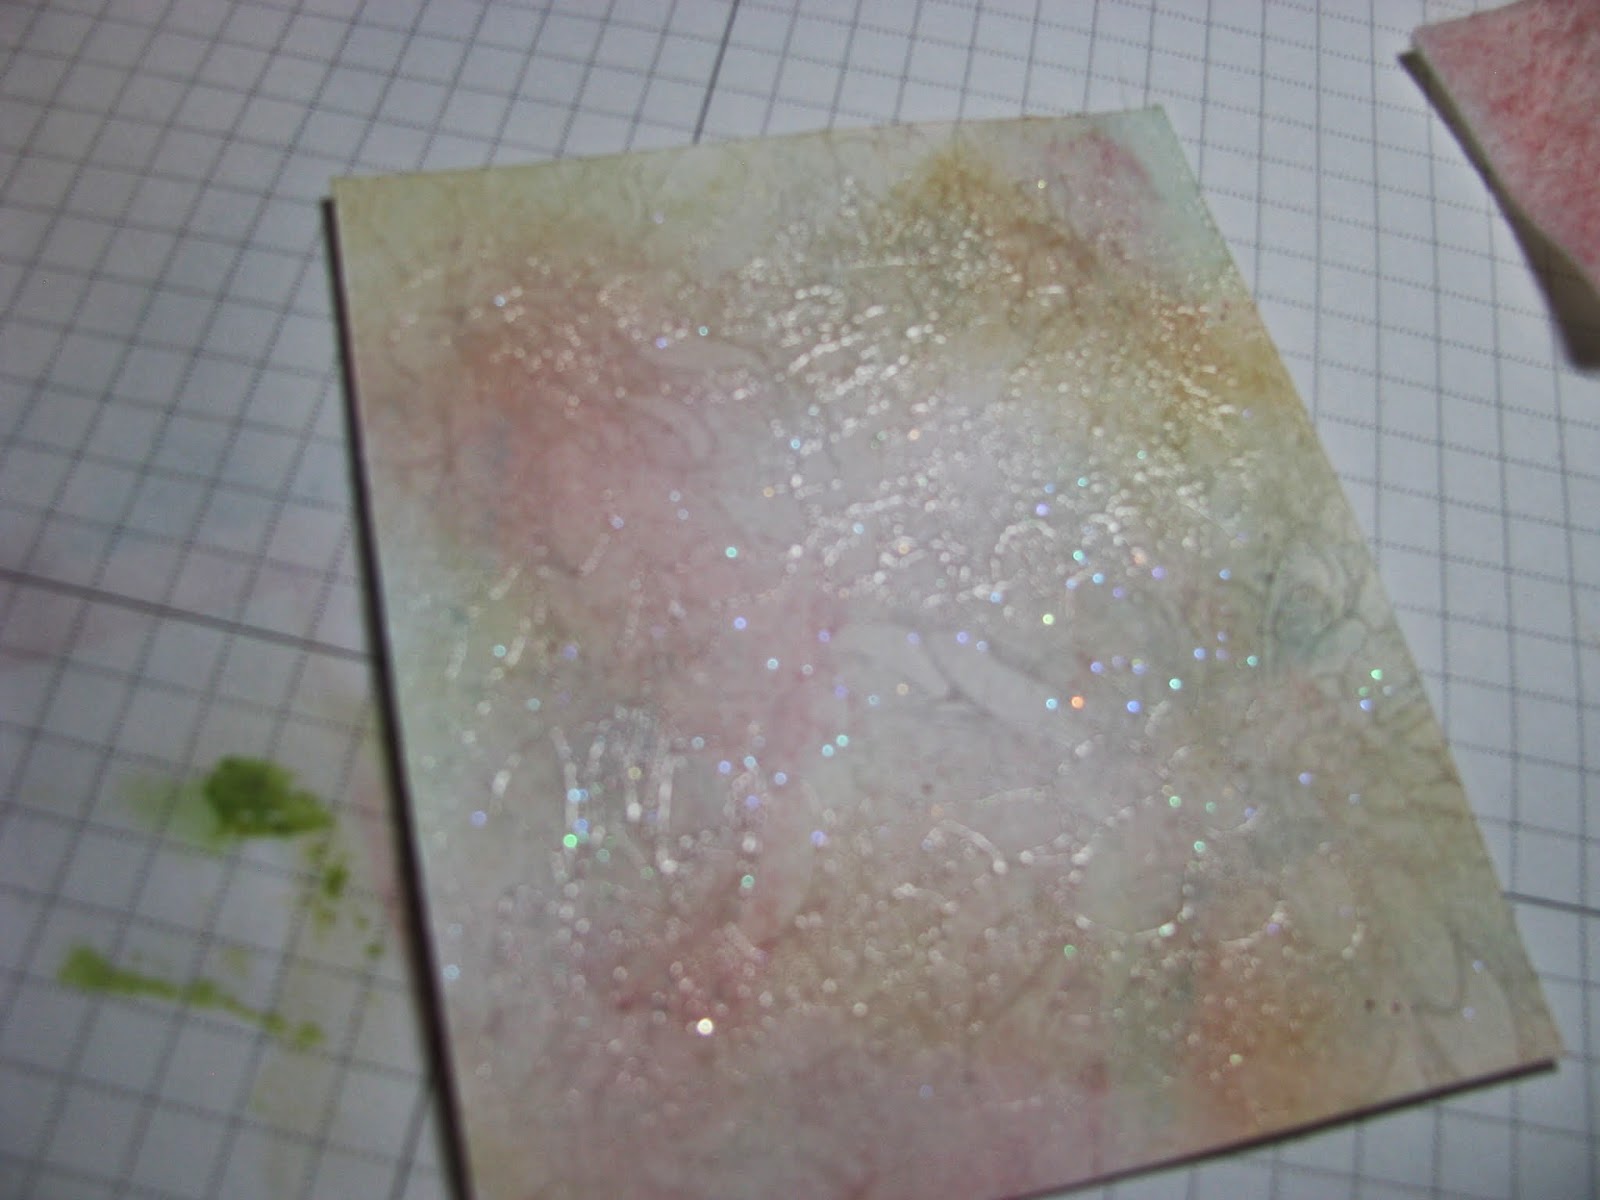
1. Distress the 4 x 5 1/4" piece, the 2 3/4 x 3 1/2" piece and the 1 3/4 x 2 3/4" piece of white card stock. I start with the yellow ink. Dab the felt or other distressing medium on the More Mustard ink pad and then directly onto the white card stock. Next, do the same thing with the Regal Rose ink going over top of the More Mustard. Finish with the Marina Mist ink over the Regal Rose. You will not cover the card stock solid with any one color. As you dab the ink onto the card stock, use a rubbing motion to get a good coverage around the card stock.


 2. Ink your image (I used the dahlia from the stamp set) with the Versa Mark ink. Stamp it randomly around the distressed card stock.
3. Place the card stock in a tray, on a lid or a sheet of paper. Sprinkle clear embossing powder to cover the card stock.

Shake off any excess powder. Return excess powder to the jar to use in your next embossing project.
4. Heat the entire card stock until the embossing powder melts.
When it is melted, it will have a glossy, shiny look.
Repeat this technique with the 3 pieces of white card stock.
5. Adhere the embossed card stock on to the plain white card stock leaving about 1/8" border all the way around each piece. The smallest embossed piece should be adhered to a piece of pale pink card stock. Layer the layers according to size with the smallest on top.
6. With the smallest piece of card stock, stamp a greeting from the Trust God stamp set in the center with Regal Rose ink. Use Marina Mist ink to distress with the blue around the outer edge of the card stock. Adhere it to the other piece of pale pink card stock with a border around the greeting piece.
7. Using the Paper Piercing tool or a very sharp needle(not recommended but it will work) punch holes all the way around the white card stock with the saying. Adhere this to the bottom right side of the card, overlapping the other layers.
8. Wrap ribbon around the right side of the card and tie in a bow. Sometimes I use glue dots to keep my bow in place.
9. Place glue dots on the back of a large pink button and adhere to the top left rectangle as shown in the picture.
10. Adhere the card front on to the card base, leaving a white border all the way around the card.


Friday, April 4, 2014

Ink Pad Watercolor Look

This is a background technique.

Materials needed:
Serene Silhouettes stamp set (#127324)
Watercolor paper 4 x 5 1/4", 2 3/4 x 3"
Wild Wasabi card stock 3 x 3 1/4", 4 1/4 x 5 1/2"
Crumb Cake ink pad
Summer Starfruit ink pad
Pistachio Pudding ink pad
Mister or spray bottle
1" Rose Red Double Stitched Grosgrain Ribbon (#111846)
Red buttons
Glue dots
Paper towel

1. Press a juicy ink pad onto the watercolor pad. I like to use 3 different colors for a good look.


2. Spray water directly onto the ink with a mister or a small spray bottle.
You want the ink to be wet so it will move around the paper.
If desired, you can tilt the paper for the ink to run on the page. Blot (don't rub) the wet ink with paper towel.

You may add more color from the ink pad & mist again if you wish until you get the color you want. Remember, this is paper so don't keep spraying until the paper falls apart. 
The paper may curl but you can flatten it out.
3. Stamp a silhouette image randomly onto the background while the paper is still wet. This will give the paper a stippled look.
4. Color another background piece that will be for the embellishment. When it is dry, stamp a silhouette image on to it. Mount it on solid card stock.
5. Decorate the card front with ribbon, buttons, etc to complete the card front.
You can make a background paper like this using any colors you choose. I almost always use 3 different colors for it. On this next one, I wanted brighter colors, so I used Strawberry Slush, Crushed Curry, and Island Indigo.
Other materials used:
Island Indigo card stock
White card stock
Certainly Celery 5/8" Grosgrain ribbon
Candy Dots subtles (#130933)
Candy Dots brad base (#132293)
Early Espresso ink


Wednesday, April 2, 2014

Stripes and Grasses with Left Overs

For this card, I was using some scraps of materials that I've had  laying around for a while. I can't give you the exact pattern name or item # on most of these.

Materials needed:
Striped patterned paper 3 x 5 1/4" (this is paper that was in my scrap box)
Night of Navy card stock 4 1/4 x 5 1/2"
White card stock
Striped ribbon 1 1/4" wide (this is SU ribbon that's been retired a few years)
Just Believe stamp set (#120453)
Teeny  Tiny Wishes stamp set (#115370)
Filigree Brads (#112577, retired)
Old Olive ink

1. Stamp the images from the Just Believe stamp set with Old Olive ink on white card stock. Stamp the greeting in the center of the label stamp. Cut them out.
2. Adhere the yellow patterned paper to the Night of Navy card stock with 1/8" border on 3 sides.
3. Cut the wide ribbon to fit and adhere it over the card stock and patterned paper so that there is an 1/8"  border all the way around.
4. Adhere the stamped images as shown on the card.
5. Punch a hole in the bottom right side. Add a large brad to the card.
6. Adhere the completed card front to a card base and sign your creation.
It can be easy to go through your left overs and scraps to make cards. Sometimes you just have to put them together. I know that I need to use up more of my materials instead of always going out to buy more new!