This is the cross that I made for my son-in-law's Christmas present. He is a chaplain in the US Army so I made his in shades of dark green with the US Army logo in the center. The logo is a sticker from another company. I mounted it on a small, circle of chipboard first to give it a bit more height. Here is my tutorial for making these.
1. Start with an 8 x 10" piece of matboard that you can find at your local craft store for about $2. If you plan to make a lot of them, you can have a large sheet of mat board cut in to 8 x 10 pieces. My craft store charges $7.99 for the mat board and 50 cents for each cut. With my 40% off coupon, I get 16 pieces for about 78 cents each.
You will also need: beads of your choice and color in varying sizes, including seed beads(save the seed beads for the very last), 8-10 toothpicks, cross pattern on my patterns page(see my blog list), Mod Podge in both matte and gloss finishes, and a sponge brush.
2.
Center the pattern over the mat board. If you hold it up to the light, you can see how to center it easier. Using a ball point pen, trace firmly around the pattern. You will want to leave an impression on the mat board.
3.
Choose a small bead (not seed beads) to thread and use for your outline. You can use a matching color or contrasting color for this. I thread mine on regular sewing thread with a floss threader but you can use jewerly "thread" and a jewerly threader, if you already have those. You will need to thread about a yard (36") for your outline. Be sure to knot the end of the thread before you start stringing the beads.
4. Pour a small amount of the matte finish Mod Podge into a small bowl or container. Using a toothpick, outline the impression of the cross on your mat board with glue. Only do a few inches at a time. Then lay your string of beads onto the glue. Continue until the outline is completed in your beads.
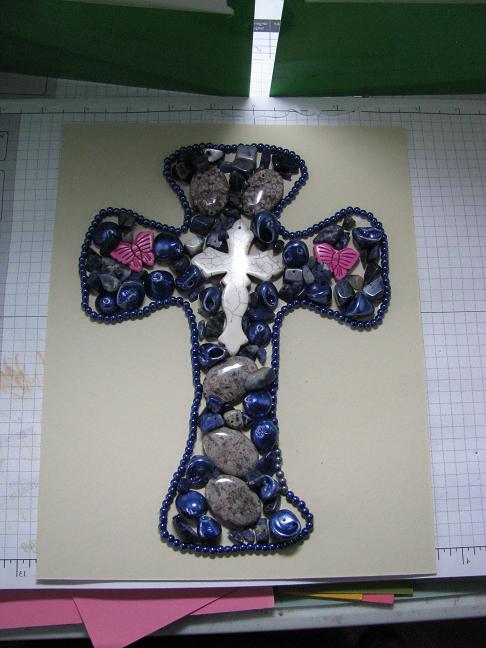
5. Place your gems/stones/items on your cross to see what basic arrangement you want for your cross. You should use several large stones like you see here and also lots of smaller stones like in the next picture. After you decide on your basic arrangement, remove the stones to begin your glueing.
6.
First glue your larger stones in place with the Mod Podge. They dry fairly quickly so you really don't have to wait before you start filling in the rest. Pour glue into the larger areas and spread it around with a toothpick. You will want the glue to cover an area all the way to the edge of the bead outline.
Do one small area at a time. Use toothpicks to help you arrange the beads so that they cover most of the area. When you are satisfied with your arrangement, then you will need to fill in any empty areas with seed beads.
Allow this to dry for several hours or overnight. When the glue is dry, I always turn mine over to remove any loose beads, especially loose seed beads. Check for any more empty spaces you might have overlooked. You want to have it all filled in with beads.
7. Your final step is to coat all the beads with the Mod Podge gloss finish.
This will seal in everything. Be careful not to get glue outside the bead outline. While it dries clear, too much on the outer area can look messy and spoil the picture. Give it at least 24 hours to dry. The mat board may warp some because of the moisture but it will flaten out easily. Add a frame for a super look and hang on your favorite wall.
This picture is not completely dry so you can still see white areas of glue. This is the one I did for the tutorial. It will be a Christmas gift for one of my children or grandchildren.
You can also add special items to these crosses. I've made one for my son for Christmas where I included some pins that belonged to my father. A friend made one using old jewerly that had belonged to her grandmother. You can make these as personal as you want or just a pretty picture.
Hope you enjoy doing these. Framed, they make great gifts for loved ones or for anyone who loves our Jesus.


Thank you so much for doing this Judy! I just think they are so beautiful!
ReplyDeleteI am going to try a smaller version on my craft mat and see if it comes off, then I want to try to make one to hang on the wall!
Hugs - RED
Absolutely beautiful!! Thank you for sharing.
ReplyDeleteBeth