Embossing can add an extra dimension to your cards or scrapbook pages. Embossing creates a feel on your cards that reach a persons sense of touch. I happen to be a very tactile person and really enjoy anything touchy-feely. Maybe, that's why I add so many brads, ribbon, flowers, etc to my cards.
There are two types of embossing--dry and heat embossing. Today we will look at dry embossing. On Thrusday, we will explore heat embossing. Dry embossing has become easier through the years but the easiest ways require more equipment, ie, a die cut machine. It can still be done without the machine.
 1. Through the years, there have been many companies that made brass embossing stencils or templates. They are usually fairly inexpensive. All the ones that I have are at least 10 years old so I did Googled it to see if they are still available. I got over 6 million hits, so they should still be pretty easy to find, if not in local stores, then online.
 3. To get the embossing texture, place the stencil between the light source and your cardstock. Then use your stylus to trace inside your design, pressing firmly.

I rubbed Daffodil Delight classic ink over it so it could be seen better. This can then be cut out, either around the outside or in a box, and placed on your project.
 5. Another form of embossing stencils is in folders. These have the brass stencil inside a plastic cover and are made mainly by Sizzix.
6. To emboss with these, you place the cardstock inside the folder and then run it through a die cut machine, like the Big Shot. They also work with many other machines.

7. The next type of dry embossing is with Texturz Plates. They do large background areas and require a silicone rubber pad and am impressions pad when you run them through the die cut machine. They measure 8 x 5 7/8" and have a design on both side of the plate. That way you get two designs with each plate.
 8. The easiest way to do dry embossing is with embossing folders. These are made by many companies but Stampin' Up! does have some really nice ones. These require the use of a die cut machine.
9. You have to build a "sandwich" for your machine by placing a cutting pad down on your work surface. Then place your cardstock inside the embossing folder and laying it on the cutting pad. Place your second cutting pad on top. Place the sandwich on the Multipurpose Platform that comes with the Big Shot.
 10. You are ready to run your sandwich through the machine. This creates the embossing on to the cardstock with you having to extend any more pressure than it takes to turn the crank.
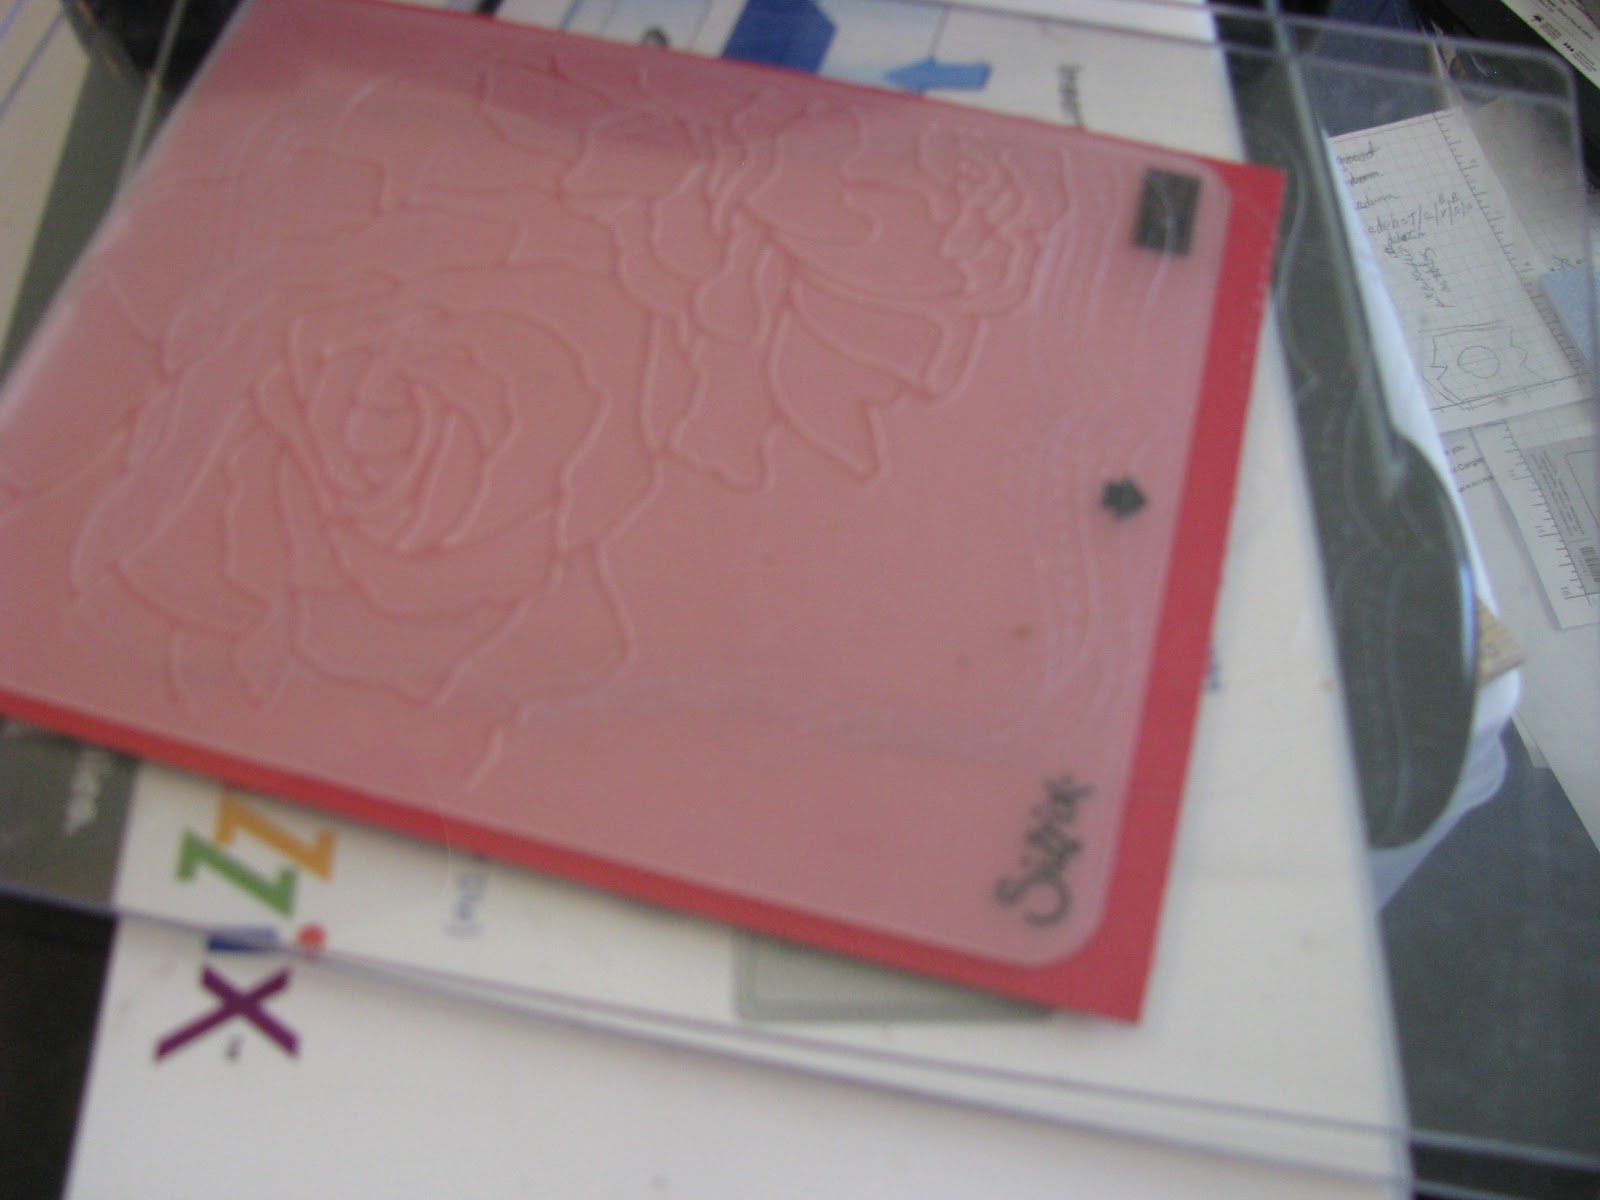
 On this picture, you can see the rose impressions that have been embossed on the red cardstock. You can place your embossing image on your paper project to enhance the look and feel. There is nothing quite like texture!
 This picture shows the reverse side of the cardstock. I don't know if you can tell the difference in the picture but this side has the impression going down. This side is called debossing and can be used also, if you wish.
I like my Big Shot for many reasons but one reason is that I can use almost any embossing folder or die from any company and they fit. To me, that makes it a very versatile machine. I have other cutting machines but my Big Shot is still my favorite.
There are two types of embossing--dry and heat embossing. Today we will look at dry embossing. On Thrusday, we will explore heat embossing. Dry embossing has become easier through the years but the easiest ways require more equipment, ie, a die cut machine. It can still be done without the machine.

2.  To work with these stencils, you need a light souce, like a light box or table or even a window, and a stylus. (Actually, I've even used a crochet hook.)
 To work with these stencils, you need a light souce, like a light box or table or even a window, and a stylus. (Actually, I've even used a crochet hook.)

4. This  is what the smaller flower on this stencil will look like.
 is what the smaller flower on this stencil will look like.
I rubbed Daffodil Delight classic ink over it so it could be seen better. This can then be cut out, either around the outside or in a box, and placed on your project.


6. To emboss with these, you place the cardstock inside the folder and then run it through a die cut machine, like the Big Shot. They also work with many other machines.

7. The next type of dry embossing is with Texturz Plates. They do large background areas and require a silicone rubber pad and am impressions pad when you run them through the die cut machine. They measure 8 x 5 7/8" and have a design on both side of the plate. That way you get two designs with each plate.
9. You have to build a "sandwich" for your machine by placing a cutting pad down on your work surface. Then place your cardstock inside the embossing folder and laying it on the cutting pad. Place your second cutting pad on top. Place the sandwich on the Multipurpose Platform that comes with the Big Shot.


I like my Big Shot for many reasons but one reason is that I can use almost any embossing folder or die from any company and they fit. To me, that makes it a very versatile machine. I have other cutting machines but my Big Shot is still my favorite.
No comments:
Post a Comment