Pastels or chalks are really easy to work with because they are practically goof-proof. Many years ago, when I started teaching elementary school, chalks were one of my favorite things to use in coloring posters for my classroom. I think one reason that I like them, aside from the goof-proof factor, is that one the tools you use to work with chalks is one that you always have with you, your fingers. Fingers are great for smoothing and blending the chalks. There are many different ways to buy chalks but one of the best is in a set of small pastel chalks like you can get from SU! Stampin' Pastels (#120962) has 40 different colors and shades of pastel chalks and 6 applicators. The SU! Pastel set that you will see in these pictures is an older set than what is in the current catalog. I've had this set for about 5 yrs and it's still in great shape.

 For this, you need your chalks, a stamp set, black classic ink, white cardstock and some cotton swabs(brand name is Q-Tips).
 ***TIP*** Sometimes when you stamp an image, especially a larger one, I don't get the center stamped clearly, as you can see with this one. The solution to this problem is to use something soft underneath the paper you are stamping on, such as a pad of papers or a mouse pad. That will give some movement room for your stamping & you will usually get a better image.
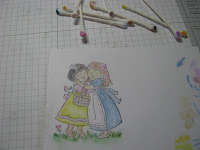
 2. For today's project, I'm using the same image that I used on Tuesday with the watercolor pencils so that you can see the difference in the look of the two medium. The image is from The Nicest Things (#120531). For pastels, a larger image is usually easier to work with as it can be difficult to get the chalk in the small areas, even with the applicators that come with the set.
Using a cotton swab, rub the color you want on the tip of the swab. Then outline that area of your image, like you did on Tuesday. The swab will make a larger stroke than the pencils did so watch the smaller spaces. After you apply the color, use either the cotton swab, the applicator or your finger to smooth the color and pull the color into the other areas.

 The applicator works better in small areas for applying color. You can still use the swab or your finger for blending.


 3. Use either a swab or your finger to blend the colors together. Pay attention to where natural shadows would fall, like under the basker or in fold lines of the skirts.


 The image on the left was colored with the watercolor pencils on Tuesday. The image on the right was colored with the pastels today. It just depends on the look you want & the method you perfer.


- Choose the image that you want to use and stamp it in black ink. With the chalks, you can use either the classic ink or the Staz On, since you're not using water in this method.


Using a cotton swab, rub the color you want on the tip of the swab. Then outline that area of your image, like you did on Tuesday. The swab will make a larger stroke than the pencils did so watch the smaller spaces. After you apply the color, use either the cotton swab, the applicator or your finger to smooth the color and pull the color into the other areas.


***TIP*** If you look closely at the picture on the left, you can see that I've smeared some blue chalk on the girl's face. Here we have one of the BIG reasons I call this goof-proof. Pastels/chalks are eraseable! Just take a white eraser, like comes with the SU! pastel set or an art gum eraser and erase the chalk away from where you don't want it. Very fixable!


 3. Use either a swab or your finger to blend the colors together. Pay attention to where natural shadows would fall, like under the basker or in fold lines of the skirts.
Here the picture is colored. You can see how I rubbed color on the right edge of the cardstock to check the shades that I wanted and that I used several swabs for my color.

4. There is one more step to this process that is optional. That is to spray a fixative on the chalked image. This is not required but highly recommended. Without it the chalk may rub off. There are many fixatives that are available at your hobby or craft stores but the cheapest(and it's just as good) is your basic hair spray that you probably have in the bathroom. Just give it a light spray, far less than you use for your hair. Then let it dry and you are done. I do not guarantee the hair spray to be acid free for your scrapbooking projects but since most cards won't be archieved, it works fine for them. The hair spray will bring out a brighter look with the chalks, also.

Now compare the two coloring methods to see which you like better. It's totally up to you how you color your images. There are several other ways too but these are my favorites.
 The image on the left was colored with the watercolor pencils on Tuesday. The image on the right was colored with the pastels today. It just depends on the look you want & the method you perfer.
No comments:
Post a Comment